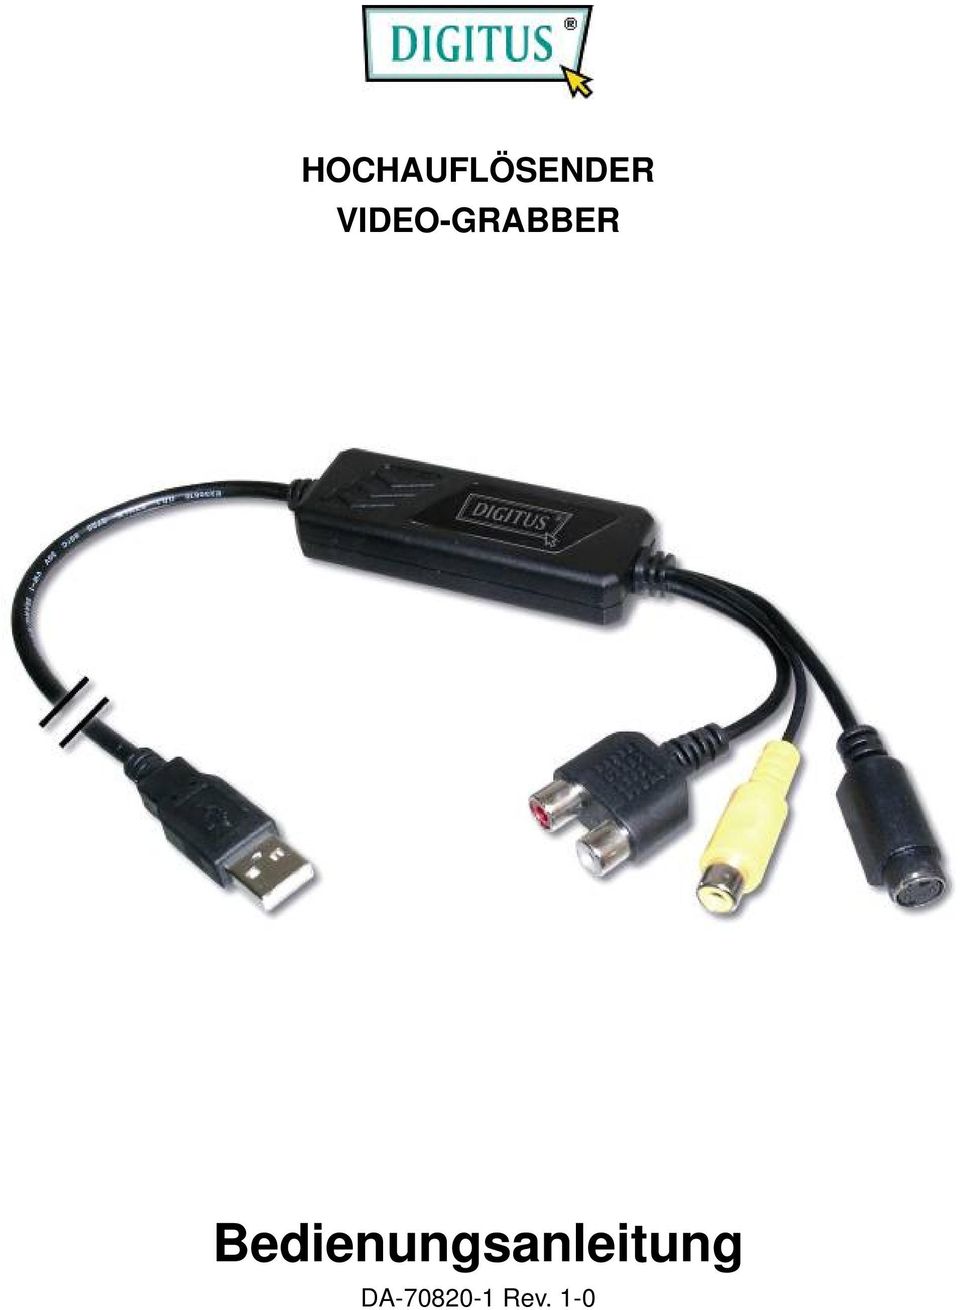
HIGH RESOLUTION VIDEO GRABBER. User s Manual. DA Rev. 1-0
|
|
|
- Hetty Hertz
- vor 8 Jahren
- Abrufe
Transkript
1 HIGH RESOLUTION VIDEO GRABBER User s Manual DA Rev. 1-0

2 FEDERAL COMMUNICATIONS COMMISSION This device complies with Part 15 of the FCC Rules Operation is subject to the following two conditions: this device may not cause harmful interference, and (2) this device must accept any interference received, including interference that may cause undesired operation. This equipment has been tested and found to comply with the limits for a Class B Digital Device, pursuant to part 15 of the FCC Rules. These limits are designed to provide reasonable protection against harmful interference in a residential installation. This equipment generates, uses and can radiated radio frequency energy and, if not installed and used in accordance with the instruction, may cause harmful interference to radio communication. However, there is no grantee that interference will not occur in a particular installation. If this equipment does cause harmful interference to radio or television reception, which can be determined by tuning the equipment off and on, the user is encouraged to try to correct the interference by one or more of the following measures: -Reorient or relocate the receiving antenna. -Increase the separation between the equipment and receiver. -Connect the equipment into an outlet on a circuit different from that to which the receiver is connected. -Consult the dealer or an experienced radio/tv technician for help. Notice: Changes or modifications not expressly approved by the party responsible for compliance could void the user s authority to operate the equipment. Printed in TAIWAN R.O.C No All contents are subject to change without notice. All trademarks are the property of their respective owner I

3 Table of Contents II
4 Chapter 1. Overview 1.1 Introduction Getting rid of your old VHS tapes and preserving your treasurable home videos!! The new generation USB 2.0 Audio/Video grabber is the bridge between your computer and analog camera, VCR, camcorder, DVD player or any other video sources. It converts analog video sources to digital format, now you can create VCD or DVDs of TV program, movies or videos from your camcorder in real time. The editing function enables you to create professional quality video. The burning function enables you to save your video clips as DVD or VCD, so you can play later on in the player. This all in one solution provides everything you need to easily transfer your video to DVDs. It is the best ideal companion for your portable audio/video application!! 1.2 Features Small physical Wonder--Dimensions are (L)81mm x (W)30mm x (H)15mm. Audio and video go though USB 2.0 bus (WinXP/Vista) for Audio/Video synchronization and superior performance. High speed USB 2.0 data transfer rate for superior audio/video recording. Encoding MPEG1/MPEG2 format directly, Ideal formats for video application. Up to 25 fps motion capture capability at 720x576(PAL) & 30 fps at 720x480(NTSC). Composite, S-Video analog input, NTSC and PAL multi system support. Simple and easy direct burning function for quickly video to VCD/SVCD/DVD making Recording period setup. Support Brightness, Contrast, Hue, Saturation, Sharpness control. Offers many different screen effects and filters, and let you create your own menus. Movie clips are managed in a File Pool for ease of viewing, editing and deleting. Trim unwanted scenes and add transition effects. VCD/SVCD/DVD burning support, no need burning software Support CD-R/RW, DVD+/-R, DVD+/-RW Plug & Play. Low power consumption. Ideal for portable computer too. No Battery---No need to install batteries or run off the wall adapter. 1

5 Chapter 1. Overview 1.3 Specifications Video input : One RCA composite, One S-Video. Video system : NTSC and PAL multi system support. Audio input : For WinXP and Vista, goes through USB; For Win 2000, goes through sound card. Motion capture : MPEG format up to 720x480@NTSC, and 720x576@PAL; Performance : Up to 25 fps at 720x576 for PAL, 30fps at 720x480 for NTSC. Power Source : 5VDC,350mA(max) through USB port. 1.4 Minimum System Requirements USB 2.0 equipped computer Pentium 4-1GHz or above or equivalent AMD processor 256MB of RAM Win2000 SP4, WinXP SP2, or Vista DirectX 9.0 CD ROM (For software installation) DVD Writer (if you want make DVD Burning application) Sound card 1.5 Package Contents USB 2.0 Audio/Video Grabber VHS to DVD Capture/Edit/Burning software User s manual 2

6 Chapter 2. Installation Please make sure your computer has USB2.0 port correctly installed and functioning!! ( Please update your WinXP to SP2, or Win2000 to SP4, and updating USB 2.0 host driver before installation to make sure computer s USB 2.0 is functioning correctly) Steps : (1) Install Driver (2) Plug in USB 2.0 Audio/Video Grabber hardware (3) Install VHS to DVD Capture/Edit/Burning software 2.1 Hardware device description USB 2.0 connector Audio L/R input Composite Video input S-Video input USB 2.0 connector : Connect to USB 2.0 port of your computer S-Video input : S-Video input from external A/V device (e.g. VCR) Composite video input : Composite video input from external A/V Device (e.g. VCR) Audio L/R input : Audio input from external A/V device (under WinXP/Vista) (In Win 2000 recommend connecting external A/V device audio to Line-in of sound card) 2.2 Driver Installation Please insert "Multimedia Installation Kit" CD-ROM into your CD-ROM drive; Run " E:\Driver\Setup.exe "; (assuming CD-ROM drive in E drive) Note: In Vista, windows will pop up a dialogue box, choose Allow to continue install Driver. 3 Click "Next"

7 Chapter 2. Installation Complete Setup Wizard, Click "Finish" Complete Setup Wizard, please restart computer After computer restarts, please plug the USB 2.0 Audio/Video Grabber into the computer s USB 2.0 port; System will now detect the new device and install completely Please check whether if the USB 2.0 Audio/Video Grabber driver was installed successfully in your computer In Windows XP In Windows VISTA Go to My Computer -> Locate and right-click on your Control Panel -> System My Computer, click and select -> Hardware -> Device Manager. Properties. Find Tasks to the left of your window, and then select Device Manager. 2.3 Application Software ( VHS to DVD Capture/Edit/Burning ) Installation Please insert "Multimedia Installation Kit" CD-ROM into your CD-ROM drive; Run "E:\AP\Setup.exe"; (assuming CD-ROM drive in E drive) Select the language you will use. Click "Next" Welcome to the InstallShield wizard. Click "Next" Accept the terms of the license agreement. Click "Next" Choose destination location. Click Next Select program folder, Click Next Click Install to begin the installation. Click Install InstallShield Wizard Complete; Click "Finish" 4

8 Chapter 3. Operation 3.1 Starting: After AP software install, you can find honestech VHS to DVD short cut on desktop. Please click the honestech VHS to DVD icon The first time starting application software, Please Enter the product key, the license key on CD envelop After starting application, you can see video window as below. 5

9 Chapter 3. Operation 3.2 File: Manage current tasks in project units. 1. New Project: Create a new project. 2. Open Project: Open an existing project. 3. Save Project: Save the work that has been done up to now. 3.3 Capture Video Device: Using the drop down menu shown above, you can select the input source for your video. this auto-detects video input devices and list them here. All your attached capture device will be list here Set Video Device: Change Input source, Control setting of the device selected. When the input source is specified as Tape source, the VCR Input checkbox needs to be checked Audio Device: Select the audio device currently installed Set Audio Device: Select the input source of the device selected. (Select Line-In normally) Format: Select the output file format from drop down menu. 6

10 Chapter 3. Operation Image Filter : Clean noise: This is a filter which is clean noise in the screen : Adjustment: To control of color value that is input video Video Type: Select the type of output file Quality: Adjust the quality of the output file. (Best/Good/Normal/Average) Split Size: Split size takes the guess work out by automatically splitting the file size of capture video according to the format and disc capacity you will be using to burn your movie. The output files are partitioned according to the capacity of the disk to be burned (CD/DVD) Recording duration time: Set the recording duration time you want. This is very handy when you know the duration of the movie you are capturing. You don't have to monitor the capture process, just set the recording duration and will HT Video to DVD will stop once this time expires. It is always good idea to set record duration time. If not set, recording will continue up to the maximum recording time Commercial Cutting: This function is cutting a scene which not be want to included at the recording file like to a commercial scene, that is only work at recording status. At the first, start recording and click when come out the CM and click after end CM and then the cuttime data be add to a combolist. Do again when you want to cut like this, and after stop recording it should be changed to Edit and add the list of cuttime date in the storybook. If you want to detail cut of the cut clip, you dobule click the clip that you can see the time range at the play panel and control a seekbar and click then be applied, At the last, click it should be output a file Output Folder: Specify the location where the capture video will be saved Recording and Burning: If checked, starts burning process right after recording for the designated time. This is ideal when you are copying your home videotapes into DVD disc. Makes the whole process automatic Start button: After all the configurations are set you can simply click on this button to start the capture process Stop button: Click on this button when you are not using the record time duration. Also when you want to stop the record process. Everything recorded prior to pressing this button will be saved into a file Current Status: Displays the status of the recording depending on your recording durations time, or the maximum record time. 7
. 3.3.10. Recording duration time: Set the recording duration time you want.")
11 Chapter 3. Operation 3.4 Edit Once all your video is captured, you can move onto the edit phase of the honestech VHS to DVD 2.5 Editing video clips are very easy with drag-and-drop feature. Your clips can be reviewed by dragging the clips in your file pool in to player panel. Editing is done within this player panel. During the edit phase, you can trim out scene from your recorded video. You can also cut your movies into multiple scenes and add them into storybook transition effects between each scene. When you have multiple scenes captured, you can combine them into one continuous clip with transitions effects. In order for you trim or cut part of the scene from the captured clips, you will need to create two separate clips, one before the part of the clip to be trimmed and another for the scenes after the part of the clip to be trimmed. You can even combine two separate clips into one scene using the storyboard Player control tools 1. This scroll bar can be moved from left right to change the Mark In and Mark Out locations for the video clips to be trimmed or Zoom In to. 2. To specify the beginning of the clip you want to keep. 3. To specify the end of the clip you want to keep. 4. This scroll bar can be used to easily move within the video clip to quick preview. You can also use the play scroll bar to assign the Mark In and Mark Out point of the movie clip. 5. To remove Mark In or Mark Out specified. 6. To Zoom into Mark In and Mark Out location for more precise trimming. 7. Play the movie clip from where the play scroll bar is located. 8. Stop the movie clip. 9. Go to beginning of the movie clip. 10. Move single frame forward in the movie clip. 11. Move single frame backward in the movie clip. 12. Go to the end of the movie clip. 13. After you are satisfied with Mark In and Mark Out location, you can use Cut tool to add the clip within the Mark In and Mark Out into the Storyboard as shown below. 8

12 Chapter 3. Operation Editing in Storyboard: You can combine video clips and transitions. A: To Change the Transition Section: 1. Select the Transition icon. 2. In the Transition Properties window, change the transition section. B: For Video Clips: To Change the Size of a Clip: 1. Select a video clip. 2. In the Player panel, use the buttons to change the size of the clip Transition: Transition allows you to add a video transition between the two clips, like a fade-in-fade-out effect : Adding Transitions Transition allows you to add a video transition between the two clips, like a fade-in-fade-out effect : To Add a Transition : 1. Drag and drop the type of transition that you want to apply onto Storyboard. 2. Once the transition has been added, the Transition Properties window will open to the right of the screen : Setting Up Transitions: When you click the Transition icon from Storyboard, the Transition Properties window opens as shown below. [Transition Properties window] 1. Preview Window : Provides immediate playback of video edits. 2. Direction : Set the direction of the transition. 3. Section Setup: You can adjust the section where the two clips overlap. 9

13 Chapter 3. Operation : Transition Effect Group The registered transition effects will be displayed on the Transition List screen. Five types of transition are available: 3D, Wipe, Slide, Stretch, and Etc. transitions Preview and Save Button A: Preview Button : You can preview the registered frame before saving it. B: Save Button : This saves the contents edited in Storyboard into a file Saving in MPEG format : Fast MPEG merge A: Rendering Method: Fast MPEG merge B: Type: Displays MPEG format of file to be rendered. C: Video: - Resolution: Displays video resolution (screen size). - Frame Rate: Displays Frames Per Second (fps). - Bit Rate: Displays Bits Per Second (bps). D: Audio: - Sampling Rate: Displays Sampling Frequency (KHz). - Bit Rate: Displays Bits Per Second (bps) : Smart Rendering A: Rendering Method: Smart Rendering - Smart Rendering encodes a part or the whole video. - Only the edited title, audio and special effect segments of the original streaming video will be encoded while the remainder of the original video will be saved as is. - If edits are applied to the entire movie clip, the whole movie will be re-rendered. 10
. - Frame Rate: Displays Frames Per Second (fps). - Bit Rate: Displays Bits Per Second (bps).")
14 Chapter 3. Operation - When movie clips with different video formats are combined, the format of the output file will be set to match the format of the "base streaming video file". Movie clips with formats that don't match the "base streaming video file" will be re-rendered. - Select the "base streaming video file" using the button. - Although the video settings cannot be changed, the audio settings can be adjusted. B: Type: Display MPEG type C: Video: - Resolution: Displays Resolution (screen size). - Frame Rate: Displays Frames Per Second (fps). - Bit Rate: Displays Bits Per Second (bps). D: Audio - Sampling Rate: Displays sampling frequency (KHz). - Bit Rate: Displays Bits Per Second (bps) : Full Rendering A: Rendering Method: Full Rendering - Flexible: Renders movie clips together that are formatted with different video and audio settings. - Customizable: The output video and audio settings can be manually selected. - Time consuming: The Full Method requires that the entire video be encoded, not just the edited part(s). B: Type: Select MPEG type Supports MPEG-1, VCD, MPEG-2, SVCD and DVD. Both NTSC and PAL standards are supported. C: Video: - Resolution: Select resolution (screen size). - Frame Rate: Select Frames Per Second (fps). - Bit Rate: Select Bits Per Second (bps). D: Audio - Sampling Rate: Select Sampling Frequency (KHz). - Bit Rate: Select Bits Per Second (bps). 11
. - Bit Rate: Displays Bits Per Second (bps). D: Audio - Sampling Rate: Displays sampling frequency (KHz). - Bit Rate: Displays Bits Per Second (bps). 3.")
15 Chapter 3. Operation Saving in DV-AVI format : DV-AVI Type A: Type 1: Video file in Digital Video format. - This is native format of video in digital camcorder. - Video and audio are in the same stream. - So it requires splitter that divides video and audio. B: Type 2: Video file in general AVI format. - Video is compressed in DV format. - Video and audio are in the separate stream. - It needs to be converted into type 1 to be transferred to a digital camcorder : Video resolution : Select NTSC or PAL. - NTSC: 720 x 480 resolution - PAL: 720x 576 resolution : Audio sample rate : Select audio frequency : Finally video output is generated. 3.5 Burning *Sequence for using the burn function A: Select output video format (VCD, SVCD, Mini-DVD, DVD). B: Option : Allows for custom settings. C: Prepare the media to be burned. : Eject CD/DVD drive. : Close CD/DVD drive. : Erase rewriteable disk. : Disk Information. 12
.")
16 Chapter 3. Operation D: Select the file to be burned using the Drag & Drop function. Attention: VCD,SVCD, Data CD, Data DVD is not supported by "Create Menu " function E: : Select among background images for each page : Select the color and style of the page navigation arrow : Select the Number of clips per Page F: Chapter: To add chapter points, move your mouse cursor on top of the thumbnail, then double-click your mouse. Or select a video in the list, then click the chapter button. The following window should appear: Move the seek bar on the point that you want to add, then click "Add chapter" button. After adding chapter points, click "OK" button. G: Text: To edit the Top Menu or Clip title, move your mouse cursor on top of the title text, then double-click your mouse. The following window should appear: Set the font, font size, font style and font color as well as edit the title text. H: Press the Start Button to start burning : Option: A: Select CD/DVD writing device B: Select video type: Select video standard. C: Make UDI File: Check this box to keep the UDI file that was created during burning. Otherwise the file will be deleted after the burning is completed. 13

17 Chapter 3. Operation D: Record to media: If you select this menu, video is saved on CD or DVD. E: Disk Name: Create custom title for CD/DVD media. F: Temp Path: : Click on this icon to browse and select the directory to be used as a Temp folder. G: OK/Exit: : Saves setting changes and closes Option Dialog window. : Cancels setting changes and closes Option Dialog window. 14

18 Chapter 4. Troubleshooting Q1 : Why can t my system detect the USB 2.0 Audio/Video Grabber? A1 : (a) Check to see you ve enabled USB 2.0 in the motherboard BIOS setup. (b) Please make sure that your system has the latest USB 2.0 host driver. For Win XP, please upgrade to Service Pack 2 or above. For Win 2000, please upgrade to Service Pack 4 or above. Q2 : Why can t I see video display? A2 : (a) Perhaps your video system setup is incorrect; please check your hardware connection and choose the correct Video Format (b) Please make sure your system has the latest USB 2.0 host driver. For Win XP, please upgrade to Service Pack 2 or above. For Win 2000, please upgrade to Service Pack 4 or above. Q3 : Why is the resolution always in 320x240 under preview mode? A3 : It s because you plugged USB 2.0 Audio/Video Grabber in USB 1.1 port, or perhaps even though your USB port is 2.0, you may not have upgrade to USB 2.0 driver. Please make sure your USB port is USB 2.0, and have already upgraded the USB 2.0 host driver available from Microsoft s Website Q4 : Why does the system show High Speed device plug into Full speed USB port A4 : (a) Please make sure your system support USB 2.0 hardware port. (b) Please make sure that you ve installed USB 2.0 Host driver already. Q5 : Why do I get unstable video during preview and recording? A5 : If you are using Ultra DMA hard disk, please updated the latest driver of IDE ATA/ATAPI controller. Certain motherboards bundled driver are not of the latest version, we suggest that you use WinXP s own system bundled driver. Q6 : Why can t I hear anything under preview mode? A6: In WinXP, the audio directly goes through USB 2.0 Audio/Video Grabber. Under Win2000, the audio needs to go through sound card s Line-in,please check your sound card setting. 15
 Perhaps your video system setup is incorrect; please check your hardware connection and choose the correct Video Format (b) Please make sure your system has the latest USB 2.0 host driver.")
19 Chapter 4. Troubleshooting Q7 : How can I get minimum number of dropped frames during video capture? A7 : The best recording performance depends on your computer system performance, but you can also take some steps described below to improve your performance. (a) Try lowering the resolution format you record. (b) Enable hard disk drive DMA ; Go to My Computer->Control Panel -> System ->Hardware->Device Manager->Disk drives to setup. (c) Try and keep more available free space in the hard disk. (d) Use a hard disk drive with speed of more than 7200 rotation per minute (e) Disable Power Management in BIOS. (f) Disable Power Saving mode of monitor. (g) Close unnecessary/unused programs in your system. (h)defrag your hard disk. (i)try not to run other program(s) during recording. Q8 : I can preview video but when recording, the system crashed/hanged. A8 : (a) Please make sure you ve install DirectX 9.0 or above. (b) Your VGA card driver may be incompatible with DirectDraw, please update your VGA driver. (c) Too many programs might have occupied available memory. Close unnecessary/unused programs. (d) Please lower your hardware acceleration; you can go to My Computer->Control Panel->Display->Settings->Advanced to adjust it. Q9 : When I start the GrabBee software, program automatically closed. A9 : Please check to see that your sound card driver was installed successfully. 16
 Try and keep more available free space in the hard disk. (d) Use a hard disk drive with speed of more than 7200 rotation per minute (e) Disable Power Management in BIOS.")
20 HOCHAUFLÖSENDER VIDEO-GRABBER Bedienungsanleitung DA Rev. 1-0
21 BUNDESAUFSICHTSAMT FÜR FERNMELDEWESEN (FCC - USA) Dieses Gerät entspricht Teil 15 der FCC-Regelung, der Betrieb unterliegt den folgenden zwei Bedingungen: Dieses Gerät darf keine schädlichen Interferenzen hervorrufen und (2) dieses Gerät muss alle empfangenen Interferenzen, einschließlich Interferenzen, die unerwünschte Funktionen verursachen, aufnehmen. Dieses Gerät wurde getestet und entspricht den Grenzwerten von Klasse B Digitalgeräten in Übereinstimmung mit Teil 15 der FCC-Regelungen. Diese Grenzwerte wurden aufgestellt, um einen angemessenen Schutz vor schädliche Interferenzen in Wohnbereichsinstallationen zu gewährleisten. Dieses Gerät erzeugt, nutzt und kann Funkfrequenzenergie abgeben und, wenn es nicht in Übereinstimmung mit der Anleitung installiert und verwendet wird, kann schädliche Interferenzen bei der Funkkommunikation hervorrufen. Es besteht jedoch keine Garantie, dass Interferenzen bei einer bestimmten Installation nicht auftreten. Wenn dieses Gerät schädliche Interferenzen für den Radiound Fernsehempfang erzeugt, was durch Einstecken und Herausziehen des Netzsteckers des Geräts festgestellt werden kann, kann der Anwender versuchen, die Interferenzen durch eine oder mehrere der folgenden Maßnahmen zu beheben: -Neuausrichtung oder Umstellung der Empfängerantenne. -Abstand zwischen dem Gerät und dem Empfänger vergrößern. -Gerät ein eine Netzsteckdose anschließen, deren Stromkreis vom Netzanschluss des Empfängers unabhängig ist. -Befragen Sie den Händler oder einen erfahrenen Radio- und Fernsehtechniker für weitere Hilfe. Anmerkung: Änderungen oder Modifikationen, die nicht ausdrücklich von der für die Einhaltung verantwortlichen Partei genehmigt wurden, heben die Genehmigung zum Betrieb des Gerätes durch den Anwender auf. Gedruckt in TAIWAN R.O.C Nr Der Inhalt dieses Dokuments unterliegt der Änderung ohne vorherige Bekanntmachung. Alle Warenzeichen sind Eigentum der betreffenden Eigentümer. I
22 Inhaltsverzeichnis Kapitel 1. Überblick Einleitung Ausstattungsdetails Technische Daten Mindestsystemanforderungen Verpackungsinhalt...2 Kapitel 2. Installation Hardware-Gerätebeschreibung Treiberinstallation Installation der Software (VHS in DVD Aufnahme/Bearbeiten/Brennen)...4 Kapitel 3. Bedienung Start Datei Aufnahme Bearbeitung Brennen...12 Kapitel 4: Fehlerbehebung...15 II
23 Kapitel 1. Überblick 1.1 Einleitung Lösen sie sich von Ihren alten VHS Kassetten und erhalten Sie ihre kostbaren Home Videos! Die neue Generation des USB 2.0 Audio/Video-Grabbers ist die Brücke zwischen Ihrem Computer und analogen Kameras, Videorekorder, Camcorder, DVD-Player und allen anderen Videoquellen. Er wandelt analoge Videoquellen in digitale Formate um, Sie können jetzt VCDs oder DVDs vom TV-Programm, Filmen oder Videos von Ihrem Camcorder in Echtzeit erstellen. Die Bearbeitungsfunktion ermöglicht das Erstellen von Videos in Profi-Qualität. Die Brennfunktion gestattet das Speichern der Videoclips als DVD oder VCD, damit Sie sie später mit dem DVD-Player abspielen können. Diese allumfassende Lösung bietet alles, was Sie brauchen, um Ihre Videos auf einfache Weise in DVDs umzuwandeln. Er ist der beste Begleiter für Ihr tragbares Audio/Video-Gerät!! 1.2 Ausstattungsdetails Kleines physikalisches Wunder - Abmessungen (L)81mm x (B)30mm x (H)15mm. Audio und Video kommen über den USB 2.0-Bus (WinXP/Vista) für Audio/Video Synchronisierung und höchste Leistung. Hochgeschwindigkeitsdatentransferrate mit USB 2.0 für beste Audio/Video-Aufnahmen. Codiert MPEG1/MPEG2-Format direkt, ideale Formate für die Video-Anwendung. Bis zu 25fps Videoaufnahmekapazität bei 720x576(PAL)und 30fps bei 720x480(NTSC) Composite, S-Video analoger Eingang, NTSC und PAL Multi-Systemunterstützung. Einfache und leicht verständliche direkte Brennfunktion für schnelles Umwandeln von Video zu VCD/SVCD/DVD Einstellung der Aufnahmedauer. Unterstützt Helligkeits-, Kontrast, Farb-, Sättigungs- und Schärfentiefensteuerung. Bietet viele verschiedene Bildschirmeffekte und Filter und Sie können eigene Menüs erstellen. Filmclips werden in einer Datenbank für einfache Ansicht, Bearbeitung und Löschung verwaltet. Schneiden Sie unerwünschte Szenen aus und fügen Sie Übergangseffekte hinzu. Unterstützung für das Brennen von VCD/SVCD/DVD, keine Brenn-Software nötig Unterstützt CD-R/RW, DVD+/-R, DVD+/-RW Plug & Play. Niedriger Stromverbrauch. Ideal auch für Notebooks. Keine Batterie - Installation von Batterie oder Netzadapter nicht nötig. 1
24 Kapitel 2. Installation 1.3 Technische Daten Video-Eingang: Ein Cinch Composite, ein S-Video. Video-System: NTSC und PAL Multi-Systemunterstützung. Audio-Eingang: Für WinXP und Vista über USB; Für Win 2000 über Soundkarte. Videoaufnahme: MPEG-Format bis zu 720 x 480 bei NTSC und 720 x 576 bei PAL; Leistung: Bis zu 25 fps bei 720 x 576 für PAL, 30 fps bei 720 x 480 für NTSC. Stromquelle: 5V DC, 350 ma(max.) über USB-Anschluss. 1.4 Mindestsystemanforderungen Computer mit USB 2.0 Pentium 4-1GHz oder darüber oder gleichwertiger AMD-Prozessor 256 MB RAM Windows 2000 SP4, Windows XP SP2 oder Vista DirectX 9.0 CD-ROM-Laufwerk (für Software-Installation) DVD-Brenner (wenn DVDs gebrannt werden sollen) Soundkarte 1.5 Verpackungsinhalt USB 2.0 Audio/Video-Grabber VHS to DVD Aufnahme/Bearbeitung/Brenn-Software Bedienungsanleitung 2
25 Kapitel 2. Installation Stellen Sie bitte sicher, dass Ihr Computer einen korrekt installierten und funktionierenden USB 2.0-Port hat!! (Aktualisieren Sie bitte WinXP auf SP2 oder Win2000 auf SP4 und aktualisieren Sie den USB 2.0-Host-Treiber vor der Installation, um sicherzustellen, dass USB 2.0 auf dem Computer korrekt funktioniert.) Schritte: (1) Treiber installieren (2) USB 2.0 Audio/Video-Grabber anschließen (3) VHS to DVD Aufnahme/Bearbeitung/Brenn-Software installieren 2.1 Hardware-Gerätebeschreibung USB 2.0-Stecker Audio L/R-Eingang Composite-Video-Eingang S-Video-Eingang USB 2.0-Stecker: Schließen Sie ihn an den USB 2.0-Port Ihres Computers an. S-Video-Eingang: S-Video-Eingang von externem A/V-Gerät (z. B. Videorekorder) Composite-Video-Eingang: Composite-Video-Eingang von externem A/V-Gerät (z. B. Videorekorder) Audio-L/R-Eingang: Audio-Eingang von externem A/V-Gerät (bei WinXP/Vista) (Bei Win 2000 wird Anschluss des externen A/V-Geräte-Audioanschlusses an den Line-In-Eingang der Soundkarte empfohlen) 2.2 Treiberinstallation Bitte legen Sie die CD-ROM Multimedia Installation Kit in das CD-ROM-Laufwerk, starten Sie E:\Driver\Setup.exe ; (Laufwerk E muss ggf. auf den aktuellen Laufwerksbuchstaben Ihres CD- / DVD- Laufwerkes geändert werden). Anmerkung: Bei Windows Vista erscheint ein Dialogfeld, wählen Sie Erlauben, um die Treiberinstallation fortzusetzen. 3 Klicken Sie auf Next/Weiter.
26 Kapitel 2. Installation Setup Wizard fertigstellen, Finish/Beenden anklicken Setup Wizard fertigstellen, Computer neu starten Nach dem Neustart des Computers schließen Sie bitte den USB 2.0 Audio/Video-Grabber an den USB 2.0-Port des Computers an, das System erkennt ein neues Gerät und stellt die Installation fertig Kontrollieren Sie bitte, ob der USB 2.0 Audio/Video-Grabber-Treiber erfolgreich auf Ihrem Computer installiert wurde. Bei Windows XP Bei Windows VISTA Gehen Sie zu Arbeitsplatz -> Rechtsklicken Sie auf Systemsteuerung -> System Arbeitsplatz, klicken und wählen Sie -> Hardware -> Gerätemanager. Eigenschaften. Suchen Sie Tasks links im Fenster und wählen Sie Gerätemanager. 2.3 Installation der Software (VHS to DVD Aufnahme/Bearbeiten/Brennen) Bitte legen Sie die CD-ROM Multimedia Installation Kit in das CD-Laufwerk, E:\AP\Setup.exe starten (Laufwerk E muss ggf. auf den aktuellen Laufwerksbuchstaben Ihres CD- / DVD- Laufwerkes geändert werden) Wählen Sie die gewünschte Sprache. Klicken Sie auf Next/Weiter Willkommen beim InstallShield-Wizard. Klicken Sie auf Next/Weiter Akzeptieren Sie die Lizenzvereinbarung. Klicken Sie auf Next/Weiter Wählen Sie den Speicherort. Klicken Sie auf Next/Weiter Wählen Sie den Programmordner, klicken Sie auf Next/Weiter Klicken Sie auf Installieren, um die Installation zu starten InstallShield Wizard fertig, Finish/Beenden anklicken 4
USB Treiber updaten unter Windows 7/Vista
 USB Treiber updaten unter Windows 7/Vista Hinweis: Für den Downloader ist momentan keine 64 Bit Version erhältlich. Der Downloader ist nur kompatibel mit 32 Bit Versionen von Windows 7/Vista. Für den Einsatz
DVD MAKER USB2.0 Installation Anleitung
 DVD MAKER USB2.0 Installation Anleitung Inhalt V1.0 Kapitel 1: DVD MAKER USB2.0 Hardware Montage...2 1.1 Inhalt der DVD MAKER USB2.0 Paket...2 1.2 Systemanforderungen...2 1.3 Hardware Montage...2 Kapitel
Softwareupdate-Anleitung // AC Porty L Netzteileinschub
 1 Softwareupdate-Anleitung // AC Porty L Netzteileinschub Softwareupdate-Anleitung // AC Porty L Netzteileinschub HENSEL-VISIT GmbH & Co. KG Robert-Bunsen-Str. 3 D-97076 Würzburg-Lengfeld GERMANY Tel./Phone:
Der Adapter Z250I / Z270I lässt sich auf folgenden Betriebssystemen installieren:
 Installationshinweise Z250I / Z270I Adapter IR USB Installation hints Z250I / Z270I Adapter IR USB 06/07 (Laden Sie den Treiber vom WEB, entpacken Sie ihn in ein leeres Verzeichnis und geben Sie dieses
USB -> Seriell Adapterkabel Benutzerhandbuch
 USB -> Seriell Adapterkabel Benutzerhandbuch 1. Produkt Eigenschaften 1 2. System Vorraussetzungen 1 3. Treiber Installation (Alle Windows Systeme) 1 4. Den COM Port ändern 2 5. Einstellen eines RS232
Readme-USB DIGSI V 4.82
 DIGSI V 4.82 Sehr geehrter Kunde, der USB-Treiber für SIPROTEC-Geräte erlaubt Ihnen, mit den SIPROTEC Geräten 7SJ80/7SK80 über USB zu kommunizieren. Zur Installation oder Aktualisierung des USB-Treibers
RS-232 SERIAL EXPRESS CARD 1-PORT. Expansion 111829
 RS-232 SERIAL EXPRESS CARD 1-PORT Expansion 111829 1. Introduction equip RS-232 Serial Express Card works with various types of RS-232 serial devices including modems, switches, PDAs, label printers, bar
EINLEITUNG KAPITEL1 HARDWAREEINSTELLUNG
 INHALT Version 1.0 EINLEITUNG...2 KAPITEL1 HARDWAREEINSTELLUNG...2 1.1 Packungsinhalt...2 1.2 Systemanforderungen...2 1.3 Hardware Installation...3 KAPITEL 2 PRÜFEN DES USB 2.0 TREIBERS VOM HOSTCONTROLLER...3
p^db=`oj===pìééçêíáåñçêã~íáçå=
 p^db=`oj===pìééçêíáåñçêã~íáçå= Error: "Could not connect to the SQL Server Instance" or "Failed to open a connection to the database." When you attempt to launch ACT! by Sage or ACT by Sage Premium for
Installation und Start der Software AQ2sp Installation and Start of the software AQ2sp
 Installation and Start of the software Abhängig von Ihrer WINDOWS-Version benötigen Sie Administrator-Rechte zur Installation dieser Software. Geeignet für folgende WINDOWS-Versionen: Windows 98 SE Windows
Kurzanleitung um Transponder mit einem scemtec TT Reader und der Software UniDemo zu lesen
 Kurzanleitung um Transponder mit einem scemtec TT Reader und der Software UniDemo zu lesen QuickStart Guide to read a transponder with a scemtec TT reader and software UniDemo Voraussetzung: - PC mit der
Anleitung zur Schnellinstallation TFM-560X YO.13
 Anleitung zur Schnellinstallation TFM-560X YO.13 Table of Contents Deutsch 1 1. Bevor Sie anfangen 1 2. Installation 2 Troubleshooting 6 Version 06.08.2011 1. Bevor Sie anfangen Packungsinhalt ŸTFM-560X
p^db=`oj===pìééçêíáåñçêã~íáçå=
 p^db=`oj===pìééçêíáåñçêã~íáçå= How to Disable User Account Control (UAC) in Windows Vista You are attempting to install or uninstall ACT! when Windows does not allow you access to needed files or folders.
Installationshinweise Z501J / Z501K Adapter IrDa USB Installation hints Z501J / Z501K Adapter IrDa USB
 Installationshinweise Z501J / Z501K Adapter IrDa USB Installation hints Z501J / Z501K Adapter IrDa USB 1/3.04 (Diese Anleitung ist für die CD geschrieben. Wenn Sie den Treiber vom WEB laden, entpacken
SanStore: Kurzanleitung / SanStore: Quick reference guide
 SanStore Rekorder der Serie MM, MMX, HM und HMX Datenwiedergabe und Backup Datenwiedergabe 1. Drücken Sie die Time Search-Taste auf der Fernbedienung. Hinweis: Falls Sie nach einem Administrator-Passwort
1. Double click on the Actisys USB icon Found on Floppy A:\
 WARNING:- Make sure that the ACTISYS FIR-USB adapter is not plugged in before installing this Software. ACHTUNG:- Den ACTISYS FIR-USB-Adapter KEINESFALLS vor der Installation der Software anschließen!
Installation des SDT200/SDT270 Treibers
 Installation des SDT200/SDT270 Treibers Installation des SDT200/SDT270 Treibers unter Windows XP Installation des SDT200/SDT270 Treibers unter Windows 7 oder Vista Installation des SDT200/SDT270 Treibers
Printer Driver Vor der Verwendung der Software
 3-876-168-31 (1) Printer Driver Installationsanleitung In dieser Anleitung wird die Installation des Druckertreibers für Windows Vista beschrieben. Vor der Verwendung der Software Lesen Sie vor der Verwendung
https://portal.microsoftonline.com
 Sie haben nun Office über Office365 bezogen. Ihr Account wird in Kürze in dem Office365 Portal angelegt. Anschließend können Sie, wie unten beschrieben, die Software beziehen. Congratulations, you have
miditech 4merge 4-fach MIDI Merger mit :
 miditech 4merge 4-fach MIDI Merger mit : 4 x MIDI Input Port, 4 LEDs für MIDI In Signale 1 x MIDI Output Port MIDI USB Port, auch für USB Power Adapter Power LED und LOGO LEDs Hochwertiges Aluminium Gehäuse
Parameter-Updatesoftware PF-12 Plus
 Parameter-Updatesoftware PF-12 Plus Mai / May 2015 Inhalt 1. Durchführung des Parameter-Updates... 2 2. Kontakt... 6 Content 1. Performance of the parameter-update... 4 2. Contact... 6 1. Durchführung
DVD MAKER USB2.0 Installationsanleitung
 DVD MAKER USB2.0 Installationsanleitung Inhalt Version 2.1 Kapitel 1 : DVD MAKER USB2.0 Hardwareinstallation...2 1.1 Packungsinhalt...2 1.2 Systemanforderungen...2 1.3 Hardwareinstallation...2 Kapitel
KURZANLEITUNG. Firmware-Upgrade: Wie geht das eigentlich?
 KURZANLEITUNG Firmware-Upgrade: Wie geht das eigentlich? Die Firmware ist eine Software, die auf der IP-Kamera installiert ist und alle Funktionen des Gerätes steuert. Nach dem Firmware-Update stehen Ihnen
Digi Vox Ultimate Pro
 Digi Vox Ultimate Pro Bedienungsanleitung Ver. 1.0 Kapitel 1 Wichtiger Hinweis 1.1 Alle Kanale sind vom Empfangsradius abhängig und können von Zeit zu Zeit geändert werden. Die Aufnahme hängt von der Art
EchoLink und Windows XP SP2
 EchoLink und Windows XP SP2 Hintergrund Für Computer auf denen Windows XP läuft, bietet Microsoft seit kurzem einen Update, in der Form des Service Pack 2 oder auch SP2 genannt, an. SP2 hat einige neue
Nachdem Sie die Datei (z.b. t330usbflashupdate.exe) heruntergeladen haben, führen Sie bitte einen Doppelklick mit der linken Maustaste darauf aus:
 heruntergeladen haben, führen Sie bitte einen Doppelklick mit der linken Maustaste darauf aus:") Deutsch 1.0 Vorbereitung für das Firmwareupdate Vergewissern Sie sich, dass Sie den USB-Treiber für Ihr Gerät installiert haben. Diesen können Sie auf unserer Internetseite unter www.testo.de downloaden.
Deutsch 1.0 Vorbereitung für das Firmwareupdate Vergewissern Sie sich, dass Sie den USB-Treiber für Ihr Gerät installiert haben. Diesen können Sie auf unserer Internetseite unter www.testo.de downloaden.
Die Maus A B C D A C G H D E G H
 Installation Windows XP / Vista / Win 7 / Win 8 Installationshinweise 1. Laden Sie die HOST-Makroengine-Installationssoftware von den offiziellen IABYTE-Internetseiten herunter. 2. Starten Sie die Installationssoftware,
DRF-A3 IEEE 1394 FireWire Adapter Schnellinstallationsleitfaden
 DRF-A3 IEEE 1394 FireWire Adapter Schnellinstallationsleitfaden DRF-A3 Schnellinstallationsleitfaden Vielen Dank, dass Sie die D-Link DRF-A3 PCI FireWire Upgradekarte gekauft haben. Dieser Leitfaden zeigt
150Mbps Micro Wireless N USB Adapter
 150Mbps Micro Wireless N USB Adapter TEW-648UBM ŸAnleitung zur Schnellinstallation (1) ŸTroubleshooting (6) 1.11 1. Bevor Sie anfangen Packungsinhalt ŸTEW-648UBM ŸCD-ROM (Dienstprogramm & Bedienungsanleitung)
Bedienungsanleitung. Xperia P TV Dock DK21
 Bedienungsanleitung Xperia P TV Dock DK21 Inhaltsverzeichnis Einführung...3 TV Dock Anschlüsse...3 Erste Schritte...4 LiveWare -Manager...4 Aktualisieren von LiveWare -Manager...4 Verwendung von TV Dock...5
Anleitung zur Installation von Windows XP Professional und dem Multilanguage Interface
 Anleitung zur Installation von Windows XP Professional und dem Multilanguage Interface Installation Windows XP Professional Den Computer / Laptop einschalten und Windows XP Professional Installations CD
EMCO Installationsanleitung Installation instructions
 EMCO Installationsanleitung Installation instructions Installationsanleitung Installation instructions Digitalanzeige digital display C40, FB450 L, FB600 L, EM 14D/17D/20D Ausgabe Edition A 2009-12 Deutsch...2
Bedienungsanleitung. MHL to HDMI Adapter IM750
 Bedienungsanleitung MHL to HDMI Adapter IM750 Inhaltsverzeichnis Einführung...3 MHL to HDMI Adapter im Überblick...3 Erste Schritte...4 Smart-Kontakt...4 Aktualisieren von Smart-Kontakt...4 Verwendung
ColpoSoft-Installations-CD
 ColpoSoft-Installations-CD Die ColpoSoft-Installations-CD installiert Treiber für die Kameras Videology 3MV-USB, Videology 3 MVC und Point Grey Chameleon sowie ein Programm mit dem Fotos aufgenommen und
Anleitung zur Schnellinstallation TU3-SA 1.01
 Anleitung zur Schnellinstallation TU3-SA 1.01 Table of Contents Deutsch 1 1. Bevor Sie anfangen 1 2. Installation der Hardware 2 3. Zugriff auf die Festplatten des TU3-SA 4 Troubleshooting 5 Version 02.15.2011
PVR-TV USB2.0 Installationsanleitung
 PVR-TV USB2.0 Installationsanleitung Inhalt Version 2.1 Kapitel 1 : PVR-TV USB2.0 Hardwareinstallation...2 1.1 Packungsinhalt...2 Systemanforderungen...2 1.3 Hardwareinstallation...2 Kapitel 2 : PVR-TV
5.2.4.5 Laborübung - Erstellen einer Partition unter Windows XP
 5.0 5.2.4.5 Laborübung - Erstellen einer Partition unter Windows XP Einführung Drucken Sie diese Übung aus und führen Sie sie durch. In dieser Übung erstellen Sie eine FAT32-formatierte Partition auf einer
Schritt-Schritt-Anleitung zum mobilen PC mit Paragon Drive Copy 10 und VMware Player
 PARAGON Technologie GmbH, Systemprogrammierung Heinrich-von-Stephan-Str. 5c 79100 Freiburg, Germany Tel. +49 (0) 761 59018201 Fax +49 (0) 761 59018130 Internet www.paragon-software.com Email sales@paragon-software.com
Xperia TX TV Dock DK22 Xperia T TV Dock DK23
 Bedienungsanleitung Xperia TX TV Dock DK22 Xperia T TV Dock DK23 Inhaltsverzeichnis Einführung...3 TV Dock im Überblick...3 Erste Schritte...4 Smart-Kontakt...4 Aktualisieren von Smart-Kontakt...4 Verwendung
Zum Download von ArcGIS 10, 10.1 oder 10.2 die folgende Webseite aufrufen (Serviceportal der TU):
:") Anleitung zum Download von ArcGIS 10.x Zum Download von ArcGIS 10, 10.1 oder 10.2 die folgende Webseite aufrufen (Serviceportal der TU): https://service.tu-dortmund.de/home Danach müssen Sie sich mit Ihrem
Anleitung zum Download von ArcGIS 10.x Zum Download von ArcGIS 10, 10.1 oder 10.2 die folgende Webseite aufrufen (Serviceportal der TU): https://service.tu-dortmund.de/home Danach müssen Sie sich mit Ihrem
v i r t u A L C O M P o r t s
 v i r t u A L C O M P o r t s (HO720 / HO730) Installieren und Einstellen Installation and Settings Deutsch / English Installieren und Einstellen des virtuellen COM Ports (HO720 / HO730) Einleitung Laden
iid software tools QuickStartGuide iid USB base driver installation
 iid software tools QuickStartGuide iid software tools USB base driver installation microsensys Nov 2016 Introduction / Einleitung This document describes in short form installation of the microsensys USB
Wichtiger Hinweis: Bitte lesen Sie diesen Hinweis vor der Installation.
 Wichtiger Hinweis: Bitte installieren Sie zuerst den Treiber und schließen erst danach Ihre VideoCAM ExpressII an den USB-Anschluss an. Bitte lesen Sie diesen Hinweis vor der Installation. 1. Software
Anleitung zur Schnellinstallation TBW-107UB 1.01
 Anleitung zur Schnellinstallation TBW-107UB 1.01 Table of Contents Deutsch 1 1. Bevor Sie anfangen 1 2. Installation 2 3. Konfiguration des Bluetooth-Adapters 5 Troubleshooting 7 Version 02.25.2010 1.
H A R D D I S K A D A P T E R I D E / S A T A T O U S B 2. 0
 H A R D D I S K A D A P T E R I D E / S A T A T O U S B 2. 0 o n e t o u c h b a c k u p H A N D B U C H A I - 7 0 7 9 4 4 D E U T S C H H A R D D I S K A D A P T E R I D E / S A T A T O U S B 2. 0 o n
Einführung. in die Videobearbeitung. mit EVE v2 von MainConcept. 2005 Sigrid Bongartz www.edv-bongartz.de
 Einführung in die Videobearbeitung mit EVE v2 von MainConcept 2005 Sigrid Bongartz www.edv-bongartz.de Inhaltsverzeichnis 1. Was ist Eve?... 3 2. Systemvoraussetzungen... 3 3. Was Sie bereits kennen sollten...
Wireless 150N Adapter
 Wireless 150N USB Adapter kurzanleitung Modell 524438 INT-524438-QIG-0908-04 Einleitung Vielen Dank für den Kauf des Wireless 150N USB Adapters (Modell 524438) von INTELLINET NETWORK SOLUTIONS. Diese
ONLINE LICENCE GENERATOR
 Index Introduction... 2 Change language of the User Interface... 3 Menubar... 4 Sold Software... 5 Explanations of the choices:... 5 Call of a licence:... 7 Last query step... 9 Call multiple licenses:...
SATA HDD-FESTPLATTE 3.5 USB 3.0 Externes Gehäuse
 SATA HDD-FESTPLATTE 3.5 USB 3.0 Externes Gehäuse Bedienungsanleitung (DA-70577) I. Systemanforderung Grundvoraussetzungen für die Installation dieses Gerätes: Hardware-Voraussetzungen: ein PC oder Notebook
KIP Druckerstatus Benutzerhandbuch KIP Druckerstatus Installations- und Benutzerhandbuch
 KIP Druckerstatus Installations- und Benutzerhandbuch - 1 - Inhalt 1 Einführung... 3 2 Installation und Einrichtung... 4 3 Funktionalität des KIP Druckerstatus... 6 4 Benutzung des KIP Druckerstatus...
ReadMe zur Installation der BRICKware for Windows, Version 6.1.2. ReadMe on Installing BRICKware for Windows, Version 6.1.2
 ReadMe zur Installation der BRICKware for Windows, Version 6.1.2 Seiten 2-4 ReadMe on Installing BRICKware for Windows, Version 6.1.2 Pages 5/6 BRICKware for Windows ReadMe 1 1 BRICKware for Windows, Version
SOUND LINK ANALYSIS SOFTWARE BEDIENUNGSANLEITUNG USER MANUAL. Für weiteren Gebrauch aufbewahren! Keep this manual for future needs!
 BEDIENUNGSANLEITUNG USER MANUAL SOUND LINK ANALYSIS SOFTWARE Für weiteren Gebrauch aufbewahren! Keep this manual for future needs! Copyright Nachdruck verboten! Reproduction prohibited! Inhaltsverzeichnis/
Delphi Diagnostics. Installationsanleitung für Vista.
 Installationsanleitung für Vista. Delphi Diagnostics Wenn Bluetooth an Ihrem Gerät installiert ist, stellen Sie bitte vor weiteren Schritten sicher, dass dieses jetzt ausgeschaltet / deaktiviert ist und
ISK 200 Treiberinstallation
 Treiberinstallation HB_ISK200_D_V10.doc 1 ALLGEMEIN 1. ALLGEMEIN Wenn der Schnittstellenkonverter ISK 200 an einem PC angeschlossen wird muss ein USB-Treiber installiert werden, damit der ISK 200 erkannt
Handbuch B4000+ Preset Manager
 Handbuch B4000+ Preset Manager B4000+ authentic organ modeller Version 0.6 FERROFISH advanced audio applications Einleitung Mit der Software B4000+ Preset Manager können Sie Ihre in der B4000+ erstellten
Anleitung zur Schnellinstallation TFM-561U
 Anleitung zur Schnellinstallation TFM-561U V1 Table of Contents Deutsch 1 1. Bevor Sie anfangen 1 2. Installation 2 Troubleshooting 5 Version 08.25.2010 1. Bevor Sie anfangen Packungsinhalt TFM-561U Treiber
WC053 - Foldable Hi-Def 1.3M Trackcam USB 2.0. Wählen Sie in diesem Menü die Option Treiber Windows 98SE, 2000 & XP.
 WC053 - Foldable Hi-Def 1.3M Trackcam USB 2.0 Einleidung Setzen Sie die Sweex Foldable Hi-Def 1.3M Trackcam USB 2.0 keinen extremen Temperaturen aus. Legen Sie das Gerät nicht in direktes Sonnenlicht oder
Word-CRM-Upload-Button. User manual
 Word-CRM-Upload-Button User manual Word-CRM-Upload for MS CRM 2011 Content 1. Preface... 3 2. Installation... 4 2.1. Requirements... 4 2.1.1. Clients... 4 2.2. Installation guidelines... 5 2.2.1. Client...
Markengeschichte. Hingabe unterscheidet uns. Hartnäckigkeit beschreibt uns.
 Bedienungsanleitung Mit unserem Glauben gehen wir voran. Mit unserer Leidenschaft steigern wir unsere Erfahrung. Vergessen die eigenen Fehlschläge, aber nicht das unerfüllte Potential. Die Leidenschaft
FIRMWARE UPDATE TAPMOTION TD
 FIRMWARE UPDATE TAPMOTION TD CMP-SPF TO WHOM IT MAY CONCERN Seite 1 von 9 Inhalt / Overview 1. Firmware überprüfen und Update-file auswählen / Firmware check and selection of update file 2. Update File
H A R D D I S K A D A P T E R I D E / S A T A T O U S B 3. 0 O N E T O U C H B A C K U P
 H A R D D I S K A D A P T E R I D E / S A T A T O U S B 3. 0 O N E T O U C H B A C K U P H A N D B U C H A I - 7 0 7 9 4 5 D E U T S C H H A R D D I S K A D A P T E R I D E / S A T A T O U S B 3. 0 O N
NuVinci Harmony Software und Firmware. Anleitung in deutscher Sprache
 NuVinci Harmony Software und Firmware Anleitung in deutscher Sprache NuVinci Desktop ( Harmony Programmierung ) Software Für Hersteller und Händler Download über eine abgesicherte Internetverbindung http://harmony.fallbrooktech.net/
BLK-2000. Quick Installation Guide. English. Deutsch
 BLK-2000 Quick Installation Guide English Deutsch This guide covers only the most common situations. All detail information is described in the user s manual. English BLK-2000 Quick Installation Guide
Formatting the TrekStor i.beat run
 DE EN Formatting the TrekStor i.beat run Formatierung des TrekStor i.beat run a Beim Formatieren werden ALLE Daten auf dem MP3-Player gelöscht. In diesem Abschnitt wird Ihnen erläutert, wie Sie Ihren MP3-Player
Multiple-USB-MIDI-Bridge-Overpass
 D I G I T A L K E Y B O A R D S Multiple-USB-MIDI-Bridge-Overpass Installation- Anleitung Deutsch Einleitung Mumbo ist ein auf Microsoft Windows 2000/XP bassierendes Programm,und stellt dieverbindung
[Tutorial] Windows 7 Clean-Install
![[Tutorial] Windows 7 Clean-Install](/thumbs/22/1642139.jpg "[Tutorial] Windows 7 Clean-Install") [Tutorial] Windows 7 Clean-Install Teil 1: Verwenden der Reparaturfunktion (Wenn Windows nicht mehr startet, kann vor dem (möglichen) Clean- Install eine Systemreparatur versucht werden!) Schritt 1: Booten
[Tutorial] Windows 7 Clean-Install Teil 1: Verwenden der Reparaturfunktion (Wenn Windows nicht mehr startet, kann vor dem (möglichen) Clean- Install eine Systemreparatur versucht werden!) Schritt 1: Booten
USB 2.0 PCI-Karte mit NEC CHIPSATZ
 Handbuch USB 2.0 PCI-Karte mit NEC CHIPSATZ deutsch Handbuch_Seite 2 Handbuch_Seite 3 Inhalt 1.0 Eigenschaften 4 2.0 Systemvoraussetzungen 4 3.0 Hardware Installation 4 4.0 Treiber Installation (Windows
USB 2.0 ZU IDE/SATA ADAPTER-KABEL
 USB 2.0 ZU IDE/SATA ADAPTER-KABEL Benutzerhandbuch DA-70148-3 1. Eigenschaften Unterstützt SATA Spread-Spectrum-Transmitter Unterstützt SATA II Asynchronous Signal Recovery (Hot Plug) Funktion Kompatibel
In 15 Schritten zum mobilen PC mit Paragon Drive Copy 11 und VMware Player
 PARAGON Technologie GmbH, Systemprogrammierung Heinrich-von-Schritthan-Str. 5c 79100 Freiburg, Germany Tel. +49 (0) 761 59018201 Fax +49 (0) 761 59018130 Internet www.paragon-software.com Email sales@paragon-software.com
Wireless LAN Installation Windows XP
 Wireless LAN Installation Windows XP Vergewissern Sie sich bitte zuerst, ob Ihre Hardware kompatibel ist und das Betriebssystem mit den aktuellen Service Packs und Patches installiert ist. Installieren
Das neue Volume-Flag S (Scannen erforderlich)
") NetWorker 7.4.2 - Allgemein Tip 2, Seite 1/5 Das neue Volume-Flag S (Scannen erforderlich) Nach der Wiederherstellung des Bootstraps ist es sehr wahrscheinlich, daß die in ihm enthaltenen Informationen
NetWorker 7.4.2 - Allgemein Tip 2, Seite 1/5 Das neue Volume-Flag S (Scannen erforderlich) Nach der Wiederherstellung des Bootstraps ist es sehr wahrscheinlich, daß die in ihm enthaltenen Informationen
TREIBER INSTALLATIONSPROZESS WINDOWS 7 (32 oder 64 BIT)
") TREIBER INSTALLATIONSPROZESS WINDOWS 7 (32 oder 64 BIT) N-Com Wizard 2.0 (und folgenden) VORAUSSETZUNG: ART DES BETRIEBSSYSTEM DES JEWEILIGEN PC 1. Klicken Sie auf Start und dann auf Arbeitsplatz. 2. Klicken
TREIBER INSTALLATIONSPROZESS WINDOWS 7 (32 oder 64 BIT) N-Com Wizard 2.0 (und folgenden) VORAUSSETZUNG: ART DES BETRIEBSSYSTEM DES JEWEILIGEN PC 1. Klicken Sie auf Start und dann auf Arbeitsplatz. 2. Klicken
DVB-T PenType USB-Empfänger. Kurzanleitung
 DVB-T PenType USB-Empfänger Kurzanleitung Inhaltsverzeichnis A. Einführung...3 B. Systemvoraussetzungen...3 C. TV-Player-Software und Gerätetreiber installieren...3 D. Anschluß des Gerätes...9 E. Gerätetreiber
USB-Stick (USB-Stick größer 4G. Es ist eine größere Partition notwendig als die eines 4GB Rohlings, der mit NTFS formatiert wurde)
") Colorfly i106 Q1 System-Installations-Tutorial Hinweise vor der Installation / Hit for preparation: 准 备 事 项 : 外 接 键 盘 ( 配 套 的 磁 吸 式 键 盘 USB 键 盘 通 过 OTG 插 发 射 器 的 无 线 键 盘 都 可 ); U 盘 ( 大 于 4G 的 空 白 U 盘,
Colorfly i106 Q1 System-Installations-Tutorial Hinweise vor der Installation / Hit for preparation: 准 备 事 项 : 外 接 键 盘 ( 配 套 的 磁 吸 式 键 盘 USB 键 盘 通 过 OTG 插 发 射 器 的 无 线 键 盘 都 可 ); U 盘 ( 大 于 4G 的 空 白 U 盘,
i Korrekturlauf mit Acrobat Reader - Correction workflow using Acrobat Reader i.1 Vorbereitung / Preparations
 IPPS UND RICKS KORREKURLAUF MI ACROBA READER - CORRECION WORKFLOW USING ACROBA READER i Korrekturlauf mit Acrobat Reader - Correction workflow using Acrobat Reader i.1 Vorbereitung / Preparations VOREINSELLUNGEN
[SP02] Digitalisieren von VHS- Bändern am IT-Zentrum
![[SP02] Digitalisieren von VHS- Bändern am IT-Zentrum](/thumbs/27/11125112.jpg "[SP02] Digitalisieren von VHS- Bändern am IT-Zentrum") IT-Zentrum Sprach- und Literaturwissenschaften, Universität München SP02-Seite 1 von 15 [SP02] Digitalisieren von VHS- Bändern am IT-Zentrum Melden Sie sich am Mac-Arbeitsplatz 10 an Starten Sie imovie
IT-Zentrum Sprach- und Literaturwissenschaften, Universität München SP02-Seite 1 von 15 [SP02] Digitalisieren von VHS- Bändern am IT-Zentrum Melden Sie sich am Mac-Arbeitsplatz 10 an Starten Sie imovie
MobiDM-App Handbuch für Windows Mobile
 MobiDM-App Handbuch für Windows Mobile Dieses Handbuch beschreibt die Installation und Nutzung der MobiDM-App für Windows Mobile Version: x.x MobiDM-App Handbuch für Windows Mobile Seite 1 Inhalt 1. WILLKOMMEN
Einstellungen im Internet-Explorer (IE) (Stand 11/2013) für die Arbeit mit IOS2000 und DIALOG
 (Stand 11/2013) für die Arbeit mit IOS2000 und DIALOG") Einstellungen im Internet-Explorer (IE) (Stand 11/2013) für die Arbeit mit IOS2000 und DIALOG Um mit IOS2000/DIALOG arbeiten zu können, benötigen Sie einen Webbrowser. Zurzeit unterstützen wir ausschließlich
Einstellungen im Internet-Explorer (IE) (Stand 11/2013) für die Arbeit mit IOS2000 und DIALOG Um mit IOS2000/DIALOG arbeiten zu können, benötigen Sie einen Webbrowser. Zurzeit unterstützen wir ausschließlich
IVE-W530BT. Bluetooth Software Update Manual mit Android Telefonen 09.03.2015
 Bluetooth Software Update Manual mit Android Telefonen IVE-W530BT 1 Einleitung In der Anleitung wird die Vorgehensweise zum aktualisieren der Radio Bluetooth Firmware beschrieben. Bitte beachten Sie alle
Produktinformation _185PNdeen
 Produktinformation 201407_185PNdeen Solldaten-UPGRADE Juli 2014 WA 900 / 920 / 020 / 950 / 970 CURA S 800 / 860 / 060 / 900 / 960 WAB01 / WAB 02 CCT CURA R1200 / CURA R2000/ API R2000 BOSCH FWA 51x Auf
Anleitung zur Schnellinstallation TFM-PCIV92A B1.21
 Anleitung zur Schnellinstallation TFM-PCIV92A B1.21 Table of Contents Deutsch 1 1. Bevor Sie anfangen 1 2. Installation 2 Troubleshooting 6 Version 05.11.2011 1. Bevor Sie anfangen Packungsinhalt ŸTFM-PCIV92A
Installation des Bondruckers TM-T88xx, der mittels eines USB-Adapters (COM-to-USB) an der USB-Schnittstelle angeschlossen ist.
 an der USB-Schnittstelle angeschlossen ist.") Installation des Bondruckers TM-T88xx, der mittels eines USB-Adapters (COM-to-USB) an der USB-Schnittstelle angeschlossen ist. Wichtige Hinweise: - Schließen Sie den Drucker und den USB-Adapter noch NICHT
Installation des Bondruckers TM-T88xx, der mittels eines USB-Adapters (COM-to-USB) an der USB-Schnittstelle angeschlossen ist. Wichtige Hinweise: - Schließen Sie den Drucker und den USB-Adapter noch NICHT
Hinweis Anschluss und Installation der Treibersoftware in der richtigen Reihenfolge durchführen - so geht s: Inhalt Download der Treibersoftware
 Hinweis: Die hier beschriebene Reihenfolge der Arbeitsschritte muss unbedingt eingehalten werden. Anschluss und Installation der Treibersoftware in der richtigen Reihenfolge durchführen - so geht s: Inhalt
Anleitung zur Schnellinstallation TU3-S
 Anleitung zur Schnellinstallation TU3-S25 1.01 Table of Contents Deutsch 1 1. Bevor Sie anfangen 1 2. Installation der Hardware 2 3. Zugriff auf die Speichergeräte im TU3-S25 4 Troubleshooting 5 Version
Installieren von Microsoft Office 2012-09-12 Version 2.1
 Installieren von Microsoft Office 2012-09-12 Version 2.1 INHALT Installieren von Microsoft Office... 2 Informationen vor der Installation... 2 Installieren von Microsoft Office... 3 Erste Schritte... 7
Einrichten des IIS für VDF WebApp. Einrichten des IIS (Internet Information Server) zur Verwendung von Visual DataFlex Web Applications
 zur Verwendung von Visual DataFlex Web Applications") Einrichten des IIS (Internet Information Server) zur Verwendung von Visual DataFlex Web Applications Windows 8 Systemsteuerung > Programme > Windows Features aktivieren / deaktivieren > Im Verzeichnisbaum
Einrichten des IIS (Internet Information Server) zur Verwendung von Visual DataFlex Web Applications Windows 8 Systemsteuerung > Programme > Windows Features aktivieren / deaktivieren > Im Verzeichnisbaum
Galileo Desktop Benutzerhandbuch Version 1.02
 Galileo Desktop Benutzerhandbuch Version 1.02 Galileo Deutschland GmbH. All rights reserved. Dieses Dokument enthält Informationen, an denen Galileo International Rechte besitzt. Dieses Dokument darf nur
NEWSLETTER. FileDirector Version 2.5 Novelties. Filing system designer. Filing system in WinClient
 Filing system designer FileDirector Version 2.5 Novelties FileDirector offers an easy way to design the filing system in WinClient. The filing system provides an Explorer-like structure in WinClient. The
Videos mit den Bordmitteln von Vista auf DVD brennen so geht s
 Videos mit den Bordmitteln von Vista V 66/1 Windows Vista bringt gegenüber Windows XP viele neue Programme mit sich. So können Sie beispielsweise Ihre privaten Videos ohne zusätzliche Software schneiden
Installation mit Lizenz-Server verbinden
 Einsteiger Fortgeschrittene Profis markus.meinl@m-quest.ch Version 1.0 Voraussetzungen für diesen Workshop 1. Die M-Quest Suite 2005-M oder höher ist auf diesem Rechner installiert 2. Der M-Lock 2005 Lizenzserver
Live Streaming => Netzwerk ( Streaming Server )
") Live Streaming => Netzwerk ( Streaming Server ) Verbinden Sie den HDR / IRD-HD Decoder mit dem Netzwerk. Stellen Sie sicher, dass der HDR / IRD-HD Decoder mit ihrem Computer kommuniziert. ( Bild 1 ) Wichtig:
Live Streaming => Netzwerk ( Streaming Server ) Verbinden Sie den HDR / IRD-HD Decoder mit dem Netzwerk. Stellen Sie sicher, dass der HDR / IRD-HD Decoder mit ihrem Computer kommuniziert. ( Bild 1 ) Wichtig:
Für Windows 7 Stand: 21.01.2013
 Für Windows 7 Stand: 21.01.2013 1 Überblick Alle F.A.S.T. Messgeräte verfügen über dieselbe USB-Seriell Hardware, welche einen Com- Port zur Kommunikation im System zur Verfügung stellt. Daher kann bei
Windows Server 2012 R2 Essentials & Hyper-V
 erklärt: Windows Server 2012 R2 Essentials & Hyper-V Windows Server 2012 R2 Essentials bietet gegenüber der Vorgängerversion die Möglichkeit, mit den Boardmitteln den Windows Server 2012 R2 Essentials
Installationshilfe und Systemanforderungen. Vertriebssoftware für die Praxis
 Vertriebssoftware für die Praxis Installationshilfe und Systemanforderungen L SIC FL BE ER XI H E Lesen Sie, wie Sie KomfortTools! erfolgreich auf Ihrem Computer installieren. UN ABHÄNGIG Software Inhalt
Presenter SNP6000. Register your product and get support at DE Benutzerhandbuch
 Register your product and get support at www.philips.com/welcome Presenter SNP6000 DE Benutzerhandbuch 1 a b c d e 2 3 4 Federal Communication Commission Interference Statement This equipment has been
5.3.1.13 Labor - Installation von Drittanbieter-Software in Windows XP
 5.0 5.3.1.13 Labor - Installation von Drittanbieter-Software in Windows XP Einführung Drucken Sie diese Übung aus und führen Sie sie durch. In dieser Übung werden Sie Software von Drittanbietern installieren
5.3.1.12 Lab - Installieren der Software von Drittanbietern unter Windows Vista
 5.0 5.3.1.12 Lab - Installieren der Software von Drittanbietern unter Windows Vista Einführung Drucken Sie diese Übung aus und folgen den Anweisungen. In dieser Übung werden Sie Software von Drittanbietern
Anleitung zum Prüfen von WebDAV
 Anleitung zum Prüfen von WebDAV (BDRS Version 8.010.006 oder höher) Dieses Merkblatt beschreibt, wie Sie Ihr System auf die Verwendung von WebDAV überprüfen können. 1. Was ist WebDAV? Bei der Nutzung des
BERNINA ArtLink V7.0N Installationsanleitung der Sticksoftware
 BERNINA ArtLink V7.0N Installationsanleitung der Sticksoftware System Voraussetzungen PC Software für Microsoft Windows XP * / Windows Vista * / Windows 7* / Windows 8 / Windows 8.1 Prozessor Single Core