R 1000 E. Treiber / Software Installationsanleitung Driver / software installation manual. elektroakustik GmbH & Co. KG. Version 1.
|
|
|
- Sebastian Fleischer
- vor 6 Jahren
- Abrufe
Transkript
1 R 1000 E Treiber / Software Installationsanleitung Driver / software installation manual Version /2016 elektroakustik GmbH & Co. KG
2 DEUTSCH 3 ENGLISH 13 2
3 INHALT Alle Betriebssysteme Systemanforderungen... 4 Hinweise zur USB Audiowiedergabe Native Musikwiedergabe... 5 Kernel-Streaming... 5 Installation und Einstellung Windows-Installation... 6 Windows-Einstellungen... 9 Windows-Einstellungen für die DSD Wiedergabe Apple MAC OS Einstellungen Achtung! Mit diesem Symbol gekennzeichnete Textstellen enthalten wichtige Hinweise, die für einen problemlosen und sicheren Betrieb des Gerätes unbedingt beachtet werden müssen. Dieses Symbol markiert Textpassagen, die Ihnen zusätzliche Hinweise und Hintergrundinformation geben und das Verständnis erleichtern sollen. 3
4 Alle Betriebssysteme Bitte beachten Sie, dass je nachdem wie Ihr System konfiguriert ist, die Abbildungen in dieser Installationsanleitung unter Umständen von der Darstellung auf Ihrem Computer abweichen können. Systemanforderungen (für die Wiedergabe von hochaufgelösten Audiofiles bis zur maximalen Samplingfrequenz) min. Intel Core i3 oder vergleichbarer AMD Prozessor. 4 GB RAM USB 2.0 Schnittstelle Microsoft Windows XP, Vista, Windows 7 / 8 / 10 oder MAC OS X Der R 1000 E kann an den aufgeführten Betriebssystemen ohne installierte Treiber betrieben werden. Ohne installierte Treiber ist die Wiedergabe von PCM Streams bis zu 96 khz möglich. 4 Zusätzlich können unter Windows nach Installation eines ASIO-Treibers DSD Streams mit 2,8 MHz (DSD64) wiedergegeben werden. Für die Wiedergabe von DSD Dateien, muss die Option USB-DSD Wiedergabe im Systemkonfigurations-Menü des R 1000 E eingeschaltet werden. Siehe hierzu Kapitel Grundeinstellungen des R 1000 E in der Betriebsanleitung. Abhängig von der Hard- und Softwarekonfiguration Ihres Computers kann eine einwandfreie Funktion mit dem R 1000 E nicht allgemein gewährleistet werden.
5 Native Musikwiedergabe (gilt nur bei Windows Systemen) Computer Betriebssysteme unterstützen standardmäßig keine 'native' Musikwiedergabe. Das bedeutet, dass der PC unabhängig von der Samplerate der wiedergegebenen Datei immer in eine feste Samplerate umrechnet. Dieses Umrechnen ist erforderlich um die Audiowiedergabe mit anderen Audioquellen, z.b. Systemklängen des Betriebssystems zu mischen (Stichwort 'Kernel Mixer'). Eine HD Audioaufnahme mit z.b. 192 khz wird vom Kernel immer auf 48 khz herunter gerechnet und anschließend auf die in den PC Systemeinstellungen eingestellte Ausgangsdatenrate z.b. 44,1 khz skaliert. Bei diesen Resamplingprozessen geht ein Teil der Audioqualität verloren. Wenn Sie dies vermeiden möchten, muss das Umrechnen des Kernelmixers umgangen werden. Da das PC-interne Handling der Audiodaten vom R 1000 E nicht beeinflusst werden kann, müssen auf dem PC geeignete Musikplayer mit entsprechenden Treibern und evtl. Plugins installiert werden, die die Standard Audioverarbeitung des PC-Betriebssystems umgehen. Gute Möglichkeiten hierfür bieten z.b. J. River Media Center oder Foobar Kernel-Streaming Als Kernelstreaming bezeichnet man das von Windows Betriebssystemen verwendete Verfahren zur Audioübertragung zwischen Medienplayern und Treiber. Je nach Betriebssystem gibt es unterschiedliche, teilweise mehrere Verfahren des Kernelstreamings. Für die Wiedergabe von DSD Dateien muss ASIO als Streamingart ausgewählt sein! Die Einstellung des Kernelstreaming wird im Medienplayer vorgenommen, sofern dieser verschiedene Methoden unterstützt. Um Systemfehler zu vermeiden, sollte während der Wiedergabe niemals die USB-Verbindung getrennt, oder der R 1000 E ausgeschaltet werden. Außerdem sollten keine Systemeinstellungen geändert werden. Zu den Hintergründen der Audio-Datenverarbeitung im PC stehen im Internet viele Informationsquellen und Foren zur Verfügung. Grundsätzlich gilt: Der R 1000 E kann die Audiodaten letztendlich nur mit der Qualität umsetzen, wie sie vom PC und dessen Betriebssystem ausgegeben werden. Bitte beachten Sie, dass wir aufgrund von eventuellen Updates der Software keine generelle Funktionsgarantie gegeben werden kann. Sollte es bei der Wiedergabe zu Störungen kommen, kontaktieren Sie bitte den Hersteller der Software. 5

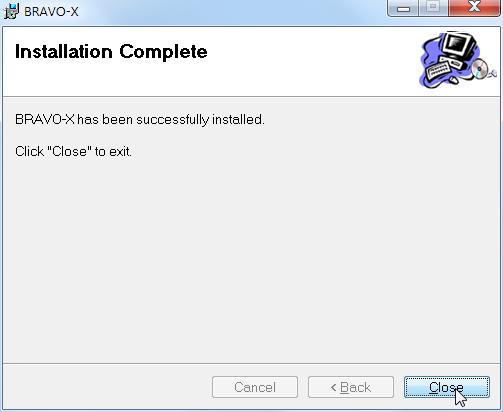
6 Windows-Installation Bevor der R 1000 E an einen Computer angeschlossen wird, müssen als erstes die Gerätetreiber installiert werden! Gehen Sie dazu wie folgt vor: Laden Sie das Softwarepaket von der Homepage unter Entpacken Sie das ZIP-Archiv. Rufen Sie das Setup durch doppeltes Anklicken der Datei 'setup.exe' auf. Bestätigen Sie die Installation durch Anklicken der Schaltfläche Ausführen. Das Setupprogramm führt in wenigen Schritten durch die Installation. Bestätigen Sie die Dialogfenster bis durch Anklicken der mit dem Mauszeiger markierten Schaltflächen. Nachdem die Installation vollständig abgeschlossen ist, beenden Sie diese durch Anklicken der Schaltfläche Close. Im nächsten Kapitel werden die erforderlichen Systemeinstellungen beschrieben. 6
7 7
. Der R 1000 E sollte nun von Windows automatisch erkannt werden.")

8 Windows-Einstellungen Nachdem die Installation vollständig abgeschlossen ist, können Sie den R 1000 E mit einem beliebigen USB Anschluss an Ihrem Computer verbinden. Der R 1000 E sollte nur direkt an den Computer angeschlossen werden. Bitte benutzen Sie keine USB Verteiler (Hubs). Der R 1000 E sollte nun von Windows automatisch erkannt werden. Systemeinstellungen: Zum Öffnen der Systemsteuerung unter Windows 7 klicken Sie auf 'Start' und anschließend auf 'Systemsteuerung'. Zum Öffnen der Systemsteuerung unter Windows 8 und 10 drücken Sie die Windows-Taste zusammen mit der x-taste auf der Tastatur. Es erscheint ein Einstellfenster. Klicken Sie hier auf 'Systemsteuerung'. Nachdem Sie die Systemsteuerung geöffnet haben, wählen Sie den Eintrag Hardware und Sound. Wählen Sie anschließend den Eintrag Sound aus. 8


9 Markieren Sie SPDIF-Schnittstelle / R1000E USB Audio und klicken Sie anschließend auf Als Standard. klicken Sie auf Eigenschaften. wählen Sie die Karteikarte Erweitert durch Anklicken aus. Stellen Sie die maximale Samplingfrequenz von Hz ein. 9
10 Windows-Einstellungen für die DSD Wiedergabe Die folgende Einstellung ist ausschließlich für die Wiedergabe von DSD Dateien erforderlich. Die gezeigte Einstellung kann erst nach der Installation des Windows (ASIO-) Treibers vorgenommen werden. Stellen Sie die USB Verbindung zum R 1000 E her, und schalten Sie ihn anschließend ein. Öffnen Sie das Setupprogramm des ASIO Treibers indem Sie das BRAVO-X ACPL Symbol auf Ihrem Desktop doppelt anklicken. Klicken Sie anschließend wie im Bild gezeigt auf 32bits. Das Setupprogramm kann jetzt geschlossen werden. 10
. Schalten Sie den R 1000 E ein. Der R 1000 E sollte nun automatisch erkannt werden.")
11 MAC OS Einstellungen Bei Mac OS Betriebssystemen ist keine Installation von Treibern erforderlich. Der R 1000 E kann mit einem beliebigen USB Anschluss des Computers verbunden werden. Der R 1000 E sollte direkt an den Computer angeschlossen werden. Bitte benutzen Sie keine USB Verteiler (Hubs). Schalten Sie den R 1000 E ein. Der R 1000 E sollte nun automatisch erkannt werden. Systemeinstellungen: Öffnen Sie das Dienstprogramm Audio Midi Setup 11
12 Markieren Sie als Audiogerät R 1000 E USB-Audio. Wählen Sie unter Einstellungen Dieses Gerät für die Tonausgabe verwenden Format Unter diesem Menüpunkt kann die maximale Samplingfrequenz eingestellt werden, stellen Sie hier Hz ein. 12
13 CONTENTS All operating systems System requirements Notes on USB audio reproduction Native music playback Kernel Streaming Installation and settings Windows installation Windows settings Windows settings for DSD playback MAC OS settings Caution! Text passages marked with this symbol contain important information which must be observed if the machine is to operate safely and without problems. This symbol marks text passages which provide supplementary notes and background information; they are intended to help the user understand how to get the best out of the machine. 13
14 All operating systems Please note that the illustrations in these installation instructions may vary from the displays on your own computer, depending on your system s configuration. System requirements (for playing high-resolution audio files at maximum sampling frequency) Intel Core i3 or higher or a comparable AMD Processor. 4 GB RAM USB 2.0 Interface Microsoft Windows XP, Vista, 7, 8, or 10 or MAC OS X If the R 1000 E is used in conjunction with the operating systems listed, then no drivers need to be installed. If no drivers are installed, it is possible to play PCM streams up to 96 khz. If an ASIO driver is installed, DSD streams at 2.8 MHz (DSD64) can also be played under Windows. To play DSD files it is necessary to switch on the USB-DSD playback option in the System Configuration menu of the R 1000 E. For more information please see the section entitled Basic settings of the R 1000 E in the user manual. We are unable to provide a general guarantee that the R 1000 E will function perfectly with your computer, as this depends on the particular configuration of your machine s hardware and software. 14
15 Native music playback (applicable to Windows systems only) Computer operating systems do not support native music playback as standard. This means that the PC always re-calculates the data to produce a fixed sampling rate, regardless of the sampling rate of the file being played. This conversion process is necessary in order to blend audio playback with other audio sources, e.g. the operating system s system sounds (referred to as the kernel mixer ). An HD audio recording at, say, 96 khz is always converted down to 48 khz, and subsequently scaled to the output data rate set in the PC system settings, e.g khz. These resampling processes cause a partial loss of audio quality. If this is to be avoided, it is necessary to circumvent the kernel mixer s conversion process. Since it is not possible for the R 1000 E to influence the PC s internal handling of audio data, suitable music players with appropriate drivers and, in some cases plugins, must be installed on the PC; this software then circumvents the standard audio processing of the PC s operating system. Programs such as J. River Media Center and Foobar 2000 offer good facilities in this area. Kernel streaming The term kernel streaming refers to the process used by the Windows operating system for transferring audio between media players and drivers. Kernel streaming involves different and in some cases multiple processes, depending on the operating system. For playing back DSD files, ASIO must be set as streaming type! If your version of Windows supports different methods of kernel streaming, the setting is entered in Media Player. To prevent fail functions and system crashes of your computer and the playback program, please note the following: Never connect or disconnect the USB connection while the system is running. The R 1000 E should never be switched off while playback. The Internet contains many forums and sources of information on the background to audio data processing using the PC. This is the basic rule: in the final analysis the R 1000 E is only able to convert the audio data which is delivered by the PC and its operating system. Please note that possible software updates mean that we are unable to provide a general guarantee that files will play properly. If you encounter problems during playback, please contact the software manufacturer. 15

16 Windows Installation The device drivers must be installed before you connect the R 1000 E to a computer. This is the procedure: Download the software package from the website: R1000E-software Unpack the ZIP-file. Double-click on the file 'setup.exe' to call up the Setup program. Confirm the installation by clicking on the Run button. The Setup program carries out the installation, running through a small number of steps. Confirm dialogue windows to by clicking on the buttons marked by the mouse cursor. Once the installation is complete, terminate the process by clicking on the Close button. The next section describes the system settings required. 16
17 17
.")

18 Windows settings When installation is complete, you can connect the R 1000 E to your computer using any available USB port. The R 1000 E should always be connected directly to the computer. Please do not use a USB distributor (hub). Windows should now detect the R 1000 E automatically. System settings: Windows 7 users first click on the 'Start' button and then on 'Control Panel'. Windows 8 and 10 users can use the keyboard shortcut 'WIN button + X button' to open a pop up window in which the 'Control panel' can be started. After the Control Panel is opened, select the Hardware and Sound entry. Now select the Sound entry. 18

19 Mark SPDIF-Schnittstelle / R1000E USB Audio and click on Set Default. Click on Properties. Select the Advanced tab by clicking on it and change the setting to the maximum sampling rate of Hz. 19
20 Windows settings for DSD playback The following settings are only required if the R 1000 E should play back DSD files. To make the following settings the Winows ASIO driver must be installed first. Connect the R 1000 E to your computer using any available USB port and switch the device on. Double click on the BRAVO-X ACPL symbol on the PC`s desktop to open the setup utility of the ASIO driver. Next click on 32bits as shown in the figure. Now the setup utility can be closed. 20
. Windows should now detect the R 1000 E automatically.")
21 MAC OS settings MAC OS needs no installation of specific drivers. You can connect the R 1000 E to your computer using any available USB port. The R 1000 E should always be connected directly to the computer. Please do not use a USB distributor (hub). Windows should now detect the R 1000 E automatically. System settings: Open the utilities Select the 'Audio MIDI Setup' entry. 21

22 Now mark 'R 1000 E USB Audio'. Check under settings output'. 'Use this device for sound Format At this point you can set the maximum sampling rate. This should be 96000,0 Hz / 32 Bit. 22
23 23
24 elektroakustik GmbH & Co. KG Herford Planckstr Tel. +49 (0) Deutschland * Germany * Allemagne
PDP 3000 HV. Treiber / Software Installationsanleitung Driver / software installation manual. elektroakustik GmbH & Co. KG. Version 1.
 PDP 3000 HV Treiber / Software Installationsanleitung Driver / software installation manual Version 1.0 09/2014 elektroakustik GmbH & Co. KG DEUTSCH 3 ENGLISH 13 INHALT Alle Betriebssysteme Systemanforderungen...
DAC 8 DSD. Treiber / Software Installationsanleitung Driver / software installation manual. elektroakustik GmbH & Co. KG. Version 1.
 DAC 8 DSD Treiber / Software Installationsanleitung Driver / software installation manual Version 1.0 11/2015 elektroakustik GmbH & Co. KG DEUTSCH 3 ENGLISH 13 INHALT Alle Betriebssysteme Systemanforderungen...
MP 3000 HV. Treiber / Software Installationsanleitung Driver / software installation manual. elektroakustik GmbH & Co. KG. Version 1.
 MP 3000 HV Treiber / Software Installationsanleitung Driver / software installation manual Version 1.0 01/2013 elektroakustik GmbH & Co. KG DEUTSCH 3 ENGLISH 21 INHALT Alle Betriebssysteme Systemanforderungen...
DAC 8. Treiber / Software Installationsanleitung Driver / software installation manual. elektroakustik GmbH & Co. KG. Version 1.
 DAC 8 Treiber / Software Installationsanleitung Driver / software installation manual Version 1.0 05/2012 elektroakustik GmbH & Co. KG DEUTSCH 3 ENGLISH 21 INHALT Alle Betriebssysteme Systemanforderungen...
DAC 8. Treiber / Software Installationsanleitung Driver / software installation manual. elektroakustik GmbH & Co. KG. Version 1.
 DAC 8 Treiber / Software Installationsanleitung Driver / software installation manual Version 1.2 02/2013 elektroakustik GmbH & Co. KG DEUTSCH 3 ENGLISH 21 INHALT Alle Betriebssysteme Systemanforderungen...
Anleitung zur Schnellinstallation TU3-S
 Anleitung zur Schnellinstallation TU3-S25 1.01 Table of Contents Deutsch 1 1. Bevor Sie anfangen 1 2. Installation der Hardware 2 3. Zugriff auf die Speichergeräte im TU3-S25 4 Troubleshooting 5 Version
Word-CRM-Upload-Button. User manual
 Word-CRM-Upload-Button User manual Word-CRM-Upload for MS CRM 2011 Content 1. Preface... 3 2. Installation... 4 2.1. Requirements... 4 2.1.1. Clients... 4 2.2. Installation guidelines... 5 2.2.1. Client...
iid software tools QuickStartGuide iid USB base driver installation
 iid software tools QuickStartGuide iid software tools USB base driver installation microsensys Nov 2016 Introduction / Einleitung This document describes in short form installation of the microsensys USB
USB -> Seriell Adapterkabel Benutzerhandbuch
 USB -> Seriell Adapterkabel Benutzerhandbuch 1. Produkt Eigenschaften 1 2. System Vorraussetzungen 1 3. Treiber Installation (Alle Windows Systeme) 1 4. Den COM Port ändern 2 5. Einstellen eines RS232
Anleitung zur Schnellinstallation TFM-560X YO.13
 Anleitung zur Schnellinstallation TFM-560X YO.13 Table of Contents Deutsch 1 1. Bevor Sie anfangen 1 2. Installation 2 Troubleshooting 6 Version 06.08.2011 1. Bevor Sie anfangen Packungsinhalt ŸTFM-560X
Der Adapter Z250I / Z270I lässt sich auf folgenden Betriebssystemen installieren:
 Installationshinweise Z250I / Z270I Adapter IR USB Installation hints Z250I / Z270I Adapter IR USB 06/07 (Laden Sie den Treiber vom WEB, entpacken Sie ihn in ein leeres Verzeichnis und geben Sie dieses
Anleitung zur Schnellinstallation TFM-PCIV92A B1.21
 Anleitung zur Schnellinstallation TFM-PCIV92A B1.21 Table of Contents Deutsch 1 1. Bevor Sie anfangen 1 2. Installation 2 Troubleshooting 6 Version 05.11.2011 1. Bevor Sie anfangen Packungsinhalt ŸTFM-PCIV92A
EMCO Installationsanleitung / Installation instructions
 EMCO Installationsanleitung / Installation instructions Installationsanleitung Installation instructions Digitalanzeige digital display C40, FB450 L, FB600 L, EM 14D/17D/20D Ausgabe / Edition B 2012-03
Anleitung zur Schnellinstallation TBW-107UB 1.01
 Anleitung zur Schnellinstallation TBW-107UB 1.01 Table of Contents Deutsch 1 1. Bevor Sie anfangen 1 2. Installation 2 3. Konfiguration des Bluetooth-Adapters 5 Troubleshooting 7 Version 02.25.2010 1.
Installation des USB HD-Audio Treibers 24/192 (Tenor-Plattform) Einstellungen des Betriebssystems
 Einstellungen des Betriebssystems") Installation des USB HD-Audio Treibers 24/192 (Tenor-Plattform) Einstellungen des Betriebssystems 1 Mac OS X 2 Windows 7 3 Windows Vista 4 Windows XP 5 Tipps Installationsanleitung Lindemann TENOR Plattform
Installation des USB HD-Audio Treibers 24/192 (Tenor-Plattform) Einstellungen des Betriebssystems 1 Mac OS X 2 Windows 7 3 Windows Vista 4 Windows XP 5 Tipps Installationsanleitung Lindemann TENOR Plattform
MANUAL_EN ANLEITUNG_DE PHONE SUITE SYNCHRONISATION SOFTWARE
 MANUAL_EN ANLEITUNG_DE PHONE SUITE SYNCHRONISATION SOFTWARE 2 PHONE SUITE MANUAL PHONE SUITE MANUAL 3 RESERVATION Technical Data is subject to change without notice. Changes, errors and misprints may not
Anleitung zur Schnellinstallation TEW-623PI 3.02
 Anleitung zur Schnellinstallation TEW-623PI 3.02 Table of Contents Deutsch 1 1. Bevor Sie anfangen 2. Installation 1 2 3. Verwendung des drahtlosen Adapters 4 Troubleshooting 5 Version 02.05.2010 1. Bevor
v i r t u A L C O M P o r t s
 v i r t u A L C O M P o r t s (HO720 / HO730) Installieren und Einstellen Installation and Settings Deutsch / English Installieren und Einstellen des virtuellen COM Ports (HO720 / HO730) Einleitung Laden
150Mbps Micro Wireless N USB Adapter
 150Mbps Micro Wireless N USB Adapter TEW-648UBM ŸAnleitung zur Schnellinstallation (1) ŸTroubleshooting (6) 1.11 1. Bevor Sie anfangen Packungsinhalt ŸTEW-648UBM ŸCD-ROM (Dienstprogramm & Bedienungsanleitung)
Anleitung zur Schnellinstallation TU2-HDMI 1.01
 Anleitung zur Schnellinstallation TU2-HDMI 1.01 Table of Contents Deutsch 1 1. Bevor Sie anfangen 1 2. Installationl 2 3. Konfiguration der Anzeigeeinstellungen 4 Troubleshooting 6 Version 02.16.2011 1.
Anleitung zur Schnellinstallation TFM-561U
 Anleitung zur Schnellinstallation TFM-561U V1 Table of Contents Deutsch 1 1. Bevor Sie anfangen 1 2. Installation 2 Troubleshooting 5 Version 08.25.2010 1. Bevor Sie anfangen Packungsinhalt TFM-561U Treiber
Anleitung zur Schnellinstallation TU3-SA 1.01
 Anleitung zur Schnellinstallation TU3-SA 1.01 Table of Contents Deutsch 1 1. Bevor Sie anfangen 1 2. Installation der Hardware 2 3. Zugriff auf die Festplatten des TU3-SA 4 Troubleshooting 5 Version 02.15.2011
USB Treiber updaten unter Windows 7/Vista
 USB Treiber updaten unter Windows 7/Vista Hinweis: Für den Downloader ist momentan keine 64 Bit Version erhältlich. Der Downloader ist nur kompatibel mit 32 Bit Versionen von Windows 7/Vista. Für den Einsatz
Parameter-Updatesoftware PF-12 Plus
 Parameter-Updatesoftware PF-12 Plus Mai / May 2015 Inhalt 1. Durchführung des Parameter-Updates... 2 2. Kontakt... 6 Content 1. Performance of the parameter-update... 4 2. Contact... 6 1. Durchführung
Nachdem Sie die Datei (z.b. t330usbflashupdate.exe) heruntergeladen haben, führen Sie bitte einen Doppelklick mit der linken Maustaste darauf aus:
 heruntergeladen haben, führen Sie bitte einen Doppelklick mit der linken Maustaste darauf aus:") Deutsch 1.0 Vorbereitung für das Firmwareupdate Vergewissern Sie sich, dass Sie den USB-Treiber für Ihr Gerät installiert haben. Diesen können Sie auf unserer Internetseite unter www.testo.de downloaden.
Deutsch 1.0 Vorbereitung für das Firmwareupdate Vergewissern Sie sich, dass Sie den USB-Treiber für Ihr Gerät installiert haben. Diesen können Sie auf unserer Internetseite unter www.testo.de downloaden.
Anleitung zur Verwendung des Update-Tools für
 English version see below (page 10) Anleitung zur Verwendung des Update-Tools für - KW DDC Steuergeräte - KW DDC WLAN Module - KW DLC Steuergeräte - KW DLC WLAN Module Bitte beachten Sie: jedes Steuergerät
Cameraserver mini. commissioning. Ihre Vision ist unsere Aufgabe
 Cameraserver mini commissioning Page 1 Cameraserver - commissioning Contents 1. Plug IN... 3 2. Turn ON... 3 3. Network configuration... 4 4. Client-Installation... 6 4.1 Desktop Client... 6 4.2 Silverlight
JTAGMaps Quick Installation Guide
 Index Index... 1 ENGLISH... 2 Introduction... 2 Requirements... 2 1. Installation... 3 2. Open JTAG Maps... 4 3. Request a free JTAG Maps license... 4 4. Pointing to the license file... 5 5. JTAG Maps
Installation des USB HD-Audio Treibers 24/192 im asynchronen Mode (XMOS-Plattform) Einstellungen des Betriebssystems
 Einstellungen des Betriebssystems") Installation des USB HD-Audio Treibers 24/192 im asynchronen Mode (XMOS-Plattform) Einstellungen des Betriebssystems 1 Mac OS X 2 Windows 7 3 Windows Vista 4 Windows XP 5 Tipps Installationsanleitung XMOS
Installation des USB HD-Audio Treibers 24/192 im asynchronen Mode (XMOS-Plattform) Einstellungen des Betriebssystems 1 Mac OS X 2 Windows 7 3 Windows Vista 4 Windows XP 5 Tipps Installationsanleitung XMOS
BLK-2000. Quick Installation Guide. English. Deutsch
 BLK-2000 Quick Installation Guide English Deutsch This guide covers only the most common situations. All detail information is described in the user s manual. English BLK-2000 Quick Installation Guide
SOUND LINK ANALYSIS SOFTWARE BEDIENUNGSANLEITUNG USER MANUAL. Für weiteren Gebrauch aufbewahren! Keep this manual for future needs!
 BEDIENUNGSANLEITUNG USER MANUAL SOUND LINK ANALYSIS SOFTWARE Für weiteren Gebrauch aufbewahren! Keep this manual for future needs! Copyright Nachdruck verboten! Reproduction prohibited! Inhaltsverzeichnis/
Softwareupdate-Anleitung // Porty L 600 / Porty L 1200
 Softwareupdate-Anleitung // Porty L 600 / Porty L 1200 1 Softwareupdate-Anleitung // Porty L 600 / Porty L 1200 HENSEL-VISIT GmbH & Co. KG Robert-Bunsen-Str. 3 D-97076 Würzburg-Lengfeld GERMANY Tel./Phone:
KURZANLEITUNG. Firmware-Upgrade: Wie geht das eigentlich?
 KURZANLEITUNG Firmware-Upgrade: Wie geht das eigentlich? Die Firmware ist eine Software, die auf der IP-Kamera installiert ist und alle Funktionen des Gerätes steuert. Nach dem Firmware-Update stehen Ihnen
ReadMe zur Installation der BRICKware for Windows, Version 6.1.2. ReadMe on Installing BRICKware for Windows, Version 6.1.2
 ReadMe zur Installation der BRICKware for Windows, Version 6.1.2 Seiten 2-4 ReadMe on Installing BRICKware for Windows, Version 6.1.2 Pages 5/6 BRICKware for Windows ReadMe 1 1 BRICKware for Windows, Version
OMNITRONIC DSP Control Installationsanweisungen bis Version 1.3.1
 OMNITRONIC DSP Control Installationsanweisungen bis Version 1.3.1 Bitte befolgen Sie diese Schritt-für-Schritt Anleitung genau, nachdem Sie ein Software Update von unserer Website heruntergeladen haben.
p^db=`oj===pìééçêíáåñçêã~íáçå=
 p^db=`oj===pìééçêíáåñçêã~íáçå= Error: "Could not connect to the SQL Server Instance" or "Failed to open a connection to the database." When you attempt to launch ACT! by Sage or ACT by Sage Premium for
Formatting the TrekStor i.beat run
 DE EN Formatting the TrekStor i.beat run Formatierung des TrekStor i.beat run a Beim Formatieren werden ALLE Daten auf dem MP3-Player gelöscht. In diesem Abschnitt wird Ihnen erläutert, wie Sie Ihren MP3-Player
Installation Manual. Driver Installation USB-to-Serial Adapter WE2111. A en/de
 Installation Manual English Deutsch Driver Installation USB-to-Serial Adapter WE2111 A4012-1.0 en/de USB-to-Serial Adapter English 2 A4012-1.0 en/de USB-to-Serial Adapter 1 Installation in Windows 7...
User Manual BB-anywhere
 User Manual BB-anywhere LOGIN PROCEDURE 1. Click the Start button, choose All Programs (right above the search box) and select BB-ANYWHERE from the Start menu: BB-anywhere in a nutshell Regardless whether
Installationshinweise Z501J / Z501K Adapter IrDa USB Installation hints Z501J / Z501K Adapter IrDa USB
 Installationshinweise Z501J / Z501K Adapter IrDa USB Installation hints Z501J / Z501K Adapter IrDa USB 1/3.04 (Diese Anleitung ist für die CD geschrieben. Wenn Sie den Treiber vom WEB laden, entpacken
Softwareupdate-Anleitung // AC Porty L Netzteileinschub
 1 Softwareupdate-Anleitung // AC Porty L Netzteileinschub Softwareupdate-Anleitung // AC Porty L Netzteileinschub HENSEL-VISIT GmbH & Co. KG Robert-Bunsen-Str. 3 D-97076 Würzburg-Lengfeld GERMANY Tel./Phone:
EMCO Installationsanleitung Installation instructions
 EMCO Installationsanleitung Installation instructions Installationsanleitung Installation instructions Digitalanzeige digital display C40, FB450 L, FB600 L, EM 14D/17D/20D Ausgabe Edition A 2009-12 Deutsch...2
DVD MAKER USB2.0 Installation Anleitung
 DVD MAKER USB2.0 Installation Anleitung Inhalt V1.0 Kapitel 1: DVD MAKER USB2.0 Hardware Montage...2 1.1 Inhalt der DVD MAKER USB2.0 Paket...2 1.2 Systemanforderungen...2 1.3 Hardware Montage...2 Kapitel
miditech 4merge 4-fach MIDI Merger mit :
 miditech 4merge 4-fach MIDI Merger mit : 4 x MIDI Input Port, 4 LEDs für MIDI In Signale 1 x MIDI Output Port MIDI USB Port, auch für USB Power Adapter Power LED und LOGO LEDs Hochwertiges Aluminium Gehäuse
Tube Analyzer LogViewer 2.3
 Tube Analyzer LogViewer 2.3 User Manual Stand: 25.9.2015 Seite 1 von 11 Name Company Date Designed by WKS 28.02.2013 1 st Checker 2 nd Checker Version history Version Author Changes Date 1.0 Created 19.06.2015
p^db=`oj===pìééçêíáåñçêã~íáçå=
 p^db=`oj===pìééçêíáåñçêã~íáçå= How to Disable User Account Control (UAC) in Windows Vista You are attempting to install or uninstall ACT! when Windows does not allow you access to needed files or folders.
Getting started with MillPlus IT V530 Winshape
 Getting started with MillPlus IT V530 Winshape Table of contents: Deutsche Bedienungshinweise zur MillPlus IT V530 Programmierplatz... 3 English user directions to the MillPlus IT V530 Programming Station...
microkontrol/kontrol49 System Firmware Update
 microkontrol/kontrol49 System Firmware Update Update Anleitung (für Windows) Dieses Update ist lediglich mit Windows XP kompatibel, versuchen Sie dieses nicht mit Windows 98/ME und 2000 auszuführen. 1.
Installation und Start der Software AQ2sp Installation and Start of the software AQ2sp
 Installation and Start of the software Abhängig von Ihrer WINDOWS-Version benötigen Sie Administrator-Rechte zur Installation dieser Software. Geeignet für folgende WINDOWS-Versionen: Windows 98 SE Windows
Anleitung zur Schnellinstallation TE100-PIP
 Anleitung zur Schnellinstallation TE100-PIP V2 Table of Contents Deutsch 1 1. Bevor Sie anfangen 1 2. Installation 2 3. Konfiguration des Druckservers 3 4. Hinzufügen des Druckers zu Ihren PC-Einstellungen
Software BC Flash. Firmware für VAS 5903 / 5905 aktualisieren. Software BC Flash. Update Firmware for VAS 5903 / 5905. Bedienungsanleitung Software
 Software BC Flash Firmware für VAS 5903 / 5905 aktualisieren Software BC Flash Update Firmware for VAS 5903 / 5905 D GB Bedienungsanleitung Software Operating Instructions Software 42,0410,1534 012008
Technische Information. Toolset Software und Cosworth Geräte
 Technische Information Technical Information 07/2014 911 GT3 Cup (991) Toolset Software und Cosworth Geräte Toolset software and Cosworth devices Fahrzeug / Vehicle: 911 GT3 Cup (991) Bauteil / Part: ICD
FOR ENGLISCH VERSION PLEASE SCROLL FORWARD SOME PAGES. THANK YOU!
 FOR ENGLISCH VERSION PLEASE SCROLL FORWARD SOME PAGES. THANK YOU! HELPLINE GAMMA-SCOUT ODER : WIE BEKOMME ICH MEIN GERÄT ZUM LAUFEN? Sie haben sich für ein Strahlungsmessgerät mit PC-Anschluss entschieden.
Durametric. Installations Anleitung Quick Installation Guide. Deutsch: Seite 2 bis 3. English: Page 4 to 5. ww.fvd.de
 Durametric Quick Installation Guide Deutsch: Seite 2 bis 3 English: Page 4 to 5 w 2 Systemvoraussetzungen: Windows 7 / XP / Vista, (32- und 64-bit) - mind. 1.8GHz Dual Core Prozessor - 1 GB Arbeitsspeicher
VGM. VGM information. HAMBURG SÜD VGM WEB PORTAL USER GUIDE June 2016
 Overview The Hamburg Süd VGM Web portal is an application that enables you to submit VGM information directly to Hamburg Süd via our e-portal Web page. You can choose to enter VGM information directly,
Anleitung zur Schnellinstallation TE100-P1U
 Anleitung zur Schnellinstallation TE100-P1U V2 Table of Contents Deutsch 1 1. Bevor Sie anfangen 1 2. Installation 2 3. Konfiguration des Druckservers 3 4. Hinzufügen des Druckers zu Ihren PC-Einstellungen
Installationsanleitung für Thermodrucker D10
 Installationsanleitung für Thermodrucker D10 Windows XP / Vista Für diesen Artikel benötigen Sie keine Software, da die Treiber bereits bei Windows integriert sind. Um den Drucker auszuwählen befolgen
How-To-Do. Hardware Configuration of the CC03 via SIMATIC Manager from Siemens
 How-To-Do Hardware Configuration of the CC03 via SIMATIC Manager from Siemens Content Hardware Configuration of the CC03 via SIMATIC Manager from Siemens... 1 1 General... 2 1.1 Information... 2 1.2 Reference...
RS232-Verbindung, RXU10 Herstellen einer RS232-Verbindung zwischen PC und Messgerät oder Modem und Messgerät
 Betriebsanleitung RS232-Verbindung, RXU10 Herstellen einer RS232-Verbindung zwischen PC und Messgerät oder Modem und Messgerät ä 2 Operating Instructions RS232 Connection, RXU10 Setting up an RS232 connection
USB und DSD Setup Anleitung. Seite 1
 USB und DSD Setup Anleitung Seite 1 Inhaltsverzeichnis Setup von Audiolab für den Asynchronmodus... 3 Alle Betriebssysteme... 4 Windows 8 / Windows 7 / Vista / XP - Installation... 5 Windows 8 / Windows
Quick Guide Home Network Mode
 Quick Guide Home Network Mode English > 1 German > 3 About the Home Network Mode EN Tivizen Nano & iplug normally work on their own created networks (whose SSID starts with tivizentv or iplug ) in which
Anleitung zur Schnellinstallation. TK-217i 1.02
 Anleitung zur Schnellinstallation TK-217i 1.02 Table of Contents Deutsch 1 1. Bevor Sie anfangen 1 2. Installation 2 3. Bedienung 3 4. Verwendung des KVM-Dienstprogramms 4 Technical Specifications 10 Troubleshooting
SanStore: Kurzanleitung / SanStore: Quick reference guide
 SanStore Rekorder der Serie MM, MMX, HM und HMX Datenwiedergabe und Backup Datenwiedergabe 1. Drücken Sie die Time Search-Taste auf der Fernbedienung. Hinweis: Falls Sie nach einem Administrator-Passwort
Symbio system requirements. Version 5.1
 Symbio system requirements Version 5.1 From: January 2016 2016 Ploetz + Zeller GmbH Symbio system requirements 2 Content 1 Symbio Web... 3 1.1 Overview... 3 1.1.1 Single server installation... 3 1.1.2
iid software tools QuickStartGuide iid USB base RFID driver read installation 13.56 MHz closed coupling RFID
 iid software tools QuickStartGuide iid software tools USB base RFID driver read installation write unit 13.56 MHz closed coupling RFID microsensys Jun 2013 Introduction / Einleitung This document describes
SOMNOcheck. PC-Software für SOMNOcheck / SOMNOcheck effort PC software for SOMNOcheck / SOMNOcheck effort
 SOMNOcheck PC-Software für SOMNOcheck / SOMNOcheck effort PC software for SOMNOcheck / SOMNOcheck effort Installationsanweisung für Windows 7 (32-bit/64-bit) Installation instructions for Windows 7 (32-bit/64-bit)
https://portal.microsoftonline.com
 Sie haben nun Office über Office365 bezogen. Ihr Account wird in Kürze in dem Office365 Portal angelegt. Anschließend können Sie, wie unten beschrieben, die Software beziehen. Congratulations, you have
Kurzanleitung um Transponder mit einem scemtec TT Reader und der Software UniDemo zu lesen
 Kurzanleitung um Transponder mit einem scemtec TT Reader und der Software UniDemo zu lesen QuickStart Guide to read a transponder with a scemtec TT reader and software UniDemo Voraussetzung: - PC mit der
MANUAL_EN ANLEITUNG_DE QSYNC OUTLOOK SYNCHRONISATION SOFTWARE
 MANUAL_ ANLEITUNG_DE QSYNC OUTLOOK SYNCHRONISATION SOFTWARE 2 TITEL DES KAPITELS TITEL DES KAPITELS 3 RESERVATION Technical Data is subject to change without notice. Changes, errors and misprints may not
UNIGATE CL Konfiguration mit WINGATE
 UNIGATE CL Konfiguration mit WINGATE - UNIGATE CL Configuration via WINGATE Art.-Nr.: V3928 Deutschmann Automation GmbH & Co. KG Carl-Zeiss-Str. 8 D-65520 Bad Camberg Phone: +49-(0)6434-9433-0 Hotline:
LimbLogic Communicator. Clever verbunden. Software Installation
 LimbLogic Communicator Clever verbunden. Software Installation DE LimbLogic Communicator Software Installation Schließen Sie den Communicator nicht an den PC an, bis Sie dazu aufgefordert werden. Hardware-
VGM. VGM information. HAMBURG SÜD VGM WEB PORTAL - USER GUIDE June 2016
 Overview The Hamburg Süd VGM-Portal is an application which enables to submit VGM information directly to Hamburg Süd via our e-portal web page. You can choose to insert VGM information directly, or download
How to use the large-capacity computer Lilli? IMPORTANT: Access only on JKU Campus!! Using Windows:
 How to use the large-capacity computer Lilli? IMPORTANT: Access only on JKU Campus!! Using Windows: In order to connect to Lilli you need to install the program PUTTY. The program enables you to create
SmartClass Firmware-Update Vorgehensweise
 Benutzeranweisungen SmartClass Firmware-Update Vorgehensweise 2008.01 (V 1.x.x) Deutsch Please direct all enquiries to your local JDSU sales company. The addresses can be found at: www.jdsu.com/tm-contacts
UCON/s UCON/s Kurzanleitung Inbetriebnahme
 UCON/s UCON/s Kurzanleitung Inbetriebnahme copyright G&D 24/08/2005 Irrum und techn. Änderungen vorbehalten 1. Was Sie zur Installation benötigen - UCON/s - 1:1 belegtes CAT-x Patchkabel - CATPRO2(bei
NEWSLETTER. FileDirector Version 2.5 Novelties. Filing system designer. Filing system in WinClient
 Filing system designer FileDirector Version 2.5 Novelties FileDirector offers an easy way to design the filing system in WinClient. The filing system provides an Explorer-like structure in WinClient. The
Can I use an older device with a new GSD file? It is always the best to use the latest GSD file since this is downward compatible to older versions.
 EUCHNER GmbH + Co. KG Postfach 10 01 52 D-70745 Leinfelden-Echterdingen MGB PROFINET You will require the corresponding GSD file in GSDML format in order to integrate the MGB system: GSDML-Vx.x-EUCHNER-MGB_xxxxxx-YYYYMMDD.xml
PeakTech Zeitprogramm erstellen über Excel - Beispiel / Timed programs with Excel Example
 PeakTech 6180 Zeitprogramm erstellen über Excel - Beispiel / Timed programs with Excel Example 1. Excel Datei erstellen / Create Excel file Öffnen Sie Excel und erstellen eine xls-datei unter einem beliebigen
Bluetooth MIDI Kurzanleitung
 Bluetooth MIDI Kurzanleitung G 1 Inhalte Verbindung mit iphone/ipad...2 Voraussetzungen... 2 Bei Apps mit Bluetooth MIDI Unterstützung... 2 Bei Apps ohne Bluetooth MIDI Unterstützung... 4 Verbindung mit
USB-C Multiport Adapter
 USB-C Multiport Adapter User Guide English USB-C Multiport Adapter Unlock the full potential of your Apple MacBook MINIX s USB-C Multiport Adapter is the world s most advanced USB-C adapter, delivering
Quick Installation Guide TU2-ET100
 Quick Installation Guide TU2-ET100 Table of of Contents Contents... 1. Bevor Sie anfangen... 2. Installation... 1 1 2 Troubleshooting... 6 Version 08.30.2006 1. Bevor Sie anfangen Packungsinhalt TU2-ET100
D A C C E ABC D ECF C E D C D A B C D EE D F E A A AE A E EE E E A DE E A AA
 ABCDECFCEDCD DACCE ABCDEEDFEAAAEAE EEEEADEEAAA Unterstützte Betriebssysteme: o Windows XP SP3 32 Bit o Windows Vista 32/64 Bit mit SP2 o Windows 7 32/64 Bit o MAC OS X 10.6.4 Hinweis: Bitte installieren
E asyline by Hama GmbH & Co KG Postfach 80 86651 Monheim/Germany Tel. +49 (0)9091/502-0 Fax +49 (0)9091/502-274 hama@hama.de www.hama.
9091/502-0 Fax +49 (0)9091/502-274 hama@hama.de www.hama.") 00021024-10.06 E asyline by Hama GmbH & Co KG Postfach 80 86651 Monheim/Germany Tel. +49 (0)9091/502-0 Fax +49 (0)9091/502-274 hama@hama.de www.hama.com Gamepad Thunderstorm II 0021024 l Bedienungsanleitung
00021024-10.06 E asyline by Hama GmbH & Co KG Postfach 80 86651 Monheim/Germany Tel. +49 (0)9091/502-0 Fax +49 (0)9091/502-274 hama@hama.de www.hama.com Gamepad Thunderstorm II 0021024 l Bedienungsanleitung
Installation Guide WLAN Interface
 Installation Guide 7106 7206 7010 WLAN Interface EN Installation Guide This guide explains how to install the Ethernet LAN card in your label printer. You should conult your dealer or distributor for more
ALL1681 Wireless 802.11g Powerline Router Quick Installation Guide
 ALL1681 Wireless 802.11g Powerline Router Quick Installation Guide 1 SET ALL1681 Upon you receive your wireless Router, please check that the following contents are packaged: - Powerline Wireless Router
MCH3 USB Driver Installation. MCH3 USB Driver Installation. Verfasser: ss. Dokumentenname: Doku-Art: Documentation. Datum: Doku-Nr.
 MCH3 USB Driver V1.0 Seite 1 von 14 Table of Contents 1 Purpose of this manual... 4 2 Windows XP... 5 3 Windows 7... 10 V1.0 Seite 2 von 14 Document History Revision Date Author Description 1.0 04.05.2010
Guidance Notes for the eservice 'Marketing Authorisation & Lifecycle Management of Medicines' Contents
 Guidance Notes for the eservice 'Marketing Authorisation & Lifecycle Management of Medicines' Contents Login... 2 No active procedure at the moment... 3 'Active' procedure... 4 New communication (procedure
Data exchange with Prosonic Flow 93T
 Supplementary documentation for the Operating Instructions Data exchange with Prosonic Flow 93T Import CSV File into Excel A0013675 Prosonic Flow 93T uses a text file format commonly referred to as a CSV
SSL Konfiguration des Mailclients
 English translation is given in this typo. Our translations of software-menus may be different to yours. Anleitung für die Umstellung der unsicheren IMAP und POP3 Ports auf die sicheren Ports IMAP (993)
1 Allgemeines (Windows)
") PLOT 6.2 (WINDOWS) 1 Allgemeines (Windows) Anbei erhalten Sie ein Liefermedium mit der Software von PLOT 6.2 Im folgenden finden Sie beschrieben, wie die Software zu installieren ist. Weitergehende Informationen
PLOT 6.2 (WINDOWS) 1 Allgemeines (Windows) Anbei erhalten Sie ein Liefermedium mit der Software von PLOT 6.2 Im folgenden finden Sie beschrieben, wie die Software zu installieren ist. Weitergehende Informationen
Table of Cont 6. 2 General Information... 4 Purpose...4 Documentation...4 Scope of Supply...5 Technical Data Safety Regulations...
 2 General Information........................ 4 Purpose........................................4 Documentation................................4 Scope of Supply................................5 Technical
Snom 3xx/7xx Serie. Manuelle Neukonfiguration. Dokumentenversion 1.0
 Snom 3xx/7xx Serie Manuelle Neukonfiguration Dokumentenversion 1.0 Snom 3xx/7xx Serie Mauelle Neukonfiguration Copyright Hinweis Copyright 2016 finocom AG Alle Rechte vorbehalten. Jegliche technische Dokumentation,
Readme-USB DIGSI V 4.82
 DIGSI V 4.82 Sehr geehrter Kunde, der USB-Treiber für SIPROTEC-Geräte erlaubt Ihnen, mit den SIPROTEC Geräten 7SJ80/7SK80 über USB zu kommunizieren. Zur Installation oder Aktualisierung des USB-Treibers
ONLINE LICENCE GENERATOR
 Index Introduction... 2 Change language of the User Interface... 3 Menubar... 4 Sold Software... 5 Explanations of the choices:... 5 Call of a licence:... 7 Last query step... 9 Call multiple licenses:...
8 Intensotab - Android 4.0 ICE CREAM SANDWICH Update
 8 Intensotab - Android 4.0 ICE CREAM SANDWICH Update Deutsche Anleitung zur Durchführung des Firmware Updates: Seite 2-10 English instruction guide for installing the firmware update: Page 11-17 1 Anleitung
Installation Guide/ Installationsanleitung. Spring 16 Release
 Guide/ Installationsanleitung Spring 16 Release Visit AppExchange (appexchange.salesforce.com) and go to the CONNECT for XING listing. Login with your Salesforce.com user is required. Click on Get It Now.
iaxe393 USB-GUITAR Software Installationsleitfaden Version 1.0 September 2006
 Software Installationsleitfaden Version 1.0 September 2006 Softwarepaket Native Instruments Guitar Combos BEHRINGER Edition (PC/Mac) Kristal Audio Engine (PC) Audacity (PC/Mac) BEHRINGER USB AUDIO Treiber
Quick Installation Guide for 4 and 7-Port Broadband Router
 Quick Installation Guide for 4 and 7-Port Broadband Router A. Hardware Installation 1. Setup LAN connection: connect an Ethernet cable from your computer s Ethernet port to one of the LAN ports of this