Quick Reference Kurzanleitung Guía rápida
|
|
|
- Til Brandt
- vor 7 Jahren
- Abrufe
Transkript

1 Quick Reference Kurzanleitung Guía rápida b b9292ff0b1 / DP1.0 1 / 12 Eurolyser Diagnostica GmbH
2 Deutsch Ein und Ausschalten des Eurolyser smart Laborfotometers Das smart Laborfotometer wird eingeschaltet, indem die Spannungsversorgung (Steckernetzteil) an das Gerät sowie an die Steckdose angeschlossen wird. Spannungsversorgung Das smart Laborfotometer ist mit einer automatischen Stand-By- Funktion ausgestattet. Es ist nicht notwendig am Arbeitsende das Gerät von der Spannungsversorgung zu trennen. LED Wenn das System im Hauptmenü für 10 Minuten nicht verwendet wird also keine Eingabe stattfindet -, so wechselt das smart Laborfotometer automatisch in den Stand-By-Modus. Dabei erlischt die Beleuchtung des Displays. Die LED an der Frontseite des smart Laborfotometers bleibt an und leuchtet grün. Um vom Stand-By-Modus in den Aktivmodus zu wechseln, brauchen Sie nur das Display zu berühren. Das Display nur mit den Fingern bedienen, keinesfalls einen spitzen Gegenstand dazu verwenden. Das Display nicht mit flüssigen Mitteln reinigen, verwenden Sie zur Reinigung nur fuselfreie, angefeuchtete Tücher Versuchen sie nicht die Klappe per Hand zu öffnen bzw. zu schließen b b9292ff0b1 / DP1.0 2 / 12 Eurolyser Diagnostica GmbH
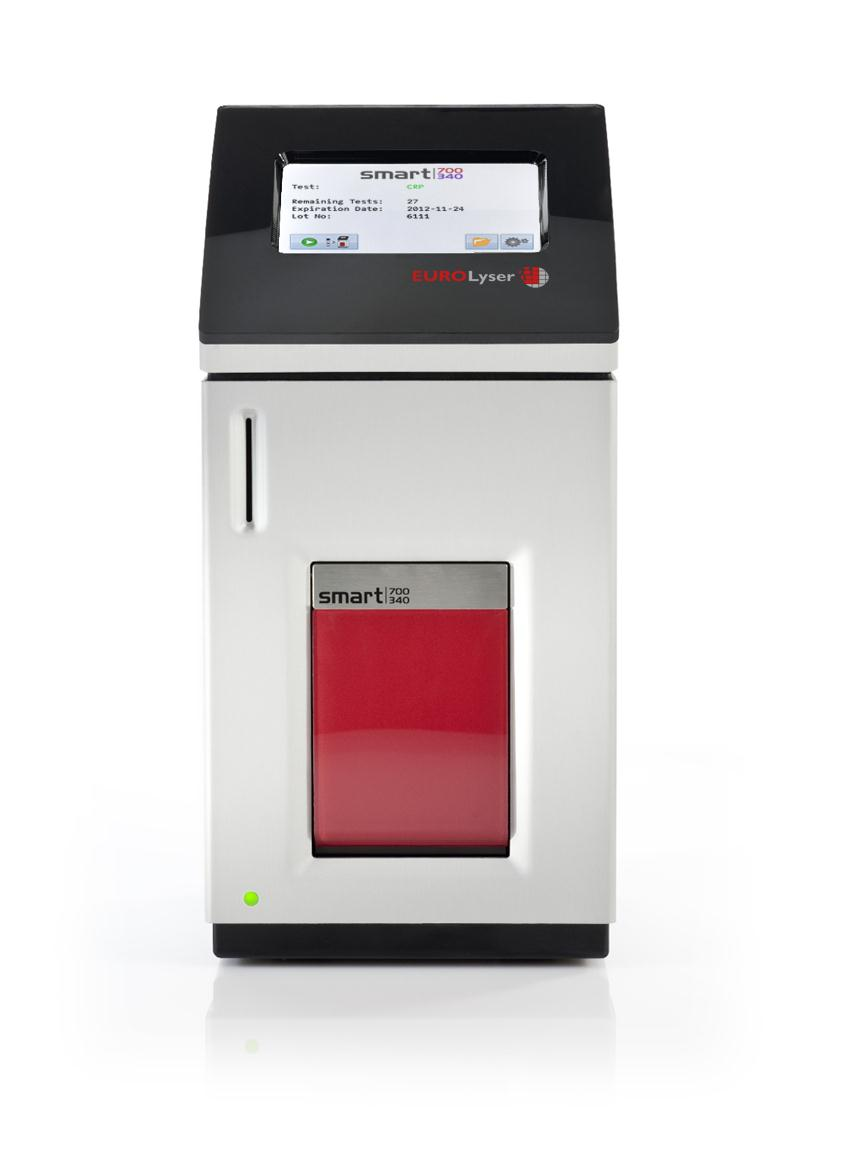
3 Analyse einer Patientenprobe 1. Start-Up-Menü 2. Hauptmenü 3. Eingabe Menü Entnehmen Sie die in der Testpackung mitgelieferte RFID- Karte und führen Sie diese in das smart Laborfotometer ein. Das smart Laborfotometer liest die Karte automatisch ein, zeigt die Testart, die Anzahl der Tests und das Ablaufdatum an. Tippen Sie auf - Die Klappe öffnet sich automatisch, es erscheint das Eingabemenü. Tippen Sie auf - es erscheint das ABC-Menü. Zum Navigieren im Eingabe Menü verwenden Sie bzw.. Zum Verlassen eines Menüs oder zum Abbruch einer Eingabe können Sie verwenden. 4. ABC-Menü 5. Ziffern-Menü 6. Geschlecht / Kontrolle Menü Geben Sie den Namen ein und bestätigen Sie diesen mit. Zum Löschen einer Fehleingabe verwenden Sie. Geben Sie die Patienten ID ein und bestätigen Sie diese mit. Zum Löschen einer Fehleingabe verwenden Sie. Tippen Sie auf Mann, Frau, Kind oder Kontrolle und bestätigen Sie dies mit b b9292ff0b1 / DP1.0 3 / 12 Eurolyser Diagnostica GmbH

4 7. Probenart Menü (nicht für alle Tests) 8. Hematokrit Menü (nicht für alle Tests bzw. Probenarten) 9. Analyse Start Menü Tippen Sie auf Serum oder Blut und bestätigen Sie dies mit. Geben Sie den Hematokrit-Wert ein und bestätigen Sie diesen mit. Führen Sie die Testcartridge ganz in das smart Laborfotometer ein. Tippen Sie auf, die Klappe wird geschlossen und der Test automatisch abgearbeitet. Achten Sie auf die korrekte Handhabung der Testcartridge gemäß der in der Testpackung beiliegenden Anleitung und achten Sie darauf, dass die Cartridge ordnungsgemäß verschlossen ist, bevor Sie in das smart Laborfotometer gegeben wird. Führen Sie die Testcartridge bis zum Anschlag in die dafür vorgesehene Öffnung ein Verwenden Sie ausschließlich vom Hersteller zugelassene Testcartridges, andernfalls kann es zu schweren Schäden des smart Laborfotometers oder zu falschen Messergebnissen kommen. Versuchen Sie nicht die Klappe per Hand zu öffnen oder zu schließen b b9292ff0b1 / DP1.0 4 / 12 Eurolyser Diagnostica GmbH
5 Anzeigen oder Verarbeiten der Analyseresultate Bis zu 250 Patienten- und Kontrollresultate werden im Speicher des Eurolyser smart Laborfotometers abgelegt. Wenn die Kapazität erschöpft ist, wird das jeweils älteste Ergebnis gelöscht. Folgende Parameter werden von jedem Test gespeichert: 1. Einzelresultat Menü 2. Cartridge entfernen Menü 3. Gesamtresultat Menü Sie können das Ergebnis ablesen. Tippen Sie auf um das Ergebnis zu drucken, um es elektronisch zu übertragen oder um die Fotometerdaten anzuzeigen. Tippen Sie auf, wenn Sie das Menü schließen und den Test beenden wollen. Das smart Laborfotometer öffnet automatisch die Klappe. Entfernen Sie die Testcartridge und entsorgen Sie diese. Tippen Sie auf um die Klappe zu schließen. Das Hauptmenü erscheint. Tippen Sie auf um das Gesamtresultat Menü zu öffnen. Mit bzw. blättern Sie in den Testresultaten vor bzw. zurück. Tippen Sie auf um das angezeigte / alle Ergebnis/se zu drucken, um diese/s elektronisch zu versenden oder um diese/s zu löschen. Mit kommen Sie zurück zum Hauptmenü b b9292ff0b1 / DP1.0 5 / 12 Eurolyser Diagnostica GmbH
6 English Switching the Eurolyser smart laboratory photometer on and off Start up the smart laboratory photometer by connecting the power supply (AC adaptor plug) to the device and plugging the power cable into the wall socket. Power supply It is not necessary to disconnect the smart laboratory photometer from the power supply after analyses have finished. LED The device is equipped with an automatic standby function. When it remains idle in the main menu for 10 minutes with no further operating commands, it switches into standby mode and dims the display lights. The green LED light on the front remains illuminated. To switch from standby mode to operational mode, just touch the display. Use only your fingers to touch the display! Never use a hard or pointed object. Do not use liquid cleaners on the display. Use a lint-free, slightly damp cloth only. Do not attempt to open or close the door manually b b9292ff0b1 / DP1.0 6 / 12 Eurolyser Diagnostica GmbH
7 Analyzing a patient s sample 1. Start-Up menu 2. Main menu 3. Entry menu Take the provided RFID card out of the testing kit package and insert it into the smart laboratory photometer. The smart laboratory photometer automatically reads the card, displays the type of test, number of tests, the expiry date and lot number. Touch. The door opens automatically and the input menu appears. Touch. The ABC menu appears. To navigate within the input menu, use and. To leave a menu or to cancel an entry, touch. 4. ABC-Menu 5. Numeral menu 6. Input Gender / Control Menu Enter the name and confirm input with. Use to delete an incorrect input. Enter the patient ID and confirm it with. Use to delete an incorrect input. Touch male, female, child or Control and confirm with b b9292ff0b1 / DP1.0 7 / 12 Eurolyser Diagnostica GmbH
8 7. Sampletype menu (not for all tests) 8. Hematocrit menu (not for all tests and/or sampletypes) 9. Start analysis menu Touch Serum or Blood and confirm the selection with. Enter the hematocrit value and confirm it with. Insert the test cartridge. Touch : The door closes and the smart laboratory photometer runs the test automatically. Be sure to handle the test cartridge according the instructions on the package insert as well as make sure the test cartridge is firmly capped before you insert it into the smart laboratory photometer. Be sure the test cartridge is completely put into the proper opening in the smart laboratory photometer. Use only test cartridges that are approved by the manufacturer. Otherwise severe damage to the smart laboratory photometer and/or incorrect results can occur. Do not attempt to open or close the door manually. Viewing and processing the test results The Eurolyser laboratory photometer can store up to 250 patient and control results in its memory. Once capacity is exceeded, oldest results are deleted. The following parameters are saved from each test: 1. Single result menu 2. Remove cartridge menu 3. Overall result menu The result is shown. Touch to print it out. Touch to export it to an HIS/LIS or PC, or touch to display the photometric data. Touch to close the menu and end the test. The smart laboratory photometer automatically opens the door. Remove the test cartridge and discard it. Touch to close the door. The main menu now appears. Touch to go to the overall result menu. Use and to scroll back and forth within the results. Touch to print the result(s). Touch to transmit the result(s) to a PC. Touch to delete the result(s). Touch to return to the main menu b b9292ff0b1 / DP1.0 8 / 12 Eurolyser Diagnostica GmbH
9 Español Encendido y apagado del analizador El analizador se enciende conectando a la fuente de corriente eléctrica. Salida para corriente eléctrica No es necesario desconectar de la fuente de energía después de haber terminado su trabajo con el analizador. LED El analizador cambia a modo de espera de forma automática después de 10 minutos. La pantalla se apaga durante el modo de espera. La Luz del LED se mantiene encendida. Tocando la pantalla el modo de espera es desactivado y la operación normal del analizador es posible. Toque la pantalla exclusivamente con los dedos. Nunca utilice objetos duros o con punta. No limpie la pantalla con líquidos, Use un paño limpio, suave libre de pelusas. No trate de abrir o cerrar la puerta manualmente b b9292ff0b1 / DP1.0 9 / 12 Eurolyser Diagnostica GmbH

10 Análisis muestra del paciente 1. Menú Inicio 2. Menú Principal 3. Menú de entrada Tome la tarjeta RFID y coloque dentro del analizador. El analizador lee la información de la tarjeta y muestra el tipo de prueba, el número de pruebas restantes y la fecha de caducidad. Pulse : La puerta se abre de forma automática. menú de entrada de datos se muestra. Pulsar. Se muestra el menú ABC. Par navegar dentro del menú de entrada usar y. Para cerrar el menú o cancelar cualquier entrada usar. 4. Menú ABC 5. Menú número 6. Menú Genero (sexo) / Control Ingresar el nombre y confirmar con. Usar para borrar la última letra. Ingresar el ID del paciente y confirmar con. Pulsar para borrar el último dígito. Elegir Masculino, Femenino, Niño o Control y confirmar con b b9292ff0b1 / DP / 12 Eurolyser Diagnostica GmbH
11 7. Menú tipo de muestra (no para todas las pruebas) 8. Menú hematocrito (no para todas las pruebas/tipos de muestra) 9. Menú inicio de análisis Pulse Suero o Sangre y confirmar con. Ingrese el valor del hematocrito y confirmar con. Insertar el cartucho de prueba. Digitar la puerta se abre y el analizador realiza la prueba. Asegúrese de usar el cartucho de prueba conforme a las instrucciones del inserto de la prueba. Compruebe que el cartucho de prueba este completamente cerrado antes de insertarlo en el analizador. Compruebe que el cartucho de prueba se inserte totalmente en el analizador. Solo use cartuchos aprobados por el fabricante, de lo contrario es posible obtener resultados erroneor o daños severos en el analizador. No trate de abrir o cerrar la puerta manualmente. Visualización o procesamiento de los resultados del análisis Hasta 250 resultados de pacientes y de control se guardan en la memoria del fotómetro de laboratorio smart. Cuando la capacidad está agotada se borra el resultado más antiguo. Los siguientes parámetros de cada prueba se guardarán: 1. Menú Resultado individual 2. Menú de extracción cartucho 3. Menú Resultado completo Podrá visualizar el resultado. Pulse sobre para imprimir el resultado, sobre para enviarlo de forma electrónica o sobre para visualizar los datos del fotómetro. Pulse sobre si desea salir del menú y finalizar la prueba. La tapa (puerta) del analizador abre automáticamente. Extraiga el cartucho de pruebas y deséchelo. Pulse sobre para cerrar la tapa (puerta). El menú principal aparece ahora. Toque para ir al menu. Use y para seleccionar el resultado deseado. Pulse sobre para imprimir el resultado(s), sobre para enviarlo de forma electrónica o para borrarlo. Con volverá al menú principal b b9292ff0b1 / DP / 12 Eurolyser Diagnostica GmbH
12 b b9292ff0b1 / DP / 12 Eurolyser Diagnostica GmbH
CUBE. KURZANLEITUNG Version DP
 CUBE KURZANLEITUNG Version DP1.0 01.06.2013 MICRO-MEDICAL Instrumente GmbH D-61462 Königstein / Ts. Telefon: +49 (0) 61 74/29 96-0 Fax: +49 (0) 61 74/2 32 03 info@micromedical.de www.micromedical.de Stand:
Softwareupdate-Anleitung // Porty L 600 / Porty L 1200
 Softwareupdate-Anleitung // Porty L 600 / Porty L 1200 1 Softwareupdate-Anleitung // Porty L 600 / Porty L 1200 HENSEL-VISIT GmbH & Co. KG Robert-Bunsen-Str. 3 D-97076 Würzburg-Lengfeld GERMANY Tel./Phone:
Restschmutzanalyse Residual Dirt Analysis
 Q-App: Restschmutzanalyse Residual Dirt Analysis Differenzwägeapplikation, mit individueller Proben ID Differential weighing application with individual Sample ID Beschreibung Gravimetrische Bestimmung
EMCO Installationsanleitung / Installation instructions
 EMCO Installationsanleitung / Installation instructions Installationsanleitung Installation instructions Digitalanzeige digital display C40, FB450 L, FB600 L, EM 14D/17D/20D Ausgabe / Edition B 2012-03
mobilcom-debitel SmartHome Schnell-Start-Anleitung Quick Start Guide
 mobilcom-debitel SmartHome Schnell-Start-Anleitung Quick Start Guide 1. Cube anschließen 1. Connect Cube n Schließen Sie den Cube an die Stromversorgung an. n Legen Sie die Batterien polungsrichtig in
Technische Information
 deutsch Software-Update ZAdyn4C 1 Software auf der Speicherkarte speichern Die Software muss auf einer Speicherkarte gespeichert werden. Gehen Sie dazu folgendermaßen vor: " Die ZIP-Datei "D3359Axx" lokal
Nachdem Sie die Datei (z.b. t330usbflashupdate.exe) heruntergeladen haben, führen Sie bitte einen Doppelklick mit der linken Maustaste darauf aus:
 heruntergeladen haben, führen Sie bitte einen Doppelklick mit der linken Maustaste darauf aus:") Deutsch 1.0 Vorbereitung für das Firmwareupdate Vergewissern Sie sich, dass Sie den USB-Treiber für Ihr Gerät installiert haben. Diesen können Sie auf unserer Internetseite unter www.testo.de downloaden.
Deutsch 1.0 Vorbereitung für das Firmwareupdate Vergewissern Sie sich, dass Sie den USB-Treiber für Ihr Gerät installiert haben. Diesen können Sie auf unserer Internetseite unter www.testo.de downloaden.
iid software tools QuickStartGuide iid USB base driver installation
 iid software tools QuickStartGuide iid software tools USB base driver installation microsensys Nov 2016 Introduction / Einleitung This document describes in short form installation of the microsensys USB
Word-CRM-Upload-Button. User manual
 Word-CRM-Upload-Button User manual Word-CRM-Upload for MS CRM 2011 Content 1. Preface... 3 2. Installation... 4 2.1. Requirements... 4 2.1.1. Clients... 4 2.2. Installation guidelines... 5 2.2.1. Client...
PhotoFrame SPF1017 SPF1027. Kurzanleitung. 1 Erste Schritte 2 3. Wiedergabe. Einstellung
 PhotoFrame SPF1017 SPF1027 Kurzanleitung 1 Erste Schritte 2 3 Wiedergabe Einstellung DE Eng Lieferumfang Philips Digital PhotoFrame Standfuß AC-DC-Netzadapter PhotoFrame Quick start guide 1 Get started
Contact 1600 QUICK REFERENCE GUIDE GUIDE D UTILISATION BEDIENUNGSANLEITUNG GUÍA DE REFERENCIA RÁPIDA GUIDA RAPIDA. www.sonybiz.net CHANGING THE WAY
 Contact 1600 CHANGING THE WAY QUICK REFERENCE GUIDE GUIDE D UTILISATION BEDIENUNGSANLEITUNG BUSINESS GUÍA DE REFERENCIA RÁPIDA GUIDA RAPIDA COMMUNICATES www.sonybiz.net GB Getting started STEP 1 Turning
Produktinformation _185PNdeen
 Produktinformation 201407_185PNdeen Solldaten-UPGRADE Juli 2014 WA 900 / 920 / 020 / 950 / 970 CURA S 800 / 860 / 060 / 900 / 960 WAB01 / WAB 02 CCT CURA R1200 / CURA R2000/ API R2000 BOSCH FWA 51x Auf
Quick Guide Home Network Mode
 Quick Guide Home Network Mode English > 1 German > 3 About the Home Network Mode EN Tivizen Nano & iplug normally work on their own created networks (whose SSID starts with tivizentv or iplug ) in which
Die Dokumentation kann auf einem angeschlossenen Sartorius Messwertdrucker erfolgen.
 Q-App: USP V2 Bestimmung des Arbeitsbereiches von Waagen gem. USP Kapitel 41. Determination of the operating range of balances acc. USP Chapter 41. Beschreibung Diese Q-App ist zur Bestimmung des Arbeitsbereiches
CABLE TESTER. Manual DN-14003
 CABLE TESTER Manual DN-14003 Note: Please read and learn safety instructions before use or maintain the equipment This cable tester can t test any electrified product. 9V reduplicated battery is used in
PeakTech Zeitprogramm erstellen über Excel - Beispiel / Timed programs with Excel Example
 PeakTech 6180 Zeitprogramm erstellen über Excel - Beispiel / Timed programs with Excel Example 1. Excel Datei erstellen / Create Excel file Öffnen Sie Excel und erstellen eine xls-datei unter einem beliebigen
Programmieranleitung CADAS 100 LPG 158
 Kupfer Programmieranleitung CADAS 100 LPG 158 Küvetten-Test LCK 529 Seite 1 Ausgabe 98/04 Achtung! Das Ausgabedatum dieser Programmieranleitung muß mit dem Ausgabedatum der Arbeitsvorschrift der Reagenzien
Please do not use in live circuits. When the POWER LED does not light, you must change the battery for testing.
 L A N / U S B C A B L E T E S T E R I n s t a l l a t i o n 1 2 9 9 6 4 1. I n t r o d u c t i o n The LAN/USB Cable Tester is designed to easily read the correct cable pin out configuration. The cables
Parameter-Updatesoftware PF-12 Plus
 Parameter-Updatesoftware PF-12 Plus Mai / May 2015 Inhalt 1. Durchführung des Parameter-Updates... 2 2. Kontakt... 6 Content 1. Performance of the parameter-update... 4 2. Contact... 6 1. Durchführung
Q-App: Backweigher light V3.0
 Q-App: Backweigher light V3.0 Differenzwägeapplikation, mit individueller Proben ID Differential weighing application with individual Sample ID Beschreibung Einfache Differenzwäge-Applikation mit individueller
DESS - 3SHAPE INTERFACE LIBRARY 1
 ENGLISH DEUTSCH FRANÇAIS ESPAÑOL DESS - 3SHAPE Interface library Download and installation instructions of dess interfaces (titan bases, gap cemented 0.09mm diameter) 3shape libraries. Download der Bibliotheken
Monitor VIS 3xx Kurzanleitung
 Monitor VIS 3xx Kurzanleitung 19.08.08 Art. Nr. 22261 Inhalt: 1. Spezifikationen...2 2. Tastenfunktionen...2 3. Menüführung und Einstellungen...3 Technik nach Maß Wöhler Monitor VIS 3xx 1. Spezifikationen
JTAGMaps Quick Installation Guide
 Index Index... 1 ENGLISH... 2 Introduction... 2 Requirements... 2 1. Installation... 3 2. Open JTAG Maps... 4 3. Request a free JTAG Maps license... 4 4. Pointing to the license file... 5 5. JTAG Maps
Rat Control HZ-DEV99RC 001 2016-04. Rat control sera suitable for internal control quality of the following HOELZEL ELISAs:
 Rat Control Rat control sera suitable for internal control quality of the following HOELZEL ELISAs: Testosterone rat/mouse Corticosterone rat/mouse Prolactin rat TSH rat (HZ-DEV9911) (HZ-DEV9922) (HZ-DEV9966)
Hinweisblatt indication sheet
 Seite page 1 von of 7 Hinweisblatt indication sheet Typ: / type: Leuchtstoffleuchten (z.b.: 50010400, 53500100) Kurzbezeichnung: Lampenwechsel bei Leuchtstoffleuchten short term: exchange of fluorescent
Table of Cont 6. 2 General Information... 4 Purpose...4 Documentation...4 Scope of Supply...5 Technical Data Safety Regulations...
 2 General Information........................ 4 Purpose........................................4 Documentation................................4 Scope of Supply................................5 Technical
VPN-Client Apple macos El Capitan (10.11)
") VPN-Client Apple macos El Capitan (10.11) Konfiguration und Installation des internen VPN-Clients und Cisco AnyConnect VPN-Clients Configuring and installing the internal VPN client and Cisco AnyConnect
VPN-Client Apple macos El Capitan (10.11) Konfiguration und Installation des internen VPN-Clients und Cisco AnyConnect VPN-Clients Configuring and installing the internal VPN client and Cisco AnyConnect
PhotoFrame SPF1017. Kurzanleitung. 1 Erste Schritte 2 3. Wiedergabe. Einstellung
 PhotoFrame SPF1017 Kurzanleitung 1 Erste Schritte 2 3 Wiedergabe Einstellung DE Eng Lieferumfang Philips Digital PhotoFrame Standfuß AC-DC-Netzadapter PhotoFrame Quick start guide 1 Get started 2 Play
Installation Instructions
 EN DE Installation Instructions WLAN Installation Kit, 300 Mbps, 5 GHz, 16 dbi AK-4 Wireless Kit Scope of delivery Junction box AK-4 (1x) 1 Connection board AK-4 CB with 12VDC power supply unit (1x) 2
Lithium Fotoakku Ladeset Lithium Photo rechargeable battery Set
 Lithium Fotoakku Ladeset Lithium Photo rechargeable battery Set Technische Daten technical features:: Eingangsspannung: 100-240V AC Input Voltage: 100-240V AC Ausgangsspannung: 3,85V / 7,3V DC Output Voltage:
Installationsanweisung Installation Instructions Notice d installation. Instrucciones de montaje Istruzioni per l installazione. Programm Update.
 Installationsanweisung Installation Instructions Notice d installation Instrucciones de montaje Istruzioni per l installazione Programm Update für FWA510 / FWA515 Program update for FWA510 / FWA515 1 2
Mock Exam Behavioral Finance
 Mock Exam Behavioral Finance For the following 4 questions you have 60 minutes. You may receive up to 60 points, i.e. on average you should spend about 1 minute per point. Please note: You may use a pocket
NVR Mobile Viewer for iphone/ipad/ipod Touch
 NVR Mobile Viewer for iphone/ipad/ipod Touch Quick Installation Guide DN-16111 DN-16112 DN16113 2 DN-16111, DN-16112, DN-16113 for Mobile ios Quick Guide Table of Contents Download and Install the App...
Softwareupdate-Anleitung // AC Porty L Netzteileinschub
 1 Softwareupdate-Anleitung // AC Porty L Netzteileinschub Softwareupdate-Anleitung // AC Porty L Netzteileinschub HENSEL-VISIT GmbH & Co. KG Robert-Bunsen-Str. 3 D-97076 Würzburg-Lengfeld GERMANY Tel./Phone:
MultiPortSwitch. VGA Umschalter. Version 1.0 As of April 19 th 2004 Subject to change!
 MultiPortSwitch VGA Umschalter Version 1.0 As of April 19 th 2004 Subject to change! Document version: Version Date Name Comment 1.00 29.03.2004 J. Klein Compiled Distributed by: idata industrielle Datensysteme
EMCO Installationsanleitung Installation instructions
 EMCO Installationsanleitung Installation instructions Installationsanleitung Installation instructions Digitalanzeige digital display C40, FB450 L, FB600 L, EM 14D/17D/20D Ausgabe Edition A 2009-12 Deutsch...2
UCON/s UCON/s Kurzanleitung Inbetriebnahme
 UCON/s UCON/s Kurzanleitung Inbetriebnahme copyright G&D 24/08/2005 Irrum und techn. Änderungen vorbehalten 1. Was Sie zur Installation benötigen - UCON/s - 1:1 belegtes CAT-x Patchkabel - CATPRO2(bei
Bedienungsanleitung User Manual. PCMCIA Reader B1
 Bedienungsanleitung User Manual PCMCIA Reader B1 Einführung Introduction Vielen Dank, dass Sie sich für ein KOBIL Smart Card Terminal entschieden haben. Mit dem KOBIL PCMCIA Reader B1 haben Sie ein leistungsfähiges
RS232-Verbindung, RXU10 Herstellen einer RS232-Verbindung zwischen PC und Messgerät oder Modem und Messgerät
 Betriebsanleitung RS232-Verbindung, RXU10 Herstellen einer RS232-Verbindung zwischen PC und Messgerät oder Modem und Messgerät ä 2 Operating Instructions RS232 Connection, RXU10 Setting up an RS232 connection
4CH AHD Digital Video Recorder kit
 4CH AHD Digital Video Recorder kit with 4x 720P outdoor fixed Lens cameras Quick Installation Guide DN-16120 Connect directly to your DVR Connecting your cameras to your DVR: 1. Find the 60ft. BNC cable,
A VGA monitor of the highest resolution that you will be using on any computer in the installation A PS/2 Keyboard A PS/2 Mouse
 PS/2 KVM SWITCH 2-PORT Vision 331217 Requirements Console A VGA monitor of the highest resolution that you will be using on any computer in the installation A PS/2 Keyboard A PS/2 Mouse Computers The following
Qualitätsmanagement-Handbuch Serviceinformation: _Serviceinformation H0201_1_Batterietrennschalter.doc Formblatt. ÜS;Linearlifte AL1
 Serviceinformation Thema Batterietrennschalter 200185065 kann brechen Seite:1/7 Produktgruppe ÜS;Linearlifte AL1 Artikelnummer Produktgruppencode H0201 Servicecode 200185065 H0201 K0012 A0001 Verfasser
Westfalia Bedienungsanleitung. Nr
 Westfalia Bedienungsanleitung Nr. 108610 Bedienungsanleitung Edelstahl Sicherheits-Brennbehälter Artikel Nr. 10 99 83 Sicherheitshinweise Der Sicherheits-Brennbehälter ist zur Verwendung in dem Westfalia
Electrical testing of Bosch common rail piezo injectors
 Applies to generation CRI 3: Bosch 10-position order number 0 445 115 = CRI 3-16 (CRI 3.0) 1600 bar 0 445 116 = CRI 3-18 (CRI 3.2) 1800 bar 0 445 117 = CRI 3-20 (CRI 3.3) 2000 bar Tools required: Hybrid
Printed Circuit Board Replacement for Sievers Model PPT TOC Analyzer
 Printed Circuit Board Replacement for Sievers Model PPT TOC Analyzer 1. Purpose 2. Scope Replace printed circuit boards (PCB s) in the Sievers Model PPT TOC analyzer. This procedure describes how to replace
AKTIVE DVB-T ZIMMERANTENNE ANSCHLUSSHINWEISE ACTIVE DVB-T INDOOR ANTENNA CONNECTION INSTRUCTIONS
 K la vi er l ac ko p tik AKTIVE DVB-T ZIMMERANTENNE ANSCHLUSSHINWEISE ACTIVE DVB-T INDOOR ANTENNA CONNECTION INSTRUCTIONS ZA 8970 DRUCKS0682.indd 1 05.09.12 15:15 VerpAckunGsinhAlT UKW / UHF / VHF Flachantenne
Anleitung zur Verwendung des Update-Tools für
 English version see below (page 10) Anleitung zur Verwendung des Update-Tools für - KW DDC Steuergeräte - KW DDC WLAN Module - KW DLC Steuergeräte - KW DLC WLAN Module Bitte beachten Sie: jedes Steuergerät
Umstellung eines Outlook Kontos von ActiveSync zu IMAP. Changing an Outlook account from ActiveSync to IMAP
 Outlook 2013/2016 Umstellung eines Outlook Kontos von ActiveSync zu IMAP Changing an Outlook account from ActiveSync to IMAP 18.04.2018 kim.uni-hohenheim.de kim@uni-hohenheim.de Diese Anleitung beschreibt
Cameraserver mini. commissioning. Ihre Vision ist unsere Aufgabe
 Cameraserver mini commissioning Page 1 Cameraserver - commissioning Contents 1. Plug IN... 3 2. Turn ON... 3 3. Network configuration... 4 4. Client-Installation... 6 4.1 Desktop Client... 6 4.2 Silverlight
VGM. VGM information. HAMBURG SÜD VGM WEB PORTAL USER GUIDE June 2016
 Overview The Hamburg Süd VGM Web portal is an application that enables you to submit VGM information directly to Hamburg Süd via our e-portal Web page. You can choose to enter VGM information directly,
KARATE. +Anleitung. how-to. Touch b 6 100W AC / DC
 how-to +Anleitung KARATE 100W AC / DC Touch b 6 Ladegerät allgemeine Bedienoberfläche Charger Interface Description Bedienoberfläche während des Ladens Charging Interface Ladeparameterspeicher Charging
"Programming Tool PGT-05-S for DRS61 Version 1.0 USB interface" "Programming-Tool PGT-05-S für DRS61 Version 1.0 USB Schnittstelle" I.
 "Programming-Tool PGT-05-S für DRS61 Version 1.0 USB Schnittstelle" "Programming Tool PGT-05-S for DRS61 Version 1.0 USB interface" Achtung! Während des Programmiervorganges darf der Encoder nicht an die
Beschreibung. Process Description: Sartorius Bestellnummer / Order No.:
 Q-App: USP Advanced Bestimmung des Arbeitsbereiches von Waagen gem. USP Kapitel 41 mit Auswertung über HTML (Q-Web) Determination of the operating range of balances acc. USP Chapter 41 with evaluation
p^db=`oj===pìééçêíáåñçêã~íáçå=
 p^db=`oj===pìééçêíáåñçêã~íáçå= Error: "Could not connect to the SQL Server Instance" or "Failed to open a connection to the database." When you attempt to launch ACT! by Sage or ACT by Sage Premium for
PoE Kit Mounting Instructions SG/XG 210/230/310/330/430/450
 PoE Kit Mounting Instructions PoE Kit Mounting Instructions Please note ÌÌ Before installing/removing any LAN module please make sure that the appliance is powered off and power cables are removed. ÌÌ
Uhrenbeweger
 Uhrenbeweger 10006661 Sehr geehrter Kunde, zunächst möchten wir Ihnen zum Erwerb Ihres Gerätes gratulieren. Bitte lesen Sie die folgenden Anschluss- und Anwendungshinweise sorgfältig durch und befolgen
Bedienungsanleitung. User Manual
 Bedienungsanleitung Seite: -3 User Manual LightmaXX 5ive STAR LED LIG0009669-000 Page: 4-5 Lieber Kunde, vielen Dank das Sie sich für ein Produkt von LightmaXX entschieden haben. In der folgenden Anleitung
VGM. VGM information. HAMBURG SÜD VGM WEB PORTAL - USER GUIDE June 2016
 Overview The Hamburg Süd VGM-Portal is an application which enables to submit VGM information directly to Hamburg Süd via our e-portal web page. You can choose to insert VGM information directly, or download
Astrosystems - GBA HR1 Details the suggested periodical maintenance for GBA HR1 Bill Acceptor
 ATTENTION: No calibrationpaper added in future. Calibration will be done after programming a new dataset, cleaning and a defined warming up time only by TAB Austria. ACHTUNG: Es wird ab sofort kein Kalibrierungspapier
RECHNUNGSWESEN. KOSTENBEWUßTE UND ERGEBNISORIENTIERTE BETRIEBSFüHRUNG. BY MARTIN GERMROTH
 RECHNUNGSWESEN. KOSTENBEWUßTE UND ERGEBNISORIENTIERTE BETRIEBSFüHRUNG. BY MARTIN GERMROTH DOWNLOAD EBOOK : RECHNUNGSWESEN. KOSTENBEWUßTE UND Click link bellow and free register to download ebook: RECHNUNGSWESEN.
Cable Tester NS-468. Safety instructions
 Cable Tester NS-468 Safety instructions Do not use the cable tester NS-468 if it is damaged. This device is only for use inside dry and clean rooms. This device must be protected from moisture, splash
Programmieranleitung CADAS 100 LPG 158
 Wasserhärte Programmieranleitung CADAS 100 LPG 158 Küvetten-Test LCK 327 Seite 1 Ausgabe 97/06 Achtung! Das Ausgabedatum dieser Programmieranleitung muß mit dem Ausgabedatum der Arbeitsvorschrift der Reagenzien
Installing a thermal imager into the Powerhouse horizontally
 Powerhouse Thermal Imager Installation Manual Please follow these instructions to prepare your Powerhouse unit for a thermal imager installation. 3 Correct Press down on the Bullard button. The arms will
Service Manual Service Anleitung U 58/7 KIT
 Service Manual Service Anleitung U 58/7 KIT Service manual for changing the main filter on a supply unit Serviceanleitung zum Austausch des Hauptfilters an der Versorgungseinheit Exemplary, only the type
Gamperl & Hatlapa GmbH Modem/WiFi settings
 1. Log in - Anmelden Pic001 device front / Gerätevorderseite Pic002 Login screen / Anmeldebildschirm Connect your computer to one of the Ethernetports on the front (Pic001) of the modem. Start your browser
Der Adapter Z250I / Z270I lässt sich auf folgenden Betriebssystemen installieren:
 Installationshinweise Z250I / Z270I Adapter IR USB Installation hints Z250I / Z270I Adapter IR USB 06/07 (Laden Sie den Treiber vom WEB, entpacken Sie ihn in ein leeres Verzeichnis und geben Sie dieses
EL-21SY. 2 in, 1 out v1.3 HDMI Switcher OPERATION MANUAL
 EL-21SY 2 in, 1 out v1.3 HDMI Switcher OPERATION MANUAL Table of Contents 1. Introduction 1 2. Features 1 3. Package Contents 1 4. Operation Controls and Functions 2 4.1 Front Panel Diagram 2 4.2 Rear
PAGOS POR EL PORTAL WEB DEL BCP ZAHLUNGEN ÜBER DEN WEBPORTAL DER BCP MANUAL DE USO BEDIENUNGSANLEITUNG BANCO DE CREDITO
 PAGOS POR EL PORTAL WEB DEL BCP ZAHLUNGEN ÜBER DEN WEBPORTAL DER BCP Ingrese a la plataforma web del BCP, usando sus credenciales (número de tarjeta BCP y clave de internet): BANCO DE CREDITO https://www.viabcp.com/wps/portal/viabcpp/personas
INDEX. 3. Package Contents Connection and Operation...4
 3 - P O R T H D M I S w i t c h V i s i o n 3 3 2 7 0 3 INDEX 1. I n t r o d u c t i o n... 2 2. S p e c i f i c a t i o n s... 3 3. Package Contents...3 4. P a n e l D e s c r i p t i o n s.. 4 5. Connection
How-To-Do. Hardware Configuration of the CC03 via SIMATIC Manager from Siemens
 How-To-Do Hardware Configuration of the CC03 via SIMATIC Manager from Siemens Content Hardware Configuration of the CC03 via SIMATIC Manager from Siemens... 1 1 General... 2 1.1 Information... 2 1.2 Reference...
BEDIENUNGSANLEITUNG / INSTRUCTION
 BEDIENUNGSANLEITUNG / INSTRUCTION DE REINIGUNG IST DER ERSTE WICHTIGE SCHRITT BEI DER GESICHTSPFLEGE LIFTMEE BRUSH entfernt den Schmutz effektiv von Ihrer Haut und macht sie weicher. Machen Sie den Test:
FIRMWARE UPDATE TAPMOTION TD
 FIRMWARE UPDATE TAPMOTION TD CMP-SPF TO WHOM IT MAY CONCERN Seite 1 von 9 Inhalt / Overview 1. Firmware überprüfen und Update-file auswählen / Firmware check and selection of update file 2. Update File
v i r t u A L C O M P o r t s
 v i r t u A L C O M P o r t s (HO720 / HO730) Installieren und Einstellen Installation and Settings Deutsch / English Installieren und Einstellen des virtuellen COM Ports (HO720 / HO730) Einleitung Laden
Walter Buchmayr Ges.m.b.H.
 Seite 1/10 Chapter Description Page 1 Advantages 3 2 Performance description 4 3 Settings 5 4 Options 6 5 Technical data 7 6 Pictures 8 http://members.aon.at/buchmayrgmbh e-mail: walter.buchmayr.gmbh@aon.at
Tube Analyzer LogViewer 2.3
 Tube Analyzer LogViewer 2.3 User Manual Stand: 25.9.2015 Seite 1 von 11 Name Company Date Designed by WKS 28.02.2013 1 st Checker 2 nd Checker Version history Version Author Changes Date 1.0 Created 19.06.2015
Installation und Einrichtung unter Windows 7/8/10. Installation and configuration for Windows 7/8/10
 AFS-Client Installation und Einrichtung unter Windows 7/8/10 Installation and configuration for Windows 7/8/10 18.04.2018 kim.uni-hohenheim.de kim@uni-hohenheim.de Bitte sowohl diese Anleitung als auch
Programmieranleitung CADAS 100 LPG 210
 Programmieranleitung CADAS 100 LPG 210 Küvetten-Test LCK 555 Seite 1 BSB 5 BSB [n] Ausgabe 9804 Achtung! Das Ausgabedatum dieser Programmieranleitung muß mit dem Ausgabedatum der Arbeitsvorschrift der
Programmieranleitung CADAS 100 LPG 210
 Phosphat-Phosphor Programmieranleitung CADAS 100 PG 210 Küvetten-Test Seite 1 CK 350 Ausgabe 91/03 Achtung! Das Ausgabedatum dieser Programmieranleitung muß mit dem Ausgabedatum der Arbeitsvorschrift der
SICHERHEITSHINWEISE STROMER LADEGERÄT SAFETY INSTRUCTIONS STROMER CHARGERS
 SICHERHEITSHINWEISE STROMER LADEGERÄT SAFETY INSTRUCTIONS STROMER CHARGERS 1 SICHERHEITSHINWEISE FÜR DAS LADEGERÄT Sie können den Akku Ihres Stromers laden, wenn er in Ihrem S-Pedelec installiert ist.
The process runs automatically and the user is guided through it. Data acquisition and the evaluation are done automatically.
 Q-App: UserCal Advanced Benutzerdefinierte Kalibrierroutine mit Auswertung über HTML (Q-Web) User defined calibration routine with evaluation over HTML (Q-Web) Beschreibung Der Workflow hat 2 Ebenen eine
Electrical testing of Bosch common rail solenoid valve (MV) injectors
 injectors") Applies to MV injector, generation: -CRI 1.0 / 2.0 / 2.1 / 2.2 -CRIN 1 / 2 / 3, with K oder AK plug Bosch 10-position order number Bosch-Bestellnummer CRI: 0 445 110 xxx Bosch-Bestellnummer CRIN: 0 445
Applies to MV injector, generation: -CRI 1.0 / 2.0 / 2.1 / 2.2 -CRIN 1 / 2 / 3, with K oder AK plug Bosch 10-position order number Bosch-Bestellnummer CRI: 0 445 110 xxx Bosch-Bestellnummer CRIN: 0 445
Bedienungsanleitung / User Manual. PAR 56 RGB LED PAR 64 RGB LED (183x10mm LED s) mit 5 DMX Kanälen/ with 5 DMX channles
 mit 5 DMX Kanälen/ with 5 DMX channles") Bedienungsanleitung / User Manual PAR 56 RGB LED PAR 64 RGB LED (183x10mm LED s) mit 5 DMX Kanälen/ with 5 DMX channles Inhalt 1 Sicherheitsbestimmungen... 3 2 Übersicht... 3 3 Funktionen... 4 3.1 Automatischer
Bedienungsanleitung / User Manual PAR 56 RGB LED PAR 64 RGB LED (183x10mm LED s) mit 5 DMX Kanälen/ with 5 DMX channles Inhalt 1 Sicherheitsbestimmungen... 3 2 Übersicht... 3 3 Funktionen... 4 3.1 Automatischer
Java Tools JDK. IDEs. Downloads. Eclipse. IntelliJ. NetBeans. Java SE 8 Java SE 8 Documentation
 Java Tools JDK http://www.oracle.com/technetwork/java/javase/ Downloads IDEs Java SE 8 Java SE 8 Documentation Eclipse http://www.eclipse.org IntelliJ http://www.jetbrains.com/idea/ NetBeans https://netbeans.org/
Einrichtung - Windows
 EPSON TM-T88V Serie How Do I NCCR 9.00 für Microsoft Dynamics NAV 2016* *NC Cash Register 9.00 ist verfügbar für Microsoft Dynamics NAV 5.0 SP1, Microsoft Dynamics NAV 2013, Microsoft Dynamics NAV 2013
Ölmess-Stäbe-Satz für Motor und Automatikgetriebe Mercedes-Benz
 Anwendung Anwendungshinweis V2112 Ölmess-Stäbe-Satz für Motor und Automatikgetriebe Mercedes-Benz Mercedes liefert die unten aufgeführten Motoren-Codes werksseitig ohne Ölmessstäbe aus. Nach jedem Ölwechsel
CONTROLLER RECEIVER REPEATER PAIRING SLIM CLIP
 ANLEITUNGEN // INSTRUCTIONS CONTROLLER RECEIVER REPEATER PAIRING SLIM CLIP BEDIENUNGSANLEITUNG // INSTRUCTION MANUAL MONTAGEANLEITUNG // ASSEMBLY INSTRUCTION MONTAGEANLEITUNG // ASSEMBLY INSTRUCTION KOPPLUNG
Installation Guide WLAN Interface
 Installation Guide 7106 7206 7010 WLAN Interface EN Installation Guide This guide explains how to install the Ethernet LAN card in your label printer. You should conult your dealer or distributor for more
USB -> Seriell Adapterkabel Benutzerhandbuch
 USB -> Seriell Adapterkabel Benutzerhandbuch 1. Produkt Eigenschaften 1 2. System Vorraussetzungen 1 3. Treiber Installation (Alle Windows Systeme) 1 4. Den COM Port ändern 2 5. Einstellen eines RS232
Bedienungsanleitung Manual
 Bedienungsanleitung Manual RX-EP-U UHF Empfänger (3) Multi-Schalter (2) Taste 2 Ohrbügel Das RX-EP-U ist ein PC-programmierbarer UHF-Empfänger mit 99 verfügbaren Speicherkanälen und 38 CTCSS- Kodierungen.
Formatting the TrekStor i.beat run
 DE EN Formatting the TrekStor i.beat run Formatierung des TrekStor i.beat run a Beim Formatieren werden ALLE Daten auf dem MP3-Player gelöscht. In diesem Abschnitt wird Ihnen erläutert, wie Sie Ihren MP3-Player
Ölmess-Stäbe-Satz für Motor und Automatikgetriebe Mercedes-Benz
 Anwendung Anwendungshinweis V2112 Ölmess-Stäbe-Satz für Motor und Automatikgetriebe Mercedes-Benz Mercedes liefert die unten aufgeführten Motoren-Codes werksseitig ohne Ölmessstäbe aus. Nach jedem Ölwechsel
ZWISCHEN TRADITION UND REBELLION - FRAUENBILDER IM AKTUELLEN BOLLYWOODFILM (GERMAN EDITION) BY CHRISTINE STöCKEL
 BY CHRISTINE STöCKEL") Read Online and Download Ebook ZWISCHEN TRADITION UND REBELLION - FRAUENBILDER IM AKTUELLEN BOLLYWOODFILM (GERMAN EDITION) BY CHRISTINE STöCKEL DOWNLOAD EBOOK : ZWISCHEN TRADITION UND REBELLION - FRAUENBILDER
Read Online and Download Ebook ZWISCHEN TRADITION UND REBELLION - FRAUENBILDER IM AKTUELLEN BOLLYWOODFILM (GERMAN EDITION) BY CHRISTINE STöCKEL DOWNLOAD EBOOK : ZWISCHEN TRADITION UND REBELLION - FRAUENBILDER
NOREA Sprachführer Norwegisch: Ein lustbetonter Sprachkurs zum Selbstlernen (German Edition)
") NOREA Sprachführer Norwegisch: Ein lustbetonter Sprachkurs zum Selbstlernen (German Edition) Click here if your download doesn"t start automatically NOREA Sprachführer Norwegisch: Ein lustbetonter Sprachkurs
NOREA Sprachführer Norwegisch: Ein lustbetonter Sprachkurs zum Selbstlernen (German Edition) Click here if your download doesn"t start automatically NOREA Sprachführer Norwegisch: Ein lustbetonter Sprachkurs
roll-up SONJA powerdisplays Aufbauanleitung Assemble instructions
 powerdisplay SONJA Mit Rollfunktion! Die Werbefläche rollt sich vollständig in das Display. So ist Ihre Werbung geschützt und in Sekunden wieder aufgebaut. Farbe: chrom/silber inkl. Tasche With rolling
Outdoor-Tasche. Operating Instructions Bedienungsanleitung GB D
 00 181243 Outdoor Case Outdoor-Tasche Splish Splash Operating Instructions Bedienungsanleitung GB D A B C D OPEN G Operating instruction 1. Important Notes Children are not permitted to play with the device.
Roger EasyPen. Quick setup guide / Schnellstartanleitung Guide d installation rapide / Guía rápida de instalación
 Roger EasyPen Quick setup guide / Schnellstartanleitung Guide d installation rapide / Guía rápida de instalación Device description Produktbeschreibung Description de l appareil Descripción del dispositivo
Where are we now? The administration building M 3. Voransicht
 Let me show you around 9 von 26 Where are we now? The administration building M 3 12 von 26 Let me show you around Presenting your company 2 I M 5 Prepositions of place and movement There are many prepositions
Installationshinweise Z501J / Z501K Adapter IrDa USB Installation hints Z501J / Z501K Adapter IrDa USB
 Installationshinweise Z501J / Z501K Adapter IrDa USB Installation hints Z501J / Z501K Adapter IrDa USB 1/3.04 (Diese Anleitung ist für die CD geschrieben. Wenn Sie den Treiber vom WEB laden, entpacken
USB Treiber updaten unter Windows 7/Vista
 USB Treiber updaten unter Windows 7/Vista Hinweis: Für den Downloader ist momentan keine 64 Bit Version erhältlich. Der Downloader ist nur kompatibel mit 32 Bit Versionen von Windows 7/Vista. Für den Einsatz
Ladeluftkühler / Intercooler Honda Civic Type R Kit-Nr.:
 190001056 - Einbauanleitung / Installation Instruction - Ladeluftkühler / Intercooler Honda Civic Type R Kit-Nr.: 200001086 Wichtige Hinweise! Diese Montageanleitung ist unbedingt vor Beginn der Einbauarbeiten