Introduction (English) Introducción (Espańol) 127 Einführung (Deutsch) Introduzione (Italiano) 169 Présentation (Français)
|
|
|
- Frieder Kerner
- vor 8 Jahren
- Abrufe
Transkript
1
2

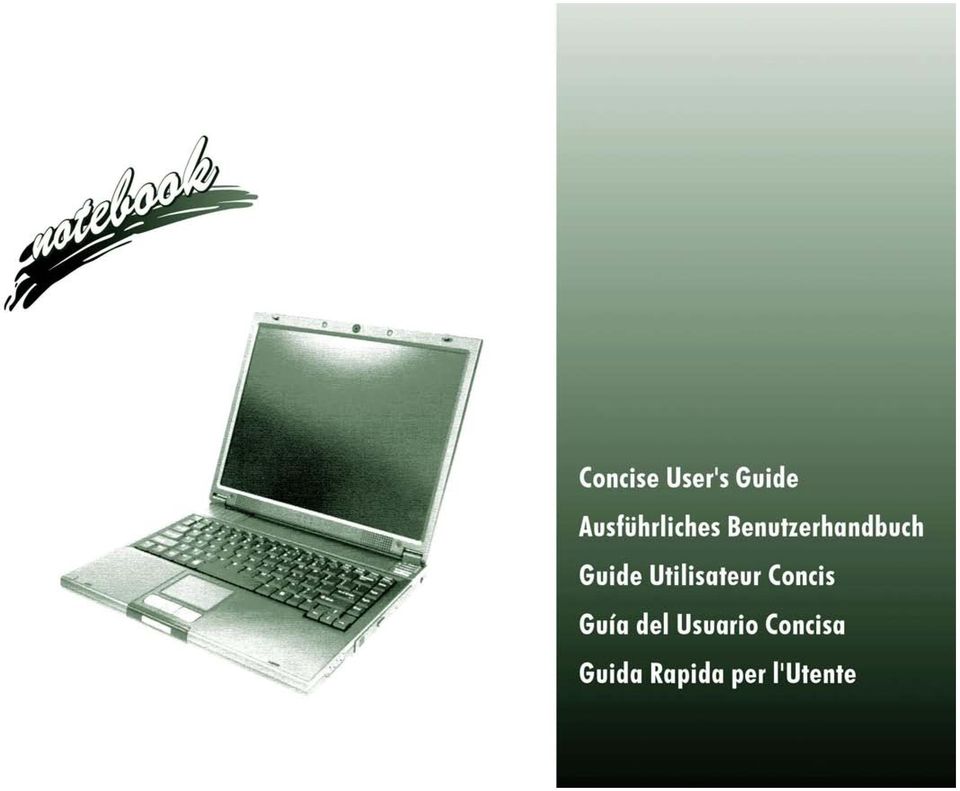
3 Introduction (English) This Concise User s Guide introduces the main features of your computer. The English version of this guide begins on page 1. The expanded User s Manual is on the Device Drivers & Utilities + User s Manual CD-ROM. Einführung (Deutsch) Dieses Ausführliche Benutzerhandbuch führt Sie in die Hauptfunktionen des Notebooks ein. Die deutsche Version des Handbuchs beginnt auf Seite 43. Das erweiterte Benutzerhandbuch finden Sie auf der CD-ROM für die Gerätetreiber und Hilfsprogramme (CD-ROM Device Drivers & Utilities + User's Manual). Présentation (Français) Ce Guide Utilisateur Concis présente les fonctionnalités principales de votre ordinateur. La version française de ce guide commence ŕ la page 85. Le Manuel de l'utilisateur étendu se trouve sur le CD-ROM de Pilotes & Utilitaires + Manuel de l'utilisateur (CD-ROM Device Drivers & Utilities + User's Manual). Introducción (Espańol) Esta Guía del Usuario Concisa le presenta las características principales de su ordenador. La versión espańola de esta guía comienza en la página 127. El Manual del usuario completo se encuentra en el CD-ROM de Controladores del dispositivo y Utilidades + Manual del usuario (CD-ROM Device Drivers & Utilities + User's Manual). Introduzione (Italiano) La presente Guida Rapida per l'utente introduce le caratteristiche principali del computer. La versione italiana di questa guida inizia da pagina 169. Il Manuale utente completo si trova nel CD contenente driver e utilitŕ + Manuale utente (CD-ROM Device Drivers & Utilities + User's Manual). I
.")
4 Contents Notice...1 About this Concise User Guide...2 Instructions for Care and Operation...3 Quick Start Guide...7 Not Included...8 System Software...8 Model Differences...9 System Map: Top View with LCD Panel Open...11 System Map: Front & Rear Views...14 System Map: Left View...15 System Map: Right View...16 System Map: Bottom View...17 Video Features...18 Power Management Features...22 Driver Installation...24 System Configuration Utility...34 Troubleshooting...35 Specifications...37 Inhalt Hinweis...43 Über das Ausführliche Benutzerhandbuch...44 Hinweise zu Pflege und Betrieb...45 Schnellstart...49 Nicht enthalten...50 Systemsoftware...50 Modellunterschiede...51 Systemübersicht: Ansicht von oben mit geöffnetem LCD-Bildschirm...53 Systemübersicht: Ansicht von vorne und Rückansicht...56 Systemübersicht: Ansicht von links...57 Systemübersicht: Ansicht von rechts...58 Systemübersicht: Ansicht von unten...59 Grafikfunktionen...60 Einstellungen des Grafiktreibers...60 Energieverwaltungsfunktionen...64 Installation der Treiber...66 System Configuration Utility (SCU)...77 Fehlerbehebung...78 Technische Daten...80 Sommaire Avertissement...85 A propos de ce Guide Utilisateur Concis...86 Instructions d entretien et d utilisation...87 Guide de démarrage rapide...91 Non inclus...92 Logiciel systčme...92 Différences entre modčles...93 Carte du systčme : Vue du dessus avec l écran LCD ouvert...95 II

5 Carte du systčme : Vues de face & arričre...98 Carte du systčme : Vue gauche...99 Carte du systčme : Vue droite Carte du systčme : Vue d en dessous Caractéristiques vidéo Caractéristiques de gestion de l alimentation Installation du pilote System Configuration Utility Dépannage Spécifications Contenidos Aviso Acerca de esta Guía del Usuario Concisa Instrucciones para el cuidado y funcionamiento Guía rápida para empezar No incluido Software de sistema Diferencias de modelos Mapa del sistema: Vista superior con panel LCD abierto Mapa del sistema: Vistas frontal y posterior Mapa del sistema: Vista izquierda Mapa del sistema: Vista derecha Mapa del sistema: Vista inferior Parámetros de vídeo Funciones de administración de energía Instalación de controladores System Configuration Utility (SCU) Solución de problemas Especificaciones Sommario Avviso Informazioni sulla Guida Rapida per l'utente Istruzioni per la custodia e il funzionamento Guida di avvio rapido Non compreso Software del sistema Differenze dei modelli Descrizione del sistema: Vista superiore con pannello LCD aperto Descrizione del sistema: Vista anteriore e posteriore Descrizione del sistema: Vista sinistra Descrizione del sistema: Vista destra Descrizione del sistema: Vista inferiore Funzioni video Funzioni di risparmio energetico Installazione driver System Configuration Utility (SCU) Risoluzione dei problemi Specifiche tecniche III

6

7 Notice Concise User s Guide The company reserves the right to revise this publication or to change its contents without notice. Information contained herein is for reference only and does not constitute a commitment on the part of the manufacturer or any subsequent vendor. They assume no responsibility or liability for any errors or inaccuracies that may appear in this publication nor are they in anyway responsible for any loss or damage resulting from the use (or misuse) of this publication. This publication and any accompanying software may not, in whole or in part, be reproduced, translated, transmitted or reduced to any machine readable form without prior consent from the vendor, manufacturer or creators of this publication, except for copies kept by the user for backup purposes. Brand and product names mentioned in this publication may or may not be copyrights and/or registered trademarks of their respective companies. They are mentioned for identification purposes only and are not intended as an endorsement of that product or its manufacturer. October 2004 English Trademarks This product incorporates copyright protection technology that is protected by method claims of certain U.S. patents and other intellectual property rights owned by Macrovision Corporation and other rights owners. Use of this copyright protection technology must be authorized by Macrovision Corporation, and is intended for home or other limited viewing uses only unless otherwise authorized by Macrovision Corporation. Reverse engineering or disassembly is prohibited. Intel and Pentium are registered trademarks of Intel Corporation. Notice - 1
 of this publication.")
8 English Concise User s Guide About this Concise User Guide This quick guide is a brief introduction to getting your system started. This is a supplement, and not a substitute for the expanded English language User s Manual in Adobe Acrobat format on the Device Drivers & Utilities + User s Manual CD-ROM supplied with your computer. This CD-ROM also contains the drivers and utilities necessary for the proper operation of the computer. Some or all of the computer s features may already have been setup. If they aren t, or you are planning to re-configure (or re-install) portions of the system, refer to the expanded User s Manual. The Device Drivers & Utilities + User s Manual CD-ROM does not contain an operating system. Regulatory Information Regulatory notices and information are contained in the expanded User s Manual on the Device Drivers & Utilities + User s Manual CD-ROM. 2 - About this Concise User Guide
 portions of the system, refer to the expanded User s Manual.")
9 Instructions for Care and Operation Concise User s Guide The notebook computer is quite rugged, but it can be damaged. To prevent this, follow these suggestions: 1. Don t drop it, or expose it to shock. If the computer falls, the case and the components could be damaged. 2. Keep it dry, and don t overheat it. Keep the computer and power supply away from any kind of heating element. This is an electrical appliance. If water or any other liquid gets into it, the computer could be badly damaged. English 3. Avoid interference. Keep the computer away from high capacity transformers, electric motors, and other strong magnetic fields. These can hinder proper performance and damage your data. 4. Follow the proper working procedures for the computer. Shut the computer down properly and don t forget to save your work. Remember to periodically save your data as data may be lost if the battery is depleted. 5. Take care when using peripheral devices. Wireless Device Operation Aboard Aircraft The use of any portable electronic transmission devices aboard aircraft is usually prohibited. Make sure the modules are OFF if you are using the computer aboard aircraft. Instructions for Care and Operation - 3

10 Concise User s Guide English Power Safety The computer has specific power requirements: Only use a power adapter approved for use with this computer. Your AC adapter may be designed for international travel but it still requires a steady, uninterrupted power supply. If you are unsure of your local power specifications, consult your service representative or local power company. The power adapter may have either a 2-prong or a 3-prong grounded plug. The third prong is an important safety feature; do not defeat its purpose. If you do not have access to a compatible outlet, have a qualified electrician install one. When you want to unplug the power cord, be sure to disconnect it by the plug head, not by its wire. Make sure the socket and any extension cord(s) you use can support the total current load of all the connected devices. Before cleaning the computer, make sure it is disconnected from any external power supplies. Power Safety Warning Before you undertake any upgrade procedures, make sure that you have turned off the power, and disconnected all peripherals and cables (including telephone lines). It is advisable to also remove your battery in order to prevent accidentally turning the machine on. 4 - Instructions for Care and Operation

11 Concise User s Guide Cleaning Do not apply cleaner directly to the computer, use a soft clean cloth. Do not use volatile (petroleum distillates) or abrasive cleaners on any part of the computer. Servicing Do not attempt to service the computer yourself. Doing so may violate your warranty and expose you and the computer to electric shock. Refer all servicing to authorized service personnel. Unplug the computer from the power supply. Refer servicing to qualified service personnel under any of the following conditions: English When the power cord is damaged or frayed. If the computer has been exposed to rain or other liquids. If the computer does not work normally when you follow the operating instructions. If the computer has been dropped or damaged (do not touch the poisonous liquid if the LCD panel breaks). If there is an unusual odor, heat or smoke coming from your computer. Power Off Before Traveling Make sure that your notebook is completely powered off before putting it into a travel bag (or any such container). Putting a notebook which is powered on in a travel bag may cause the vent(s)/fan intake(s) to be blocked. To prevent your computer from overheating make sure nothing blocks the vent(s)/fan intake(s) while the computer is in use. Instructions for Care and Operation - 5

12 Concise User s Guide Battery Precautions English Only use batteries designed for this computer. The wrong battery type may explode, leak or damage the computer. Do not continue to use a battery that has been dropped, or that appears damaged (e.g. bent or twisted) in any way. Even if the computer continues to work with a damaged battery in place, it may cause circuit damage, which may possibly result in fire. Recharge the batteries using the notebook s system. Incorrect recharging may make the battery explode. Do not try to repair a battery pack. Refer any battery pack repair or replacement to your service representative or qualified service personnel. Keep children away from, and promptly dispose of a damaged battery. Always dispose of batteries carefully. Batteries may explode or leak if exposed to fire, or improperly handled or discarded. Keep the battery away from metal appliances. Affix tape to the battery contacts before disposing of the battery. Do not touch the battery contacts with your hands or metal objects. Battery Disposal & Caution The product that you have purchased contains a rechargeable battery. The battery is recyclable. At the end of its useful life, under various state and local laws, it may be illegal to dispose of this battery into the municipal waste stream. Check with your local solid waste officials for details in your area for recycling options or proper disposal. Danger of explosion if battery is incorrectly replaced. Replace only with the same or equivalent type recommended by the manufacturer. Discard used battery according to the manufacturer s instructions. 6 - Instructions for Care and Operation

13 Concise User s Guide Quick Start Guide This guide assumes that you are already familiar with computers and can tell at a glance what and where all the key components are. If you are not that comfortable with this type of device, then please refer to the following pages, which give an overview of the system. 1. Remove all packing materials. 2. Securely attach any peripherals you want to use with the notebook (e.g. keyboard and mouse) to their ports. 3. Attach the AC adapter to the DC-In jack on the right of the computer, then plug the AC power cord into an outlet, and connect the AC power cord to the AC adapter. 4. Raise the lid/lcd to a comfortable viewing angle. 5. Press the power button to turn on. Peripheral Devices Please note that peripherals (printers, digital cameras, etc.) which attach to your computer by either USB or Mini-IEEE 1394 ports may be connected after Windows is up and running. All other peripherals must be connected before you turn on the system. English Quick Start Guide - 7

14 Concise User s Guide English Not Included Operating Systems (e.g. Windows XP) have their own manuals as do applications (e.g. word processing, spreadsheet and database programs). If you have questions about the operating systems or programs then please consult the appropriate manuals. System Software Your computer may already come with system software pre-installed. Where this is not the case, or where you are reconfiguring your computer for a different system, you will find this manual refers to the Microsoft Windows XP operating system. Further information on installing the drivers and utilities is available in Chapters 4 & 7 of the expanded User s Manual on the Device Drivers & Utilities + User s Manual CD-ROM. 8 - Not Included

15 Concise User s Guide Model Differences This notebook series includes two different model types. You can identify your computer model by checking the left side of the computer. Model A has both S-Video-Out jack and Mini-IEEE 1394 port, Model B does not. In addition to the two model types, both models incorporate two different designs as illustrated in Figure 2 on page 11. English Feature Model A Model B S-Video-Out Jack Yes No Mini-IEEE 1394 Port Yes No WLAN Module Intel PRO/Wireless 2100 (802.11b) OR 2200BG (802.11b/g) Mini PCI WLAN Module - Standard Mini PCI WLAN Module (802.11b/g) - Option Table 1 - Model Differences Model Differences - 9
 OR 2200BG (802.")
16 Concise User s Guide English Gloss Style Top Cover Designs Some designs within this notebook series have colored gloss style top covers. Note the following guidelines for care and attention of this type of top cover. Remove the protective cover slowly and carefully. Do not forcibly tear off the protective cover as this may damage the surface of the top cover. Do not use pointed objects on the surface of the top cover, and do not place objects on top of it. Do not expose the top cover to excessive heat or direct sunlight. Only use the soft cloth provided for cleaning the top cover, and do not use abrasive cleaners. Figure 1 - Gloss Style Top Cover 10 - Model Differences

17 System Map: Top View with LCD Panel Open Concise User s Guide The following pages are a general map of the system s features. Detailed descriptions of the functions, setup and system controls are covered in the expanded User s Manual Design I Design II Figure 2 Top View with LCD Panel Open 1. Optional Built-In PC Camera 2. LCD 3. LED Power & Communication Indicators 4. Speakers 5. Lid Sensor 6. LED Status Indicators 7. Power Button 8. Keyboard 9. Built-In Microphone 10. TouchPad and Buttons 11. Hot-Key Buttons English System Map: Top View with LCD Panel Open - 11

18 Concise User s Guide English LED Indicators & Hot-Key Buttons Table 2 - LED Power & Communication Indicators Icon Color Description Orange Green Blinking Green Orange Green Blinking Orange Blinking Green DC power is plugged in The computer is on The computer is in Standby mode The battery is being charged The battery is fully charged The battery has reached critically low power status New mail has arrived Table 3 - LED Status Indicators Icon Color Description Green Green Green Green Green Hot-Key Button Hard disk/cd Device activity The module(s) (WLAN, PC Camera, Bluetooth) is/are On Number Lock is activated Caps Lock is activated Scroll Lock is activated (to activate press Fn & Scr Lk) Table 4 - Hot-Key Buttons Function Activate the default Internet browser Activate the default program Activate the module(s) - (Wireless LAN/Bluetooth/PC Camera modules) 12 - System Map: Top View with LCD Panel Open
 Table 4 - Hot-Key Buttons Function Activate the default Internet browser Activate the default")
19 Concise User s Guide Function Keys & Numeric Keypad On the bottom-left of the keyboard is the Fn key or Function key. The Fn key allows you to change operational features instantly. To use the functions press and hold the Fn key, then press the appropriate function key (F5 - F12 etc.) located on your keyboard. Activate the Number Lock feature by pressing the Num Lock key at the top right of the keyboard. You may check if Number Lock is enabled or not by looking at the LED status indicators. To type a number from the numeric keypad make sure Number Lock is enabled, then hold the Fn key down and press the key on the numeric keypad (for instructions on Padlock mode see page 34). Figure 3 - Function Keys & Numeric Keyboard Function Keys Numeric Keypad Keys Fn Fn + Esc Fn + F5 Fn + F6 Fn + F9 Fn + F10 Fn + F11 Fn + F12 Fn + Scr Lk Fn + Num Lock Table 5 - Function Keys Function Key Description Sleep/Resume Toggle Mute Toggle Display Toggle Decrease LCD Brightness Increase LCD Brightness Decrease Audio Volume Increase Audio Volume Scroll Lock Toggle Toggles Padlock Mode (if set in the SCU - see page 34) if Number Lock is enabled English Num Lock & Scr Lk Keys Fn Key My Computer Key System Map: Top View with LCD Panel Open - 13
.")
20 English Concise User s Guide System Map: Front & Rear Views Figure 4 Front View 1. LCD Latches 2. Hot-Key Buttons 1 2 Wireless Device Operation Aboard Aircraft 1 The use of any portable electronic transmission devices aboard aircraft is usually prohibited. Make sure the modules are OFF if you are using the computer aboard aircraft. When your computer Boots Up the modules will be ON. Use the Module On/Off Button (see LED Indicators & Hot- Key Buttons on page 12) to turn the modules (Wireless LAN/Bluetooth/PC Camera) on and off. Figure 5 Rear View 1. Security Lock Slot 2. Vent 1 2 Overheating To prevent your computer from overheating make sure nothing blocks the vent(s)/fan intake(s) while the computer is in use System Map: Front & Rear Views
 to turn the modules (Wireless LAN/Bluetooth/PC Camera) on and off. Figure 5 Rear View 1.")
21 System Map: Left View Mini-IEEE 1394 The Mini-IEEE 1394 port only supports SELF POWERED IEEE 1394 devices. TV Video Standard If you have a TV connected to the S-Video-Out jack you can switch the TV video standard to either PAL or NTSC from the video controls, if the video driver is installed (see Switching/Enabling Displays (Driver) on page 19). Concise User s Guide Figure 6 Left View 1. Vent 2. External Monitor (VGA) Port 3. S-Video-Out Jack (Model A Computers ONLY) 4. RJ-11 Phone Jack 5. RJ-45 LAN Jack 6. 2 USB 2.0/1.1 Ports 7. Mini-IEEE 1394 Port (Model A Computers ONLY) 8. PC Card Slot 9. PC Card Eject Button Overheating To prevent your computer from overheating make sure nothing blocks the vent(s)/fan intake(s) while the computer is in use. English System Map: Left View - 15
22 Concise User s Guide English System Map: Right View Figure 7 Right View 1. Microphone-In Jack 2. Headphone-Out Jack 3. S/PDIF Out Jack 4. Optical Device Bay 5. Emergency Eject Hole 6. DC-In Jack Changing DVD Regional Codes Go to the Control Panel and double-click System > Hardware (tab), click Device Manager, then click the + next to DVD/CD- ROM drives. Double-click on the DVD-ROM device to bring up the Properties dialogue box, and select the DVD Region (tab) to bring up the control panel to allow you to adjust the regional code CD Emergency Eject If you need to manually eject a CD/DVD (e.g. due to an unexpected power interruption) you may push the end of a straightened paper clip into the emergency eject hole. Do not use a sharpened pencil or similar object that may break and become lodged in the hole. DVD Regional Codes DVD region detection is device dependent, not OS-dependent. You can select your module s region code 5 times. The fifth selection is permanent. This cannot be altered even if you change your operating system or you use the module in another computer. Media Warning Don t try to remove a floppy disk/cd while the system is accessing it. This may cause the system to crash System Map: Right View
23 System Map: Bottom View CPU The CPU is not a user serviceable part. Opening this compartment, or accessing the CPU in any way, may violate your warranty. Drive Warning Don t try to remove the hard disk (HDD) while the system is on. This could cause data loss or damage. Unauthorized removal or tampering with the HDD may violate your warranty. If you are in doubt, consult your service representative Battery Information Concise User s Guide Figure 8 Bottom View 1. Vent/Fan Intake 2. Battery 3. CPU Cover 4. RAM & WLAN Module Cover 5. Optical Device Screw Cover 6. Hard Disk & WLAN Module Cover Always completely discharge, then fully charge, a new battery before using it. Use the computer with battery power until it shuts down due to a low battery. When charging the battery, don t stop until the LED charging indicator light changes from orange to green. Completely discharge and charge the battery at least once every 30 days or after about 20 partial discharges. 1 1 English System Map: Bottom View - 17
24 English Concise User s Guide Video Features Video Driver Controls The Display control panel in the video interface lets you change the screen resolution and color output. You can switch display devices from the Intel(R) 82852/82855 GM/GME Graphics Controller Properties control panel in Windows, as long as the video driver is installed. 1. Click Start (menu), point to Settings and click Control Panel (or just click Start > Control Panel). 2. Double-click Display (icon); Display (icon) is in Appearance and Themes (category). 3. In the Display Properties dialog box, click Settings (tab). 4. In Screen resolution, move the slider to the preferred setting for resolution In Color quality, click the arrow and scroll to the preferred setting for color depth Click Advanced 3 to bring up the options tabs. 7. Click Intel(R) Extreme Graphics 2 for Mobile (tab) > Graphics Properties (button) to get to the Intel(R) 82852/82855 GM/GME Graphics Controller Properties. (Or click on the icon in the taskbar to bring up the menu and scroll to Graphics Options > Graphics Properties and click on it to get to the Intel(R) 82852/82855 GM/GME Graphics Controller Properties.) 1 Figure 9 Intel Graphics Controller/Display Properties Video Features
25 Concise User s Guide Switching/Enabling Displays (Driver) With the video driver installed, you can use its built-in controls to switch between the displays as follows: 1. Plug the VGA monitor or TV (Model A only) into the appropriate port. 2. Go to the Intel(R) 82852/82855 GM/GME Graphics Controller Properties control panel (see Video Driver Controls on page 18) and select Devices (tab). 3. Choose the display option from the list on the left and click Apply (and OK to confirm the settings change). 4. You can choose a device to be Primary or Secondary, and change the settings from Device Settings (button). English Figure 10 Device Settings Examples You can also change the TV Video Standard from the Device Settings in the Intel(R) 82852/82855 GM/GME Graphics Controller Properties. The following pages will introduce the different display options. Video Features - 19
26 Concise User s Guide English Display Options Besides the built-in LCD, you can also use an external VGA monitor or TV (Model A only) as your display device. A VGA monitor connects to the external monitor (VGA) port, a TV to the S-Video-Out jack (Model A only). You have the following Multi-Monitor modes available when the external monitor and/or TV (Model A only) is attached. Intel(R) Dual Display Clone This mode will drive multiple displays with the same content. Use this feature to display the screen through a projector for a presentation. Extended Desktop This mode allows a desktop to span multiple displays and acts as a large workspace. This creates a lot more screen area for display. Use the Display Properties control panel to drag the monitors to match the physical arrangement you wish to use, or you may also use the Extended Desktop Settings control panel tab in the Intel(R) 82852/82855 GM/GME Graphics Controller Properties (Figure 11) to configure the relative size and position. Video Memory Intel Dynamic Video Memory Technology automatically and dynamically allocates as much (up to 64MB) system memory as needed to the video system; and returns it to the system when it is no longer needed. DVMT is not userconfigurable Video Features
27 Concise User s Guide Extended Desktop Mode 1. Plug the VGA monitor and/or TV (Model A only) into the appropriate port. 2. Go to the Intel(R) 82852/82855 GM/GME Graphics Controller Properties control panel (see Video Driver Controls on page 18) and select Devices (tab). 3. Click the Extended Desktop icon (Note: this option is only available when you have attached a monitor and/or TV) in the Devices tab. 4. Choose which device is to be the Primary display, and which is to be Secondary. 5. Adjust the settings by clicking the Device Settings (button) if necessary. 6. Click Apply > OK and close the control panels. English Figure 11 - Extended Desktop Mode Settings Video Features - 21
28 Concise User s Guide English Power Management Features The Power Options control panel in Windows allows you to configure power management features for your computer. You may conserve power through individual components such as the monitor or hard disk, or you may use either Standby or Hibernate mode to conserve power throughout the system (enable Hibernate support from the Control Panel as pictured in Figure 12). Figure 12 Power Options The computer s power button, sleep button (Fn + Esc key combination), and lid sensor may be set to send the computer in to either Standby or Hibernate mode Power Management Features
29 Concise User s Guide Power Schemes You can set your computer to conserve power through individual components by means of Power Schemes. You can also adjust the settings for each scheme to set the monitor to turn off after a specified time, and the computer's hard disk motor to turn off if the hard disk drive has not been accessed for a specified period of time (if the system reads or writes data, the hard disk motor will be turned back on). The schemes may also be set to set a specified time for the system to enter Standby or Hibernate mode. English Windows Power Schemes Choose the Home/Office Desk scheme for maximum performance when the computer is powered from an AC power source. Choose the Max Battery scheme (bear in mind that this scheme may slow down the overall performance of the computer in order to save power) for maximum power saving when the computer is battery (DC power) powered. Windows will use Portable/Laptop as the default scheme. Figure 13 - Power Schemes Each Windows Power Scheme will also adjust the processor performance of your machine in order to save power. This is worth bearing in mind if you are experiencing any reduced performance (especially under DC/battery power). Power Management Features - 23
30 Concise User s Guide English Driver Installation The Device Drivers & Utilities + User s Manual CD- ROM contains the drivers and utilities necessary for the proper operation of the computer. The drivers for all the optional modules (WLAN, Bluetooth & PC Camera) are available on individual CD-ROMs supplied. The driver installation instructions supplied are for Windows XP only. Windows 2000 driver installation information is available in Chapters 4 & 7 of the expanded User s Manual on the same CD-ROM. Install the drivers in the order indicated in Table 6. Installation Methods (Windows XP) You have a choice of installation methods to install your drivers: from CD autorun program manual install Table 6 - Install Procedure Feature Win XP (SP2) Install the appropriate Service Pack for your Service Pack system if not included in your Windows version Chipset page 27 Audio page 27 Video page 27 Network (LAN) page 27 Modem page 28 Hot-Key Buttons page 28 TouchPad page 29 PC Card/PCMCIA (check the module type first) page 29 Check Mail page 30 Wireless LAN - Model A (Intel PRO/Wireless 2100 or 2200BG - depending on your page 30 purchase option) Wireless LAN (optional) - Model B page 32 Bluetooth (optional) page 32 PC Camera (optional) page Driver Installation
31 Concise User s Guide Driver Installation Application Insert the Device Drivers & Utilities + User s Manual CD-ROM and the Driver Installation application will run automatically. Using the Driver Installation Application 1. Check the driver installation order from Table 6 on page 24 (the drivers must be installed in this order) which is the same as that listed in the menu on the left. 2. Double-click to select and run the driver you wish to install. 3. Make a note of the drivers you have installed. 4. If the computer needs to restart after installing a driver, and you will usually need to click the Yes/Finish button when prompted to restart the computer. 5. Make sure you tick the Show Install Menu next time you start Windows when CD is Inserted tickbox to come back to the Driver Installation screen (otherwise click Start (menu) > Run... and navigate (Browse..) to D:\SETUP.EXE and click OK OR Double-click the My Computer icon, and then doubleclick the CD icon). English Figure 14 - Driver Installation Manual Driver Installation Insert the Device Drivers & Utilities + User s Manual CD-ROM and click Exit. Follow the instructions for each individual driver as listed on the following pages. Driver Installation - 25
32 Concise User s Guide English Updating/Reinstalling Individual Drivers If you wish to update/reinstall individual drivers it may be necessary to uninstall the original driver.to do this go to the Control Panel in the Windows OS and doubleclick the Add/Remove Programs item. If you see the individual driver listed (if not see below), uninstall it, following the on screen prompts (it may be necessary to restart the computer). Go to the appropriate section of the manual to complete the update/reinstall procedure for the driver in question. Windows XP Service Pack 2 Make sure you install Windows XP Service Pack 2 (or a Windows XP version which includes Service Pack 2) before installing any drivers. Service Pack 2 includes support for USB 2.0. If you have upgraded the system by installing Service Pack 2 (i.e. your Windows XP version does not include Service Pack 2) then follow these instructions: If the driver is not listed in the Add/Remove Programs item: 1. Click Start (menu), point to Settings and click Control Panel (or just click Start > Control Panel). 2. Double-click System (icon); System (icon) is in Performance and Maintenance (category). 3. Click Hardware (tab) > Device Manager (button). 4. Double-click the device you wish to update/reinstall the driver for (you may need to click + ). 5. Look for the Update Driver button (check the Driver tab) and follow the on screen prompts. 1. Click Start (menu), point to Settings and click Control Panel (or just click Start > Control Panel). 2. Double-click System (icon); System (icon) is in Performance and Maintenance (category). 3. Click Hardware (tab) > Device Manager (button). 4. Click + next to Other devices (if its sub-items are not shown). 5. Right-click Universal Serial Bus (USB) Controller and select Uninstall > OK (if you don t see the item, then there is no need to take any further action). 6. Restart the computer and it will find the USB 2.0 controller Driver Installation
33 Concise User s Guide Chipset (WinXP) 1. Double-click Chipset from the Driver Installation menu. OR Click Start (menu) > Run... and navigate (Browse..) to D:\Drivers\inf_update\infinst_autol.exe and click OK. 2. Click Next > Yes > Next. 3. Click Finish to restart the computer. Video (WinXP) 1. Double-click VGA from the Driver Installation menu. OR Click Start (menu) > Run... and navigate (Browse..) to D:\Drivers\VGA\Setup.exe and click OK. 2. Click Next > Yes. 3. Click Finish to restart the computer. 4. See Video Features on page 18 for details on adjusting the video settings. English Audio (WinXP) 1. Double-click Audio from the Driver Installation menu. OR Click Start (menu) > Run... and navigate (Browse..) to D:\Drivers\Audio\Setup.exe and click OK. 2. Click Next > Finish to restart the computer. 3. You can click the AC97 Audio Configuration icon in the taskbar for configuration options. LAN (WinXP) 1. Double-click Lan from the Driver Installation menu. OR Click Start (menu) > Run... and navigate (Browse..) to D:\Drivers\Lan\Setup.exe and click OK. 2. Click Next. 3. Click Finish. 4. The network settings can now be configured. Driver Installation - 27
34 Concise User s Guide English Modem (WinXP) 1. Double-click Modem from the Driver Installation menu. OR Click Start (menu) > Run... and navigate (Browse..) to D:\Drivers\Modem\WinXP\Setup.exe and click OK. 2. Click (button). 3. Click. 4. The modem is ready for dial-up configuration. Hot-Key Buttons (WinXP) 1. Double-click Quick-Key from the Driver Installation menu. OR Click Start (menu) > Run... and navigate (Browse..) to D:\Drivers\Quick-KEY\CNK001.exe and click OK. 2. Choose the language you prefer, and click OK. 3. Click Next. 4. Click Finish to restart your computer. Modem Country Selection Be sure to check if the modem country selection is appropriate for you (Control Panel > Phone and Modem Options) Driver Installation
35 Concise User s Guide TouchPad (WinXP) 1. Double-click TouchPad from the Driver Installation menu (go to step 3). OR Click Start (menu) > Run... (go to step 2). 2. If your computer is Model A: Navigate (Browse...) to D:\Drivers\Touchpad\Synaptics\Win2K_XP\Setup.e xe and click OK. If your computer is Model B: Navigate (Browse...) to D:\Drivers\Touchpad\KTP3\WinXP\Setup.exe and click OK. 3. Click Next > Next > Next. 4. Click Finish to restart your computer. PC Card/PCMCIA (WinXP) The instructions for installing your PC Card driver will depend on your PCMCIA module type. 1. Click Start (menu), point to Settings and click Control Panel (or just click Start > Control Panel). 2. Double-click System (icon); System (icon) is in Performance and Maintenance (category). 3. Click Hardware (tab) > Device Manager (button). 4. Click + next to PCMCIA adapters (if its sub-items are not shown). 5. If you see Texas Instruments PCI-1410 CardBus Controller DO NOT install the driver as it is not required. OR If you see Generic CardBus Controller then follow these steps: 6. Double-click ENE_PCMCIA from the Driver Installation menu. OR Click Start (menu) > Run... and navigate (Browse...) to D:\Drivers\ENE-PCMCIA\Setup.exe and click OK. 7. Click Next > Next. 8. Click Finish to restart your computer. English Driver Installation - 29
36 Concise User s Guide English Check Mail (WinXP) 1. Double-click LED from the Driver Installation menu. OR Click Start (menu) > Run... and navigate (Browse..) to D:\Drivers\ LED\Setup.exe and click OK. 2. To continue click Next > Install > Finish. 3. Click Finish to restart your computer. 4. The program will run upon startup. Wireless LAN (WinXP) - Model A Intel PRO/Wireless 2100 (802.11b) 1. Insert the Intel PRO CD-ROM into the CD drive. 2. Click Wireless LAN Adapters (button). 3. Click Install Software (button). 4. Click Next. 5. Click the button to accept the license and click Next > Next > Install > Finish. 6. Click Start (menu), point to Settings and click Control Panel (or just click Start > Control Panel). 7. Double-click System (icon); System (icon) is in Performance and Maintenance (category). 8. Click Hardware (tab) > Device Manager (button). 9. Click + next to Other Devices (if its sub-items are not shown). 10.Double-click Network Controller and click Reinstall Driver (button). 11. When the Hardware Update Wizard appears, click Install from a list or specific location (Advanced) then click Next. 12.Select Search for the best driver in these locations. and select ONLY Include this location in the search:. 13.Navigate (Browse...) to D:\ProW2100\PROW7100\WINXP and click OK > Next. 14.Click Finish and close the open windows. You can now install the Administration Tools: 1. Insert the Intel PRO CD-ROM into the CD drive. 2. Click Wireless LAN Adapters (button). 3. Click Install Administration Tools (button). 4. Click Next. 5. Click the button to accept the license and click Next > Next > Install > Finish Driver Installation
37 Concise User s Guide 6. You can configure the settings by going to the Start menu and pointing to Programs/All Programs and clicking Intel Network Adapters, then clicking either the Intel (R) PROset icon, or the options under the Access Point Administration Tools. Intel PRO/Wireless 2200BG (802.11b/g) 1. Make sure the module is powered on, then insert the Intel PRO CD-ROM into the CD drive. 2. Click Install Software (button). 3. Click Next. 4. Click the button to accept the license and click Next > Next > Install > Finish. 5. Click Start (menu), point to Settings and click Control Panel (or just click Start > Control Panel). 6. Double-click System (icon); System (icon) is in Performance and Maintenance (category). 7. Click Hardware (tab) > Device Manager (button). 8. Click + next to Other Devices (if its sub-items are not shown). 9. Double-click Network Controller and click Reinstall Driver (button). 10.When the Hardware Update Wizard appears, click Install from a list or specific location (Advanced) then click Next. 11. Select Search for the best driver in these locations. and select ONLY Include this location in the search:. 12.Navigate (Browse...) to D:\ProW2200\WINXP and click OK > Next. 13.Click Finish. 14.An Intel Configuration Service control panel will appear, and you can choose Yes to have Intel PROset software to manage the wireless adapter. 15.A list of available networks will appear (click Finish to exit the Wizard). 16.You can configure the settings by going to the Intel (R) PROset for Wireless control panel (Start > Programs/ All Programs > Intel Network Adapters). English Driver Installation - 31
38 Concise User s Guide English Wireless LAN (WinXP) - Model B 1. Insert the Wireless LAN CD-ROM into the CD drive. 2. The program will run automatically. 3. Click Install Software (button). 4. Click Next. 5. Click the button to accept the license and click Next > Next > Install > Finish. 6. The network settings can now be configured. 7. Right-click the WLAN icon in the taskbar and scroll to View Available Wireless Networks (or double-click the WlanUtility desktop icon). 8. Select the network and click Connect to connect to the network, or Advanced for further configuration options (your System Administrator may need to help you fill in the information in the Advanced options). 9. The WinXP operating system is the default setting for wireless LAN control. It is recommended that you switch to use the MSI Wireless Network Utility to control your WLAN connection. Check the User s Manual on the CD for instructions on how to do this (click User s Manual (button) > MS6834 PC54G2 or MS6835 CB54G2). Bluetooth (WinXP) 1. Insert the Bluetooth CD-ROM into the CD drive. 2. The program will run automatically. 3. Click Install Drivers and Application Software and click Next. 4. Click the button to accept the license agreement, then click Next. 5. Click Next > Install (click OK/Continue Anyway if asked if you want to continue). 6. Click Finish. 7. The System Properties window should be open (if the window is not open, perform steps 1 & 2 in page 26); click Device Manager (button) from the Hardware (tab). 8. Click + next to Bluetooth Radios (if its sub-items are not shown). 9. Right-click Generic Bluetooth Radio and select Update Driver. 10.When the Hardware Update Wizard appears, select No, not this time and click Next. 11. Select Install from a list or specific location (Advanced), and click Next Driver Installation
39 Concise User s Guide 12.Select Don t search. I will choose the driver to install, and click Next. 13.Click to select Billionton USB Bluetooth Device, and click Next. 14.Click Finish and close the open windows. 15.You can configure the settings in the Bluetooth Configuration control panel (Start menu and point to Settings and click Control Panel then double-click the Bluetooth Configuration icon). PC Camera (WinXP) 1. Insert the PC Camera CD-ROM into the CD drive. 2. Click Next (click Continue Anyway if asked if you want to continue at any time). 3. Click Finish to restart the computer. 4. After restart the computer will find the new hardware for you. 5. Run the AMCAP program from the CMM PC Camera item in the Start > Programs/All Programs menu. English Latest PC Camera Driver Information Check the PC Camera CD-ROM, and any accompanying insert pages, for the latest updated information on the PC Camera driver, which may override the information provided here. Driver Installation - 33
40 English Concise User s Guide System Configuration Utility To enter the SCU, turn on the computer and press Ctrl-Alt-S simultaneously during the startup. You can use the mouse or arrow keys to navigate through the menus. Use the Save and Exit item from the Exit menu to save changes. Insyde Software SCU For Intel chipset Startup Disks Components Power Exit Aug 16, :40:02 am Devices Keyboard Numlock Keyboard Repeat Hard Drive C Keyboard = 20Keyboard Type Repeat Enable Padlock System CPU Clock = 1500MHz Memory Base = 640 KB Extended = KB = 64 KB Shadow Reserved = 320 KB Total RAM = KB = 512 KB Cache (Ext) Enable the numeric key pad lock function by pressing Fn+NumLock and NumLock LED is on. This hotkey has no function for Japanese keyboard. Figure 15 Components Menu (SCU) Enable Padlock (Components Menu) Activate Enable Padlock to type the numbers from the numeric keypad without having to hold down the Fn key. Number Lock must be activated to use this feature. Once Number Lock is activated, press the Fn and Num Lock keys simultaneously to enable the Padlock mode. When Padlock mode is enabled, and you press the yellow typeface numeric keys, you will be able to type numbers directly without holding down the Fn key (holding Fn and pressing a key on the numeric keypad will type a letter). To disable Padlock mode press the Fn and Num Lock keys again System Configuration Utility
41 Troubleshooting Problem The Battery LED power indicator, is blinking orange. Possible Cause - Solution Concise User s Guide Low Battery. Plug in the AC power source. If the computer doesn t start up immediately, turn it off then on again. English The notebook feels too hot. You forget the boot password. The compact disc tray will not open when there is a disc in the tray. The DVD regional codes can no longer be changed. Unwelcome numbers appear when typing. Make sure the notebook is properly ventilated and the vent(s)/fan intake(s) is (are) not blocked. If this doesn t cool it down, put the system into Hibernate mode or turn it off for an hour. Make sure the computer isn t sitting on a thermal surface. Make sure you re using the correct adapter. If you forget the password, you may have to discharge the battery of the CMOS. Contact your service representative for help. The compact disc is not correctly placed in the tray. Gently try to remove the disc using the eject hole. See CD Emergency Eject on page 16. The code has been changed the maximum 5 times. See DVD Regional Codes on page 16. If the LED is lit, then Number Lock is turned ON. Check that Padlock mode is not enabled (see page 34). Troubleshooting - 35
42 Concise User s Guide English Problem The Wireless LAN/Bluetooth/PC Camera modules cannot be detected/configured. Possible Cause - Solution The modules are off. Check the LED indicator to see if the modules are on or off (see LED Indicators & Hot-Key Buttons on page 12). If the LED indicator is off, then press the module On/Off button in order to enable the modules. The driver(s) for the module(s) have not been installed. Make sure you have installed the driver for the appropriate module (see Wireless LAN (WinXP) - Model A on page 30/ Wireless LAN (WinXP) - Model B on page 32/ Bluetooth (WinXP) on page 32/ PC Camera (WinXP) on page 33) Troubleshooting
43 Concise User s Guide Specifications Latest Specification Information English The specifications listed in this Appendix are correct at the time of going to press. Certain items (particularly processor types/speeds) may be changed or updated due to the manufacturer's release schedule. Check with your service center for details. Feature Model A Model B Processor Types Intel Pentium M - (478-pin) Micro-FCPGA package (µ0.13) 0.13 Micron Process Technology, 1MB On-die L2 Cache & 400MHz FSB - 1.3/ 1.4/ 1.5/ 1.6/ 1.7 GHz Intel Pentium M - (478-pin) Micro-FCPGA package (µ0.09) 0.09 Micron Process Technology, 2MB On-die L2 Cache & 400MHz FSB - 1.6/ 1.7/ 1.8/ 2.0 GHz Intel Celeron M - (478-pin) Micro-FCPGA package (µ0.13) 0.13 Micron Process Technology, 512KB On-die L2 Cache & 400MHz FSB - 1.2/ 1.3/ 1.4/ 1.5 GHz Intel Pentium M - (478-pin) Micro-FCPGA package (µ0.09) 0.09 Micron Process Technology, 2MB On-die L2 Cache & 400MHz FSB - 715/ 725/ 735 (1.5 ~ 1.7 GHz) Intel Celeron M - (478-pin) Micro-FCPGA package (µ0.13) 0.13 Micron Process Technology, 512KB On-die L2 Cache & 400MHz FSB - 320/ 330/ 340 (1.3 ~ 1.5 GHz) Specifications - 37
44 Concise User s Guide English Feature Model A Model B Intel Celeron M - (478-pin) Micro-FCPGA package (µ0.09) 0.09 Micron Process Technology, 1MB On-die L2 Cache & 400MHz FSB - 350/ 360/ 370 (1.3 ~ 1.5 GHz) Core Logic Intel 855GME + ICH4-M Intel 852GM + ICH4-M Structure Security PC2001 Compliant PCI 2.2 Compliant ACPI 2.0 Compliant Security (Kensington Type) Lock Slot BIOS Password Memory Two 200-pin SODIMM sockets, supporting 200/ 266/ 333 MHz DDR modules Memory expandable up to 1GB (128/ 256/ 512 MB DDR modules) Two 200-pin SODIMM sockets, supporting 266 MHz DDR modules Memory expandable up to 2GB (128/ 256/ 512/ 1024 MB DDR modules) BIOS 512KB Flash ROM Insyde BIOS, Plug and Play (1.0a) LCD 14.1" XGA Flat Panel TFT (1024*768) 38 - Specifications
45 Concise User s Guide Feature Model A Model B Display 128 bit 2D/3D Graphics Engine Fully DirectX 7/8 Compliant Graphics Engine Supports VESA DDCI, DDC2B and DDC 3.0 Specifications Supports Dynamic Video Memory Technology English Storage Audio Keyboard & Pointing Device PCMCIA Changeable 12.7mm(h) Optical Device (CD/DVD) Type Drive Easy changeable 2.5" 9.5 mm (h) IDE Hard Disk AC Compliant Advanced Wavetable Synthesizer DirectSound 3D Accelerator Full-duplex Built-In Microphone 2 Built-In Speakers Win-Key Keyboard Built-In TouchPad with Scrolling Function One Type-II PCMCIA 3.3V/ 5V Socket Specifications - 39
46 Concise User s Guide English Feature Model A Model B Interface Two USB 2.0/1.1 Ports One External Monitor (VGA) Port One Headphone-Out Jack One Microphone-In Jack One S/PDIF Out Jack One RJ-11 Jack for Plug & Play Fax/Modem One RJ-45 Jack for 100M (Max) Ethernet One DC-in Jack One Mini-IEEE 1394 Port One S-Video-Out Jack Communication 56K Plug & Play Fax/Modem (V.90/ 92 Compliant) Built-in 100M (Max) Ethernet LAN PC Camera with USB Interface (optional) Bluetooth & MDC Modem Combo Module (optional) Intel PRO/Wireless 2100 (802.11b) Wireless LAN Module with Mini PCI Interface* OR Intel PRO/Wireless 2200BG (802.11b/g) Wireless LAN Module with Mini PCI Interface* b/g Mini PCI WLAN Module (optional) * Depending on your purchase option 40 - Specifications
47 Concise User s Guide Feature Model A Model B Power Management Supports ACPI 2.0 Supports Hibernate Mode Supports Standby Mode Supports Battery Low Sleep Mode Supports Resume From Modem Ring Supports Wake on LAN English Power Full Range AC Adapter AC-Input 100~240V, 47~63Hz DC Output 20V, 3.25A (65W) Environmental Spec Smart Lithium-Ion Battery Pack (6 cells, 48 Watt) - Approx 3 Hours battery life Smart Lithium-Ion Battery Pack (12 cells, 96 Watt) (optional) - Approx 6 Hours battery life Temperature Operating: 5 C ~ 35 C Non-Operating: -20 C ~ 60 C Smart Lithium-Ion Battery Pack (4 cells, 32 Watt) - Approx 2 Hours battery life Smart Lithium-Ion Battery Pack (6 cells, 48 Watt) (optional) - Approx 3 Hours battery life Relative Humidity Operating: 20% ~ 80% Non-Operating: 10% ~ 90% Physical Dimensions & Weight 312mm (w) * 273mm (d) * 27.5mm (h) Min 2.2 kg without Battery Specifications - 41
48 Concise User s Guide English Feature Model A Model B Optional Standard Smart Lithium-Ion Battery Pack (6 cells, 48 Watt) Extended Smart Lithium-Ion Battery Pack (12 cells, 96 Watt) 2.5" 12.5/12.7mm Height Hard Disk Drive Intel PRO/Wireless 2100 (802.11b) Wireless LAN Module with Mini PCI Interface Intel PRO/Wireless 2200BG (802.11b/g) Wireless LAN Module with Mini PCI Interface Bluetooth & MDC Modem Combo Module PC Camera with USB Interface Software DVD Player Smart Lithium-Ion Battery Pack (4 cells, 32 Watt) Smart Lithium-Ion Battery Pack (6 cells, 48 Watt) b/g Mini PCI WLAN Module 42 - Specifications
p^db=`oj===pìééçêíáåñçêã~íáçå=
 p^db=`oj===pìééçêíáåñçêã~íáçå= Error: "Could not connect to the SQL Server Instance" or "Failed to open a connection to the database." When you attempt to launch ACT! by Sage or ACT by Sage Premium for
Cameraserver mini. commissioning. Ihre Vision ist unsere Aufgabe
 Cameraserver mini commissioning Page 1 Cameraserver - commissioning Contents 1. Plug IN... 3 2. Turn ON... 3 3. Network configuration... 4 4. Client-Installation... 6 4.1 Desktop Client... 6 4.2 Silverlight
p^db=`oj===pìééçêíáåñçêã~íáçå=
 p^db=`oj===pìééçêíáåñçêã~íáçå= How to Disable User Account Control (UAC) in Windows Vista You are attempting to install or uninstall ACT! when Windows does not allow you access to needed files or folders.
Word-CRM-Upload-Button. User manual
 Word-CRM-Upload-Button User manual Word-CRM-Upload for MS CRM 2011 Content 1. Preface... 3 2. Installation... 4 2.1. Requirements... 4 2.1.1. Clients... 4 2.2. Installation guidelines... 5 2.2.1. Client...
Anleitung zur Schnellinstallation TFM-560X YO.13
 Anleitung zur Schnellinstallation TFM-560X YO.13 Table of Contents Deutsch 1 1. Bevor Sie anfangen 1 2. Installation 2 Troubleshooting 6 Version 06.08.2011 1. Bevor Sie anfangen Packungsinhalt ŸTFM-560X
VIDEO CALL CAMERA G-VCAM-01
 VIDEO CALL CAMERA G-VCAM-01 EN AUS GUTEM GRUND ENGLISH 07-10 2 SAFETY AND INFORMATION Safety 7 This camera is designed to transmit video and audio signals. All other uses are expressly prohibited. 7 Protect
USB -> Seriell Adapterkabel Benutzerhandbuch
 USB -> Seriell Adapterkabel Benutzerhandbuch 1. Produkt Eigenschaften 1 2. System Vorraussetzungen 1 3. Treiber Installation (Alle Windows Systeme) 1 4. Den COM Port ändern 2 5. Einstellen eines RS232
Anleitung zur Schnellinstallation TEW-623PI 3.02
 Anleitung zur Schnellinstallation TEW-623PI 3.02 Table of Contents Deutsch 1 1. Bevor Sie anfangen 2. Installation 1 2 3. Verwendung des drahtlosen Adapters 4 Troubleshooting 5 Version 02.05.2010 1. Bevor
Anleitung zur Schnellinstallation TFM-PCIV92A B1.21
 Anleitung zur Schnellinstallation TFM-PCIV92A B1.21 Table of Contents Deutsch 1 1. Bevor Sie anfangen 1 2. Installation 2 Troubleshooting 6 Version 05.11.2011 1. Bevor Sie anfangen Packungsinhalt ŸTFM-PCIV92A
150Mbps Micro Wireless N USB Adapter
 150Mbps Micro Wireless N USB Adapter TEW-648UBM ŸAnleitung zur Schnellinstallation (1) ŸTroubleshooting (6) 1.11 1. Bevor Sie anfangen Packungsinhalt ŸTEW-648UBM ŸCD-ROM (Dienstprogramm & Bedienungsanleitung)
Anleitung zur Schnellinstallation TFM-561U
 Anleitung zur Schnellinstallation TFM-561U V1 Table of Contents Deutsch 1 1. Bevor Sie anfangen 1 2. Installation 2 Troubleshooting 5 Version 08.25.2010 1. Bevor Sie anfangen Packungsinhalt TFM-561U Treiber
How-To-Do. Hardware Configuration of the CC03 via SIMATIC Manager from Siemens
 How-To-Do Hardware Configuration of the CC03 via SIMATIC Manager from Siemens Content Hardware Configuration of the CC03 via SIMATIC Manager from Siemens... 1 1 General... 2 1.1 Information... 2 1.2 Reference...
USB Treiber updaten unter Windows 7/Vista
 USB Treiber updaten unter Windows 7/Vista Hinweis: Für den Downloader ist momentan keine 64 Bit Version erhältlich. Der Downloader ist nur kompatibel mit 32 Bit Versionen von Windows 7/Vista. Für den Einsatz
NVR Mobile Viewer for iphone/ipad/ipod Touch
 NVR Mobile Viewer for iphone/ipad/ipod Touch Quick Installation Guide DN-16111 DN-16112 DN16113 2 DN-16111, DN-16112, DN-16113 for Mobile ios Quick Guide Table of Contents Download and Install the App...
Anleitung zur Schnellinstallation TU3-SA 1.01
 Anleitung zur Schnellinstallation TU3-SA 1.01 Table of Contents Deutsch 1 1. Bevor Sie anfangen 1 2. Installation der Hardware 2 3. Zugriff auf die Festplatten des TU3-SA 4 Troubleshooting 5 Version 02.15.2011
Anleitung zur Verwendung des Update-Tools für
 English version see below (page 10) Anleitung zur Verwendung des Update-Tools für - KW DDC Steuergeräte - KW DDC WLAN Module - KW DLC Steuergeräte - KW DLC WLAN Module Bitte beachten Sie: jedes Steuergerät
RS-232 SERIAL EXPRESS CARD 1-PORT. Expansion 111829
 RS-232 SERIAL EXPRESS CARD 1-PORT Expansion 111829 1. Introduction equip RS-232 Serial Express Card works with various types of RS-232 serial devices including modems, switches, PDAs, label printers, bar
1. General information... 2 2. Login... 2 3. Home... 3 4. Current applications... 3
 User Manual for Marketing Authorisation and Lifecycle Management of Medicines Inhalt: User Manual for Marketing Authorisation and Lifecycle Management of Medicines... 1 1. General information... 2 2. Login...
iid software tools QuickStartGuide iid USB base driver installation
 iid software tools QuickStartGuide iid software tools USB base driver installation microsensys Nov 2016 Introduction / Einleitung This document describes in short form installation of the microsensys USB
JTAGMaps Quick Installation Guide
 Index Index... 1 ENGLISH... 2 Introduction... 2 Requirements... 2 1. Installation... 3 2. Open JTAG Maps... 4 3. Request a free JTAG Maps license... 4 4. Pointing to the license file... 5 5. JTAG Maps
Quick Guide Home Network Mode
 Quick Guide Home Network Mode English > 1 German > 3 About the Home Network Mode EN Tivizen Nano & iplug normally work on their own created networks (whose SSID starts with tivizentv or iplug ) in which
MANUAL_EN ANLEITUNG_DE PHONE SUITE SYNCHRONISATION SOFTWARE
 MANUAL_EN ANLEITUNG_DE PHONE SUITE SYNCHRONISATION SOFTWARE 2 PHONE SUITE MANUAL PHONE SUITE MANUAL 3 RESERVATION Technical Data is subject to change without notice. Changes, errors and misprints may not
VGM. VGM information. HAMBURG SÜD VGM WEB PORTAL - USER GUIDE June 2016
 Overview The Hamburg Süd VGM-Portal is an application which enables to submit VGM information directly to Hamburg Süd via our e-portal web page. You can choose to insert VGM information directly, or download
Tube Analyzer LogViewer 2.3
 Tube Analyzer LogViewer 2.3 User Manual Stand: 25.9.2015 Seite 1 von 11 Name Company Date Designed by WKS 28.02.2013 1 st Checker 2 nd Checker Version history Version Author Changes Date 1.0 Created 19.06.2015
NEWSLETTER. FileDirector Version 2.5 Novelties. Filing system designer. Filing system in WinClient
 Filing system designer FileDirector Version 2.5 Novelties FileDirector offers an easy way to design the filing system in WinClient. The filing system provides an Explorer-like structure in WinClient. The
ONLINE LICENCE GENERATOR
 Index Introduction... 2 Change language of the User Interface... 3 Menubar... 4 Sold Software... 5 Explanations of the choices:... 5 Call of a licence:... 7 Last query step... 9 Call multiple licenses:...
User Manual Bedienungsanleitung. www.snom.com. snom Wireless Headset Adapter snom Schnurlos-Headset-Adapter. English. Deutsch
 English snom Wireless Headset Adapter snom Schnurlos-Headset-Adapter Deutsch User Manual Bedienungsanleitung 2007 snom technology AG All rights reserved. Version 1.00 www.snom.com English snom Wireless
ALL1681 Wireless 802.11g Powerline Router Quick Installation Guide
 ALL1681 Wireless 802.11g Powerline Router Quick Installation Guide 1 SET ALL1681 Upon you receive your wireless Router, please check that the following contents are packaged: - Powerline Wireless Router
C R 2025 C LOSE PUSH OPEN
 3V C R 2025 C LOSE PUSH OPEN ) ) ) 25 222 3V C R 2025 C LOSE PUSH OPEN 25 222 3V C R 2025 C LOSE PUSH OPEN 25 222 Den här symbolen på produkten eller i instruktionerna betyder att den elektriska
Exercise (Part V) Anastasia Mochalova, Lehrstuhl für ABWL und Wirtschaftsinformatik, Kath. Universität Eichstätt-Ingolstadt 1
 Anastasia Mochalova, Lehrstuhl für ABWL und Wirtschaftsinformatik, Kath. Universität Eichstätt-Ingolstadt 1") Exercise (Part V) Notes: The exercise is based on Microsoft Dynamics CRM Online. For all screenshots: Copyright Microsoft Corporation. The sign ## is you personal number to be used in all exercises. All
Exercise (Part V) Notes: The exercise is based on Microsoft Dynamics CRM Online. For all screenshots: Copyright Microsoft Corporation. The sign ## is you personal number to be used in all exercises. All
BLK-2000. Quick Installation Guide. English. Deutsch
 BLK-2000 Quick Installation Guide English Deutsch This guide covers only the most common situations. All detail information is described in the user s manual. English BLK-2000 Quick Installation Guide
Quick Installation Guide TBW-101UB TBW-102UB
 Quick Installation Guide TBW-101UB TBW-102UB Table of Contents Deutsch... 1. Bevor Sie anfangen... 2. Installation... 3. Cómo usar el adaptador Bluetooth... 1 1 2 4 Troubleshooting... 5 (Version 01.06.2006)
Der Adapter Z250I / Z270I lässt sich auf folgenden Betriebssystemen installieren:
 Installationshinweise Z250I / Z270I Adapter IR USB Installation hints Z250I / Z270I Adapter IR USB 06/07 (Laden Sie den Treiber vom WEB, entpacken Sie ihn in ein leeres Verzeichnis und geben Sie dieses
Ingenics Project Portal
 Version: 00; Status: E Seite: 1/6 This document is drawn to show the functions of the project portal developed by Ingenics AG. To use the portal enter the following URL in your Browser: https://projectportal.ingenics.de
ALL2282. Pan-Tilt MPEG4/MJPEG Network Camera. Quick Installation Guide
 ALL2282 Pan-Tilt MPEG4/MJPEG Network Camera Quick Installation Guide 1 Getting Started Package Contents Check the items contained in the package carefully. You should have the following items. Once any
Quick Installation Guide TU2-ET100
 Quick Installation Guide TU2-ET100 Table of of Contents Contents... 1. Bevor Sie anfangen... 2. Installation... 1 1 2 Troubleshooting... 6 Version 08.30.2006 1. Bevor Sie anfangen Packungsinhalt TU2-ET100
Please store in a safe place. Bitte sicher aufbewahren.
 equinux ID: Password/Passwort: 1 Please store in a safe place. Bitte sicher aufbewahren. English Mac Thank you for choosing an equinux product Your new TubeStick includes The Tube, a modern and convenient
Yealink W52 DECT IP Telefon
 Yealink W52 DECT IP Telefon Manuelle Neukonfiguration Dokumentenversion 1.0 Yealink W52 DECT IP Telefon Mauelle Neukonfiguration Copyright Hinweis Copyright 2016 finocom AG Alle Rechte vorbehalten. Jegliche
Anleitung zur Schnellinstallation TBW-107UB 1.01
 Anleitung zur Schnellinstallation TBW-107UB 1.01 Table of Contents Deutsch 1 1. Bevor Sie anfangen 1 2. Installation 2 3. Konfiguration des Bluetooth-Adapters 5 Troubleshooting 7 Version 02.25.2010 1.
Durametric. Installations Anleitung Quick Installation Guide. Deutsch: Seite 2 bis 3. English: Page 4 to 5. ww.fvd.de
 Durametric Quick Installation Guide Deutsch: Seite 2 bis 3 English: Page 4 to 5 w 2 Systemvoraussetzungen: Windows 7 / XP / Vista, (32- und 64-bit) - mind. 1.8GHz Dual Core Prozessor - 1 GB Arbeitsspeicher
Quick Installation Guide
 LevelOne WHG-1000 300Mbps Wireless PoE Hotspot Gateway Quick Installation Guide English Deutsch Table of Contents English... 3 Deutsch... 13 Default Settings IP Address-LAN1 192.168.1.254 IP Address-LAN2
Exercise (Part XI) Anastasia Mochalova, Lehrstuhl für ABWL und Wirtschaftsinformatik, Kath. Universität Eichstätt-Ingolstadt 1
 Anastasia Mochalova, Lehrstuhl für ABWL und Wirtschaftsinformatik, Kath. Universität Eichstätt-Ingolstadt 1") Exercise (Part XI) Notes: The exercise is based on Microsoft Dynamics CRM Online. For all screenshots: Copyright Microsoft Corporation. The sign ## is you personal number to be used in all exercises. All
Exercise (Part XI) Notes: The exercise is based on Microsoft Dynamics CRM Online. For all screenshots: Copyright Microsoft Corporation. The sign ## is you personal number to be used in all exercises. All
VGM. VGM information. HAMBURG SÜD VGM WEB PORTAL USER GUIDE June 2016
 Overview The Hamburg Süd VGM Web portal is an application that enables you to submit VGM information directly to Hamburg Süd via our e-portal Web page. You can choose to enter VGM information directly,
EMCO Installationsanleitung Installation instructions
 EMCO Installationsanleitung Installation instructions Installationsanleitung Installation instructions Digitalanzeige digital display C40, FB450 L, FB600 L, EM 14D/17D/20D Ausgabe Edition A 2009-12 Deutsch...2
Anleitung zur Schnellinstallation TU2-HDMI 1.01
 Anleitung zur Schnellinstallation TU2-HDMI 1.01 Table of Contents Deutsch 1 1. Bevor Sie anfangen 1 2. Installationl 2 3. Konfiguration der Anzeigeeinstellungen 4 Troubleshooting 6 Version 02.16.2011 1.
Anleitung zur Schnellinstallation TU3-S
 Anleitung zur Schnellinstallation TU3-S25 1.01 Table of Contents Deutsch 1 1. Bevor Sie anfangen 1 2. Installation der Hardware 2 3. Zugriff auf die Speichergeräte im TU3-S25 4 Troubleshooting 5 Version
Monitor VIS 3xx Kurzanleitung
 Monitor VIS 3xx Kurzanleitung 19.08.08 Art. Nr. 22261 Inhalt: 1. Spezifikationen...2 2. Tastenfunktionen...2 3. Menüführung und Einstellungen...3 Technik nach Maß Wöhler Monitor VIS 3xx 1. Spezifikationen
How-To-Do. Hardware Configuration of the CPU 317NET with external CPs on the SPEED Bus by SIMATIC Manager from Siemens
 How-To-Do Hardware Configuration of the CPU 317NET with external CPs on the SPEED Bus by SIMATIC Manager from Siemens Content Hardware Configuration of the CPU 317NET with external CPs on the SPEED Bus
Dexatek's Alexa Smart Home Skills Instruction Guide
 Dexatek's Alexa Smart Home Skills Instruction Guide Version 0.3 Author Esther Date 01/10/18 ~ 1 ~ Revision History Version Date Editor Remark 0.1 2017/04/05 Esther Initial version 0.2 2018/01/09 Esther
v i r t u A L C O M P o r t s
 v i r t u A L C O M P o r t s (HO720 / HO730) Installieren und Einstellen Installation and Settings Deutsch / English Installieren und Einstellen des virtuellen COM Ports (HO720 / HO730) Einleitung Laden
prorm Budget Planning promx GmbH Nordring Nuremberg
 prorm Budget Planning Budget Planning Business promx GmbH Nordring 100 909 Nuremberg E-Mail: support@promx.net Content WHAT IS THE prorm BUDGET PLANNING? prorm Budget Planning Overview THE ADVANTAGES OF
Power supply Interference suppressed acc. to DIN EN /- 4, EN 55011, EN CI. B, power factor corrected Power factor BöSha LED driver
 Operating Instructions LED Mast Double Luminaire Callisto SC DB, incl. Inclination Adjustment, Single-Chip Technology (Please, read carefully before starting operation) Version: 16.01.2017 Model 369-M
Snom 3xx/7xx Serie. Manuelle Neukonfiguration. Dokumentenversion 1.0
 Snom 3xx/7xx Serie Manuelle Neukonfiguration Dokumentenversion 1.0 Snom 3xx/7xx Serie Mauelle Neukonfiguration Copyright Hinweis Copyright 2016 finocom AG Alle Rechte vorbehalten. Jegliche technische Dokumentation,
Parameter-Updatesoftware PF-12 Plus
 Parameter-Updatesoftware PF-12 Plus Mai / May 2015 Inhalt 1. Durchführung des Parameter-Updates... 2 2. Kontakt... 6 Content 1. Performance of the parameter-update... 4 2. Contact... 6 1. Durchführung
Die Bedeutung neurowissenschaftlicher Erkenntnisse für die Werbung (German Edition)
") Die Bedeutung neurowissenschaftlicher Erkenntnisse für die Werbung (German Edition) Lisa Johann Click here if your download doesn"t start automatically Download and Read Free Online Die Bedeutung neurowissenschaftlicher
Die Bedeutung neurowissenschaftlicher Erkenntnisse für die Werbung (German Edition) Lisa Johann Click here if your download doesn"t start automatically Download and Read Free Online Die Bedeutung neurowissenschaftlicher
How-To-Do. Communication to Siemens OPC Server via Ethernet
 How-To-Do Communication to Siemens OPC Server via Content 1 General... 2 1.1 Information... 2 1.2 Reference... 2 2 Configuration of the PC Station... 3 2.1 Create a new Project... 3 2.2 Insert the PC Station...
VN7640 FlexRay/CAN/LIN/Ethernet Interface Quick Start Guide. Version 1.1 English/Deutsch
 VN7640 FlexRay/CAN/LIN/Ethernet Interface Quick Start Guide Version 1.1 English/Deutsch Quick Start Guide VN7640 ENGLISH 1 ENGLISH 1.1 Installation Step by Step Procedure Please use the drivers from the
LimbLogic Communicator. Clever verbunden. Software Installation
 LimbLogic Communicator Clever verbunden. Software Installation DE LimbLogic Communicator Software Installation Schließen Sie den Communicator nicht an den PC an, bis Sie dazu aufgefordert werden. Hardware-
Installation Guide WLAN Interface
 Installation Guide 7106 7206 7010 WLAN Interface EN Installation Guide This guide explains how to install the Ethernet LAN card in your label printer. You should conult your dealer or distributor for more
How to access licensed products from providers who are already operating productively in. General Information... 2. Shibboleth login...
 Shibboleth Tutorial How to access licensed products from providers who are already operating productively in the SWITCHaai federation. General Information... 2 Shibboleth login... 2 Separate registration
EMCO Installationsanleitung / Installation instructions
 EMCO Installationsanleitung / Installation instructions Installationsanleitung Installation instructions Digitalanzeige digital display C40, FB450 L, FB600 L, EM 14D/17D/20D Ausgabe / Edition B 2012-03
PONS DIE DREI??? FRAGEZEICHEN, ARCTIC ADVENTURE: ENGLISCH LERNEN MIT JUSTUS, PETER UND BOB
 Read Online and Download Ebook PONS DIE DREI??? FRAGEZEICHEN, ARCTIC ADVENTURE: ENGLISCH LERNEN MIT JUSTUS, PETER UND BOB DOWNLOAD EBOOK : PONS DIE DREI??? FRAGEZEICHEN, ARCTIC ADVENTURE: Click link bellow
Benutzerhandbuch / User s Manual RUPS 2000 / -B1
 RUPS 2000 / RUPS 2000-B1 Benutzerhandbuch / User s Manual RUPS 2000 / -B1 Deutsch English Benutzerhandbuch RUPS 2000 / RUPS 2000-B1 Deutsch In diesem Benutzerhandbuch finden Sie eine Kurzanleitung zu Installation
User Manual BB-anywhere
 User Manual BB-anywhere LOGIN PROCEDURE 1. Click the Start button, choose All Programs (right above the search box) and select BB-ANYWHERE from the Start menu: BB-anywhere in a nutshell Regardless whether
E asyline by Hama GmbH & Co KG Postfach 80 86651 Monheim/Germany Tel. +49 (0)9091/502-0 Fax +49 (0)9091/502-274 hama@hama.de www.hama.
9091/502-0 Fax +49 (0)9091/502-274 hama@hama.de www.hama.") 00021024-10.06 E asyline by Hama GmbH & Co KG Postfach 80 86651 Monheim/Germany Tel. +49 (0)9091/502-0 Fax +49 (0)9091/502-274 hama@hama.de www.hama.com Gamepad Thunderstorm II 0021024 l Bedienungsanleitung
00021024-10.06 E asyline by Hama GmbH & Co KG Postfach 80 86651 Monheim/Germany Tel. +49 (0)9091/502-0 Fax +49 (0)9091/502-274 hama@hama.de www.hama.com Gamepad Thunderstorm II 0021024 l Bedienungsanleitung
How-To-Do. OPC-Server with MPI and ISO over TCP/IP Communication. Content. How-To-Do OPC-Server with MPI- und ISO over TCP/IP Communication
 How-To-Do OPC-Server with MPI and ISO over TCP/IP Content OPC-Server with MPI and ISO over TCP/IP... 1 1 General... 2 1.1 Information... 2 1.2 Reference... 2 2 Procedure for the Setup of the OPC Server...
Newest Generation of the BS2 Corrosion/Warning and Measurement System
 Newest Generation of the BS2 Corrosion/Warning and Measurement System BS2 System Description: BS2 CorroDec 2G is a cable and energyless system module range for detecting corrosion, humidity and prevailing
Cisco SSPA122. Installation und manuelle Rekonfiguration. Dokumentenversion 1
 Cisco SSPA122 Installation und manuelle Rekonfiguration Dokumentenversion 1 Placetel UC-One Cisco SPA122 Installation und manuelle Rekonfiguration Copyright Hinweis Copyright 2015 finocom AG Alle Rechte
Anleitung zur Schnellinstallation TE100-P1U
 Anleitung zur Schnellinstallation TE100-P1U V2 Table of Contents Deutsch 1 1. Bevor Sie anfangen 1 2. Installation 2 3. Konfiguration des Druckservers 3 4. Hinzufügen des Druckers zu Ihren PC-Einstellungen
iid software tools QuickStartGuide iid USB base RFID driver read installation 13.56 MHz closed coupling RFID
 iid software tools QuickStartGuide iid software tools USB base RFID driver read installation write unit 13.56 MHz closed coupling RFID microsensys Jun 2013 Introduction / Einleitung This document describes
DVD MAKER USB2.0 Installation Anleitung
 DVD MAKER USB2.0 Installation Anleitung Inhalt V1.0 Kapitel 1: DVD MAKER USB2.0 Hardware Montage...2 1.1 Inhalt der DVD MAKER USB2.0 Paket...2 1.2 Systemanforderungen...2 1.3 Hardware Montage...2 Kapitel
Release Notes BRICKware 7.5.4. Copyright 23. March 2010 Funkwerk Enterprise Communications GmbH Version 1.0
 Release Notes BRICKware 7.5.4 Copyright 23. March 2010 Funkwerk Enterprise Communications GmbH Version 1.0 Purpose This document describes new features, changes, and solved problems of BRICKware 7.5.4.
miditech 4merge 4-fach MIDI Merger mit :
 miditech 4merge 4-fach MIDI Merger mit : 4 x MIDI Input Port, 4 LEDs für MIDI In Signale 1 x MIDI Output Port MIDI USB Port, auch für USB Power Adapter Power LED und LOGO LEDs Hochwertiges Aluminium Gehäuse
Anleitung zur Schnellinstallation TE100-PIP
 Anleitung zur Schnellinstallation TE100-PIP V2 Table of Contents Deutsch 1 1. Bevor Sie anfangen 1 2. Installation 2 3. Konfiguration des Druckservers 3 4. Hinzufügen des Druckers zu Ihren PC-Einstellungen
Hama GmbH & Co KG Postfach Monheim/Germany Tel. +49 (0)9091/502-0 Fax +49 (0)9091/
9091/502-0 Fax +49 (0)9091/") www.hama.de Hama GmbH & Co KG Postfach 80 86651 Monheim/Germany Tel. +49 (0)9091/502-0 Fax +49 (0)9091/502-274 hama@hama.de www.hama.de 00062249-05.05 Multimedia Kit für/for Mercedes Command 2.0 00062249
www.hama.de Hama GmbH & Co KG Postfach 80 86651 Monheim/Germany Tel. +49 (0)9091/502-0 Fax +49 (0)9091/502-274 hama@hama.de www.hama.de 00062249-05.05 Multimedia Kit für/for Mercedes Command 2.0 00062249
Titelbild1 ANSYS. Customer Portal LogIn
 Titelbild1 ANSYS Customer Portal LogIn 1 Neuanmeldung Neuanmeldung: Bitte Not yet a member anklicken Adressen-Check Adressdaten eintragen Customer No. ist hier bereits erforderlich HERE - Button Hier nochmal
Installation Manual. Driver Installation USB-to-Serial Adapter WE2111. A en/de
 Installation Manual English Deutsch Driver Installation USB-to-Serial Adapter WE2111 A4012-1.0 en/de USB-to-Serial Adapter English 2 A4012-1.0 en/de USB-to-Serial Adapter 1 Installation in Windows 7...
Walter Buchmayr Ges.m.b.H.
 Seite 1/10 Chapter Description Page 1 Advantages 3 2 Performance description 4 3 Settings 5 4 Options 6 5 Technical data 7 6 Pictures 8 http://members.aon.at/buchmayrgmbh e-mail: walter.buchmayr.gmbh@aon.at
SmartClass Firmware-Update Vorgehensweise
 Benutzeranweisungen SmartClass Firmware-Update Vorgehensweise 2008.01 (V 1.x.x) Deutsch Please direct all enquiries to your local JDSU sales company. The addresses can be found at: www.jdsu.com/tm-contacts
Application Note. Import Jinx! Scenes into the DMX-Configurator
 Application Note Import Jinx! Scenes into the DMX-Configurator Import Jinx! Scenen into the DMX-Configurator 2 The Freeware Jinx! is an user friendly, well understandable software and furthermore equipped
CABLE TESTER. Manual DN-14003
 CABLE TESTER Manual DN-14003 Note: Please read and learn safety instructions before use or maintain the equipment This cable tester can t test any electrified product. 9V reduplicated battery is used in
Readme-USB DIGSI V 4.82
 DIGSI V 4.82 Sehr geehrter Kunde, der USB-Treiber für SIPROTEC-Geräte erlaubt Ihnen, mit den SIPROTEC Geräten 7SJ80/7SK80 über USB zu kommunizieren. Zur Installation oder Aktualisierung des USB-Treibers
Exercise (Part II) Anastasia Mochalova, Lehrstuhl für ABWL und Wirtschaftsinformatik, Kath. Universität Eichstätt-Ingolstadt 1
 Anastasia Mochalova, Lehrstuhl für ABWL und Wirtschaftsinformatik, Kath. Universität Eichstätt-Ingolstadt 1") Exercise (Part II) Notes: The exercise is based on Microsoft Dynamics CRM Online. For all screenshots: Copyright Microsoft Corporation. The sign ## is you personal number to be used in all exercises. All
Exercise (Part II) Notes: The exercise is based on Microsoft Dynamics CRM Online. For all screenshots: Copyright Microsoft Corporation. The sign ## is you personal number to be used in all exercises. All
vcdm im Wandel Vorstellung des neuen User Interfaces und Austausch zur Funktionalität V
 vcdm im Wandel Vorstellung des neuen User Interfaces und Austausch zur Funktionalität V0.1 2018-10-02 Agenda vcdm User Interface History Current state of User Interface User Interface X-mas 2018 Missing
Lithium Fotoakku Ladeset Lithium Photo rechargeable battery Set
 Lithium Fotoakku Ladeset Lithium Photo rechargeable battery Set Technische Daten technical features:: Eingangsspannung: 100-240V AC Input Voltage: 100-240V AC Ausgangsspannung: 3,85V / 7,3V DC Output Voltage:
Softwareupdate-Anleitung // AC Porty L Netzteileinschub
 1 Softwareupdate-Anleitung // AC Porty L Netzteileinschub Softwareupdate-Anleitung // AC Porty L Netzteileinschub HENSEL-VISIT GmbH & Co. KG Robert-Bunsen-Str. 3 D-97076 Würzburg-Lengfeld GERMANY Tel./Phone:
Electrical testing of Bosch common rail piezo injectors
 Applies to generation CRI 3: Bosch 10-position order number 0 445 115 = CRI 3-16 (CRI 3.0) 1600 bar 0 445 116 = CRI 3-18 (CRI 3.2) 1800 bar 0 445 117 = CRI 3-20 (CRI 3.3) 2000 bar Tools required: Hybrid
Anleitung zur Schnellinstallation TE100-P
 Anleitung zur Schnellinstallation TE100-P21 3.01 Table of Contents Deutsch 1 1. Bevor Sie anfangen 1 2. Installation 2 3. Konfiguration des Druckservers 3 4. Fügen Sie den Drucker an den Computer an 5
Installation und Einrichtung unter Windows 7/8/10. Installation and configuration for Windows 7/8/10
 AFS-Client Installation und Einrichtung unter Windows 7/8/10 Installation and configuration for Windows 7/8/10 18.04.2018 kim.uni-hohenheim.de kim@uni-hohenheim.de Bitte sowohl diese Anleitung als auch
KURZANLEITUNG. Firmware-Upgrade: Wie geht das eigentlich?
 KURZANLEITUNG Firmware-Upgrade: Wie geht das eigentlich? Die Firmware ist eine Software, die auf der IP-Kamera installiert ist und alle Funktionen des Gerätes steuert. Nach dem Firmware-Update stehen Ihnen
Analog GSM-Gateway TRF
 Analog GSM-Gateway TRF GSM gateway for voice- or fax transmission 1 2009 com.sat GmbH Kommunikationssysteme Schwetzinger Str. 19 D-68519 Viernheim www.comsat.de Tel: +49-(0)180-3-768837 The connecting
CNC ZUR STEUERUNG VON WERKZEUGMASCHINEN (GERMAN EDITION) BY TIM ROHR
 BY TIM ROHR") (GERMAN EDITION) BY TIM ROHR READ ONLINE AND DOWNLOAD EBOOK : CNC ZUR STEUERUNG VON WERKZEUGMASCHINEN (GERMAN EDITION) BY TIM ROHR PDF Click button to download this ebook READ ONLINE AND DOWNLOAD CNC ZUR
(GERMAN EDITION) BY TIM ROHR READ ONLINE AND DOWNLOAD EBOOK : CNC ZUR STEUERUNG VON WERKZEUGMASCHINEN (GERMAN EDITION) BY TIM ROHR PDF Click button to download this ebook READ ONLINE AND DOWNLOAD CNC ZUR
DIBELS TM. German Translations of Administration Directions
 DIBELS TM German Translations of Administration Directions Note: These translations can be used with students having limited English proficiency and who would be able to understand the DIBELS tasks better
Order Ansicht Inhalt
 Order Ansicht Inhalt Order Ansicht... 1 Inhalt... 1 Scope... 2 Orderansicht... 3 Orderelemente... 4 P1_CHANG_CH1... 6 Function: fc_ins_order... 7 Plug In... 8 Quelle:... 8 Anleitung:... 8 Plug In Installation:...
https://portal.microsoftonline.com
 Sie haben nun Office über Office365 bezogen. Ihr Account wird in Kürze in dem Office365 Portal angelegt. Anschließend können Sie, wie unten beschrieben, die Software beziehen. Congratulations, you have
Konfiguration von eduroam. Configuring eduroam
 eduroam Windows 8.1 / 10 Konfiguration von eduroam Configuring eduroam 08.10.2018 kim.uni-hohenheim.de kim@uni-hohenheim.de Wissenschaftliche Einrichtungen und Universitäten bieten einen weltweiten Internetzugang
A VGA monitor of the highest resolution that you will be using on any computer in the installation A PS/2 Keyboard A PS/2 Mouse
 PS/2 KVM SWITCH 2-PORT Vision 331217 Requirements Console A VGA monitor of the highest resolution that you will be using on any computer in the installation A PS/2 Keyboard A PS/2 Mouse Computers The following